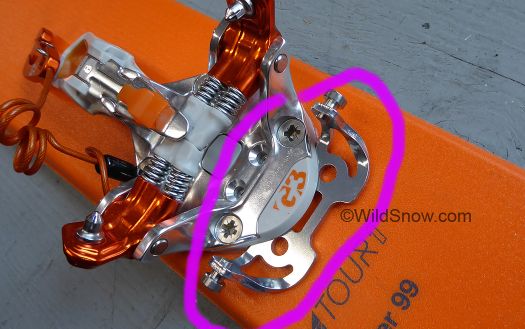
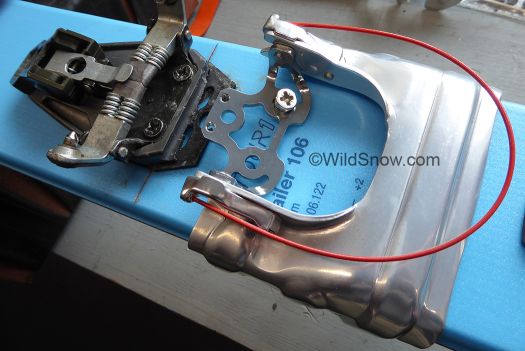
It’s springtime in the Northern Hemisphere, time for ski crampons? “Spikes” can save your life. Or at least make your life much easier on those glazed “death wall” skin tracks left by those who go steeper than you do.
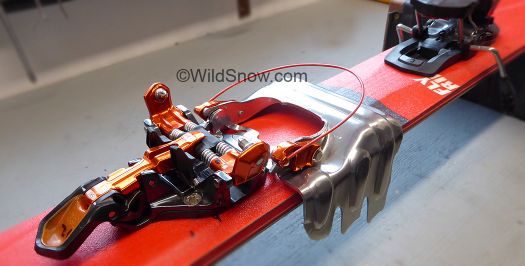
G3 ION sporting its excellent crampon option. We’ve tested these for a few years now and they work well — especially appropriate if you tend to use ski crampons quite often as they’re strong and incredibly easy to attach-remove.
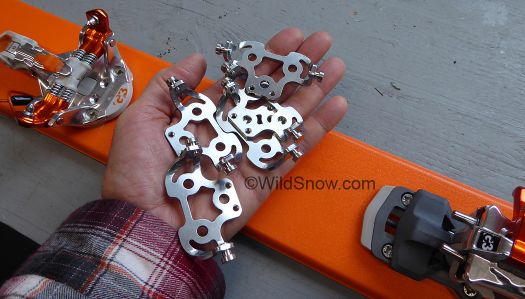
G3 crampon brackets are easy to install and remove, and can also be screwed directly to ski or splitboard for use with just about any binding.
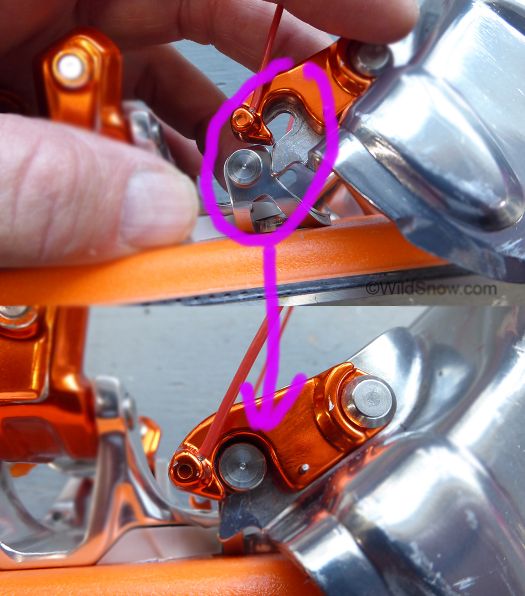
G3 ski crampons attach with a pin and hook arrangement. Appears a bit complex, but works beautifully. Allows super quick install and removal, with boots in bindings if you’re flexible.

A tug on the red cable lifts the hooks and the crampon comes off super easy. Only downside of this system is that the G3 bracket is twice as heavy (16 grams) as the Dynafit Radical bracket (8 grams). Upside is the G3 bracket is very easy to remove, even in the field if you carry a screwdriver in your repair kit.
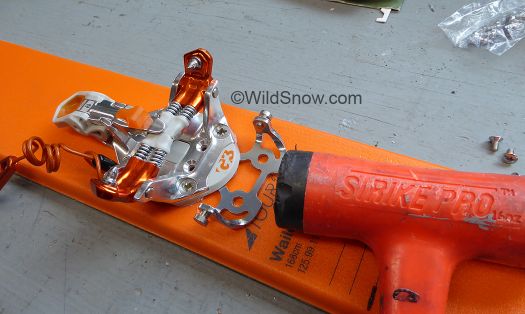
Light taps with hammer break through small amount of epoxy residue. This is probably the biggest gotcha if you’re retrofitting G3 brackets. Better to at least insert the bracket temporarily while mounting to ensure you don’t have any glue in the way.
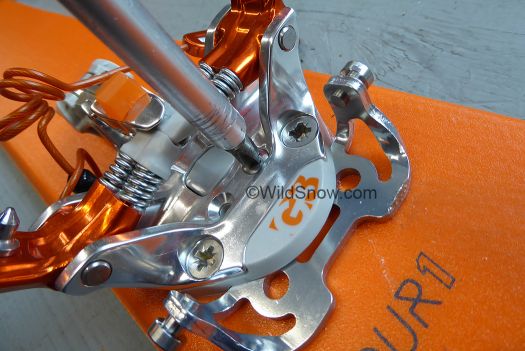
Number 2 phillips inserts the screws, which tighten nicely. I don’t recommend thread locker on these unless you’re sure you’re doing a permanent install, as they’re probably stainless steel and all too easily damaged during removal if you have to break a thread locker bond. If you do need thread locker, 1-hour epoxy might be best because it can be easily reversed with the touch of a hot soldering iron to the screw head.
For those of you new to using ski crampons, a few tips:
1. While ski crampons do slow you down a bit if you’re depending on any sort of glide from your skins, don’t hesitate to try them out if you’re lugging them in your backpack. You might be surprised where they help.
2. I say it below but will say it here, don’t get crazy and let your spikes get you into dangerous situations that would be safe if you were booting.
3. Experiment with your skin track angle. Sometimes ski crampons work better at lower angles when they can assist in gripping with a more sideways force (think resisting side slipping).
4. Consider group dynamics. During our tours we tend to bring crampons if everyone else has them, and leave home if they do not.
5. With compacted snow conditions (boot friendly) I usually bring either boot or ski crampons, but not both. Depends on the day’s goal, and companions.
6. Figure out a way to carry your cramps so they’re easy to access. When we know we’ll be using them we clip to backpack with carabiner. Rubber band or strap them together so they don’t clank.
7. For style points, if you’re a frankophile always call them “couteaux.” If you’re partial to the more Germanic persuasion, “Harscheisen” is the prefered term. Italy? I don’t know, perhaps “coltelli?”
Caveats for ski crampons: Be sure your crampons fit quite close to your ski width as the ski is what keeps the crampon from excessive twisting that can damage the mount or the crampon. And yes, they can save your life — but conversely get you into some tenuous positions where you might otherwise be sporting boot crampons. As with any gear, beware the limitations and cautions.
WildSnow.com publisher emeritus and founder Lou (Louis Dawson) has a 50+ years career in climbing, backcountry skiing and ski mountaineering. He was the first person in history to ski down all 54 Colorado 14,000-foot peaks, has authored numerous books about about backcountry skiing, and has skied from the summit of Denali in Alaska, North America’s highest mountain.

