(Note, this how-to covers the Dynafit Comfort, Vertical and Radical FT and ST bindings. Classic TLT model brakes are installed by simply screwing them on to the binding baseplate, and are discontinued. Also, later model Dynafit Radical series bindings circa 2014-2015 sadly do not have removable brakes.)
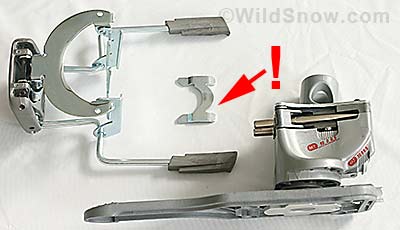
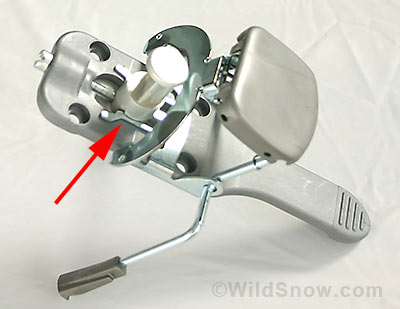
Dynafit binding brake parts prior to 2013, when brake was made non-removable. Arrow indicates important retainer clip that is easily forgotten.
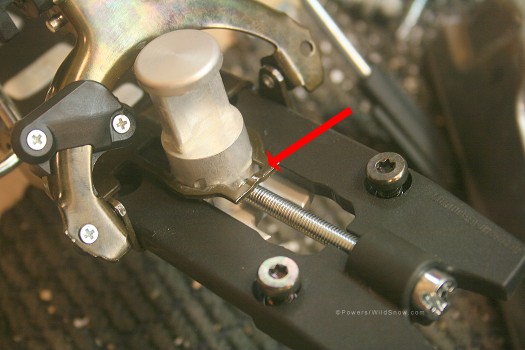
Trapped brake of latest Dynafit Radical 2013 FT/ST series bindings. For different width brakes you’ll need to buy different base plates and brake combos, or else do a somewhat challenging swap of brake arms.
For more about dealing with the permanent brake on Radicals, as well as swapping brake arms, see this blog post.
We’ll describe this as if installing brakes. Removal is reverse of the procedure. Bindings here are pictured unmounted — while mounting bindings you DO NOT want your brakes installed, so do this procedure AFTER mounting your bindings.
Parts pictured above include the Comfort heel unit to right, the all important retainer clip in the middle, and brake to the left.
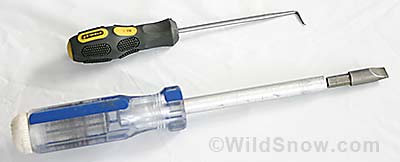
Tools you’ll need, a right angle pick and wide flat-blade screwdriver. Sometimes you can forego the pick, more about that below.
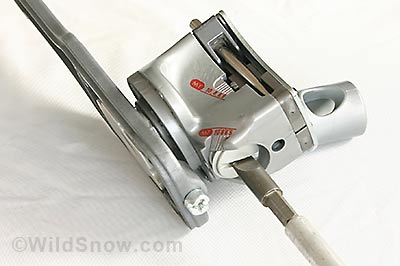
Removing spring cover barrel is much easier than replacing it.
First step is to remove upper heel unit from base plate, as pictured above. Do so by backing the release barrel all the way out, then removing the internal springs and thimble bushing. NOTE: If you bought the brakes separate from the bindings, you will notice that a set of black springs comes with the brakes; these springs are one release value (RV) number softer than the stock springs to compensate for release and resistance friction that the brake adds to the system. You don’t have to use the black springs if you simply set your RV one number lower. But if you set your RV by the numbers and not by experimentation, it’s recommended that you swap in the black springs so you won’t get fooled and end up with a higher DIN setting than you think.
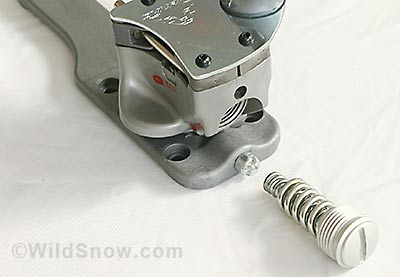
Barrel and springs removed from Dynafit Radical or Comfort backcountry skiing binding heel unit, thimble bushing is still inside.
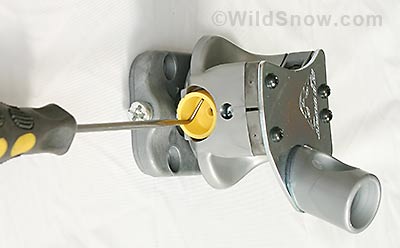
Sometimes you can pull out the thimble bushing with your finger, but a right angled pick works reliably. You don’t need to completely remove bushing, just back it out.
You’ll find the plastic thimble bushing inside the cavity where the springs were. Back it out using your right angle pick or finger if you’re feeling lucky. You can leave the thimble bushing in the bore if it’s backed out a centimeter or so.
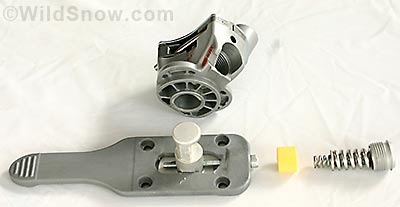
With the thimble bushing out, you can lift the upper heel unit off the base plate and post. Now you’ve got a pile of parts. Keep them organized.
NOTE for Radical series bindings: When you pull the heel unit up and off some early models, you’ll expose the “stop pin” that prevents rotation in the wrong direction. This pin may pop out and suffer loss due to it being under spring tension. To prevent the pin from flying, keep your fingers over it as you slowly raise the heel unit off the center spindle post. Note that all Radical models should be upgraded by removing the “stop pin” and installing an external anti-rotation stop on the brake.
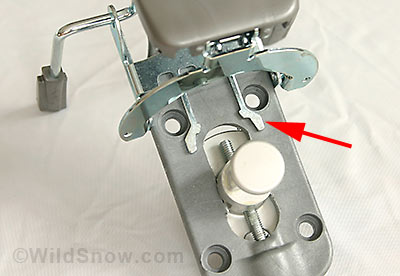
Slide brake onto plastic baseplate, paying attention to how the prongs engage-clip flanges on the aluminum spindle.
Arms on brake engage vertical aluminum post spindle.
After sliding the brake on, the arms will engage notches in the post, as shown above. If you have trouble sliding the brake on to the plate, look for obstruction (such as glue gobs) in the groove on the underside of the plate.
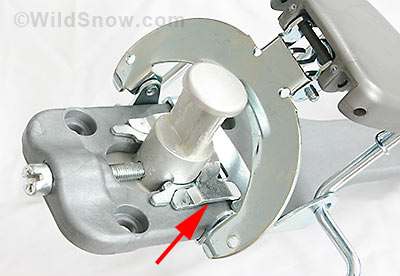
IMPORTANT, retainer clip must be installed!
Next, install the retainer clip as shown. The arms of the retainer clip have to fit on the OUTSIDE of the brake arms. This holds them so they can’t expand outwards and let the brake come off. Be aware of the front and rear of the binding – the clip goes around the FRONT of the post, as shown.
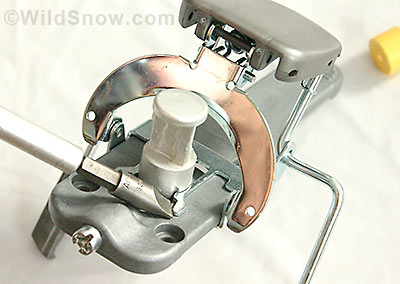
Removal of brakes is easy. First delete the retainer clip, then nudge the clip arms around the center post as you slide and wriggle the brake off the plastic base plate.
To remove the brake, disassemble the binding as described above, and remove the retainer clip. While pulling the brake away from the center post, work the retainer arms out of the notches.
When reassembling the Dynafit Radical, Vertical or Comfort backcountry skiing binding, be sure the thimble bushing is greased and inserted all the way in, insert the springs, then take care not to cross-thread the spring barrel when you thread it in. Set your DIN, and off you go for fun powerful parallel turns on the technical marvel of the age.
WildSnow.com publisher emeritus and founder Lou (Louis Dawson) has a 50+ years career in climbing, backcountry skiing and ski mountaineering. He was the first person in history to ski down all 54 Colorado 14,000-foot peaks, has authored numerous books about about backcountry skiing, and has skied from the summit of Denali in Alaska, North America’s highest mountain.
