Bob Griffiths
I contacted Scarpa back in October and asked if a stiffer tongue was is in the works for the Maestrale. Although they had early on intimated that that might be the case, it turns out… no. If you are one of those people who wishes your Maestrales were just “a little bit stiffer,” here’s a solution that I tried and is working for me. This idea grew out of a discussion with Luke at Bristlecone Sports in Basalt, CO.
Luke’s suggestion was to epoxy a strip of carbon fiber on the inside of the Pebax outer tongue. He reasoned that it was thin, lightweight and durable. He suggested a layer or two of 1” carbon fiber tape because it would be easier to work with than carbon fiber fabric. The tape is sealed on two sides and wouldn’t tend to unravel and separate like the fabric.

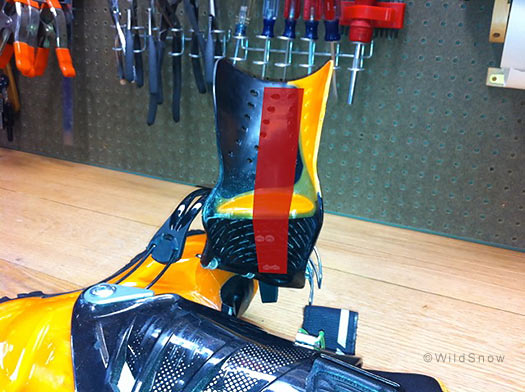
The red strip is a PhotoShopped representation of the plan for stiffening the tongue of my Scarpa Maestrale backcountry skiing boots.
I had never “glassed” anything in my life… let alone work with carbon fiber. So I hunted around the interwebs for basic techniques and supplies. I stumbled upon Stoller Composites in Franklin, NH and struck up an email conversation with Jon Stoller. Turns out he is a long time skier (and nice guy) and thought that this would work. He suggested using Kevlar, not carbon, because it is more forgiving with many flexes. It is about 15% more flexible than similar carbon fiber. He explained that carbon is stiffer and will have a tendency to break over many flexes. He also expressed concern about the epoxy adhering to the Pebax. Luke seemed to think it would be no problem if I properly cleaned and roughed up the surface with 80 grit sandpaper.
So I pressed ahead. What’s the worst that could happen? 😉 I ordered the following from Jon:
Stoller DK-H4 fabric:
http://www.solarcomposites.com/composites/compositearamid.html#Kevlar
Stoller Epoxy Kit A:
http://www.sollercomposites.com/composites/Epoxy0308.html
If you click on the links, you’ll notice two things. The Kevlar is a fabric, not a tape. And that is a heck of a lot of epoxy! Unfortunately, that’s all that was on offer for that type of epoxy and the pumps made measuring a snap. I took the path of least resistance… albeit not the cheap way. Turned out to be a good call.
I started by taking the Pebax tongues off the Maestrales and roughing up the inside with sandpaper. I also used a Dremel tool with a wire wheel to get into the tight spots.
Then I cut the Kevlar… or tried to. Neither my shop scissors, nor my Exacto knife, nor the kitchen scissors would make a dent in the fabric. And true to Luke’s warning, it was beginning to unravel. So, being a rash and foolish man, I asked my wife if I could try her good sewing scissors… only after promising her things that I couldn’t deliver on if I ruined them. Thankfully, they worked AND survived the trauma. I cut strips 1.75” wide and 9” long.
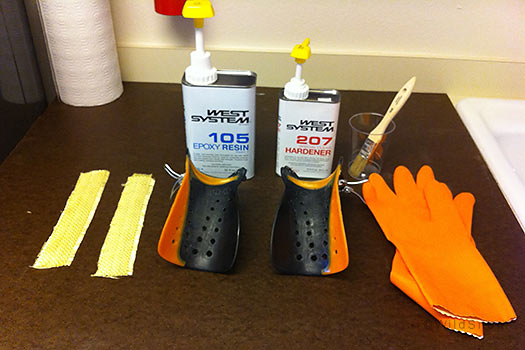
So I was ready to “glass”. I laid everything out on a piece of Masonite to minimize the mess. Another good call.

Materials for backcountry skiing boot mod. Laid out nice and neat -- didn't stay that way for long.
I put a pump-full of resin and hardener into a small cup, mixed it up and used a small, cheap paint brush to coat the inside of the tongues… just a little bit wider than the width of the Kevlar strips I had cut. The consistency of the epoxy was like a very thick syrup. It was a snap to brush on but it did tend to run. So make the first coat a thin one.
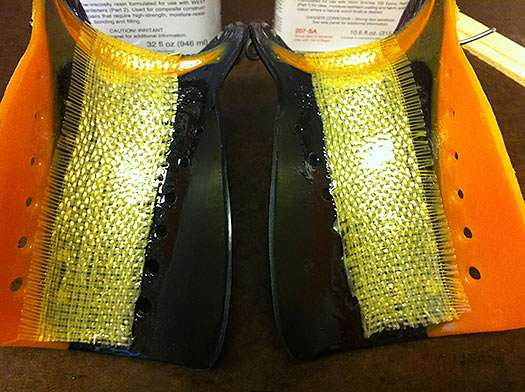
Then I pressed the Kevlar into place, making sure to press the fabric onto the bellows section of the tongue. I believe this is the critical part in making the boot stiffer. I then brushed on another coat of epoxy.

Kevlar on the boot with one coat of epoxy on top.

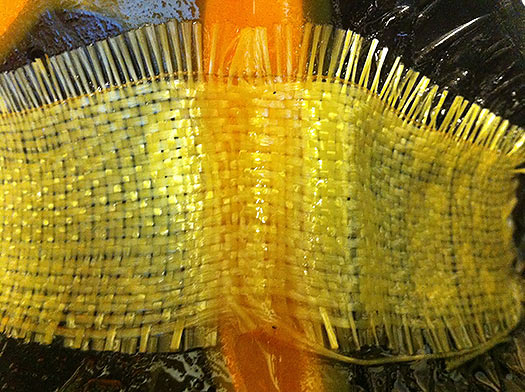
Second coat, note the bubble on the left of the bellows.
I did a “just OK” job of getting the fabric to conform to the bellows section. The Kevlar/epoxy combo will want to pop out of the bellows area if left on it’s own. I pushed the fabric into the bellows area several times while waiting for it to set up. As you can see in the pix, I still got a “bubble” on the left side of the bellows. I suggest that anybody trying this pay particular attention to this part of the process. Maybe weighting the area with small weights that conformed to the shape would help. A small, thin plastic sheet could be placed in the bellows area before setting the weights to keep them from sticking. There is a glassing technique called “vacuum bagging”… but it is pretty advanced and equipment intensive.
I waited an hour or so for the epoxy to set-up, then brushed another coat on each tongue. I waited for that to dry overnight and gave it one final coat. I then waited for a few days for the epoxy to fully dry and cure. Then I took my Dremel tool and cleaned things up a bit, getting rid of drips, spatters, rough spots and the stray Kevlar fiber.
The results? Despite the dearth of snow here in Aspen/Snowmass area, I have been on them more than six times. They are truly “a little bit stiffer”. So I’m thrilled with the performance. Thus far, after a few initial “crunchy” sounds, the epoxy has held really well.
Lessons learned:
Kevlar is truly bulletproof. It’s a bear to cut. They make special scissors if you don’t want to risk spousal arousal. This particular epoxy is thin and doesn’t set up very quickly. It tends to run out onto the Masonite and then bond the tongue to it. It also wants to run out the holes in the tongue. Mostly this is a cosmetic issue. But the takeaway is don’t slop this stuff on. Work in thin coats. Wear gloves and protect your bench/kitchen counter. The one layer of Kevlar I used made things a little stiffer. Two and three layers would correspondingly add more. How much? Hard to say. Jon Stoller told me that if you don’t like the initial stiffness with one layer, you can always add another layer right on top of the first one.
Lou says he’s amazed I got epoxy to adhere to Pebax in an area that flexes. We’ll see how the long-term durability is.
There you have it. If a noob like me can do this, so can you.
Beyond our regular guest bloggers who have their own profiles, some of our one-timers end up being categorized under this generic profile. Once they do a few posts, we build a category. In any case, we sure appreciate ALL the WildSnow guest bloggers!
