Part 1 — Screw Driving
Part 2 — Ski Binding Specific
Part 4 — More Tools
Many ski binding mount templates require locating on the left-right center of the ski. (Some templates have marks you can attempt to line up with the ski’s outside top edges, but with most skis having curved top edges, using a center line is better.)
In our DIY binding mount posts we mention various methods of determining the ski’s lengthwise center. It occurred to me we should make a blog post that’s specific to only this one process (and required tools) as it is so important, and a bit tricky due to the sides and top of the ski being curved and the ski’s width changing as you move your measurement point between tip and tail.
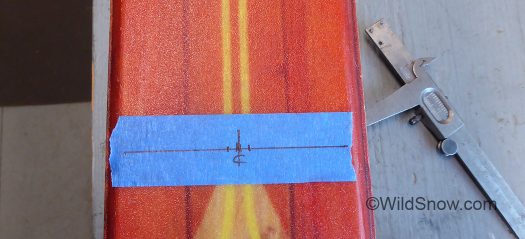
No matter what method you use for bifurcation, first step is to mark the locations where you’re finding ski centers so that ski width change won’t mess up the process. When I’m in a hurry, I just use eyeball the placement of a straightedge and draw a reference line across the ski. When I’m more concerned about neatness and don’t mind an extra step, I use one of the more detailed methods outlined below, and apply painter’s tape to prevent making marks on ski.
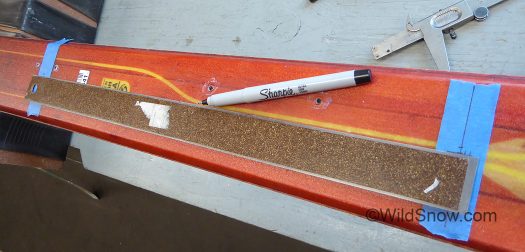
(I won’t get into the entire mounting process details here, instead see any of our mounting how-to pages. For those of you new to this, suffice it to say that the center marks are located some distance to rear and front of binding mount location and connected with a longitudinal center line. The center marks on the paper binding mount template are then registered on the line.)
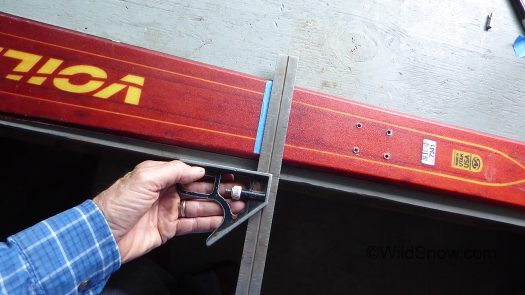
The perfectionist method for drawing square mark across skis: Lay the skis parallel to the edge of your workbench. Keep the ski tip next to bench edge, but move the tail a bit away from edge due to ski being narrower at the rear. You can measure to find the tail offset, but a centimeter works well enough for most reasons you’re doing this. With ski thus in “true parallel” to the workbench edge draw your reference lines using a carpenter’s square held against the bench edge.
Once the ski is marked, you can use one of four methods to find ski left-right center:
1. Simply eyeball a ruler placed across the top of the ski. Not highly accurate, but fast and often adequate.
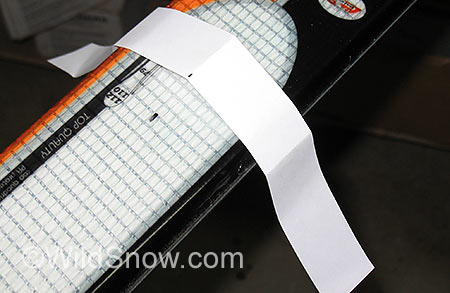
Using paper folding to find center of ski, left-right.
2. The “paper strip” method is quite accurate and simple. Wrap a strip of paper around the ski, crease it over the sharp steel base edges, remove and fold in half using the edge marks as reference, again place on ski and use the crease to locate center. While simple, work carefully (mainly, mark the spot on your ski where you place the paper, as moving it towards the tip or tail will throw things off because of the ski’s varied width.)
3. Use your calipers to measure ski total width, divide in half, and figure out a way of transferring measurement to ski. Laying a ruler on the ski as in #1 is quick, but again subjects you to dealing with the curved ski top edges. Better, buy a cheapo caliper and do a tool mod to specifically create a tool for finding ski centers.
4. This is my favorite, it seems quickest while still accurate. Using modified caliper, swap ski side you measure from a few times, make marks, adjust caliper as you go until you’re making opposing marks just a millimeter or so apart, then eyeball your final dot. Once you practice this method a few times, you’ll be surprised how fast you can bisect the width of the ski. But the modified tool is essential.
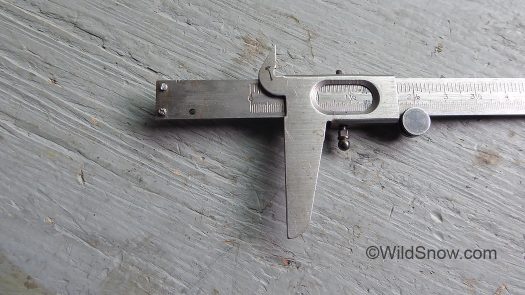
Modified caliper for measuring top of skis with curved top edges. Use to find center, or double check your center line by flipping the caliper from side to side. For about 10 bucks I’ve found this to be a super useful tool.

Using modified caliper to find ski center, just approximate, switch sides and make marks, you can usually narrow it down in two steps. You can also measure the ski width then set caliper to 1/2, but doing so still needs verification, and thus seems redundant.
For the caliper mod, get a cheapo non-digital steel caliper and remove the upper arm. Photos above makes this clear. Funny thing is it’s rather hard to find the truly inexpensive caliper you need for this.
My initial search on Amazon got 63,432 caliper results. Took me a few days to narrow it down. So you don’t have to.
Amazon link to right is the best price I could find on a non-digital basic caliper. Hardware store and big box home supply usually sell these as well.
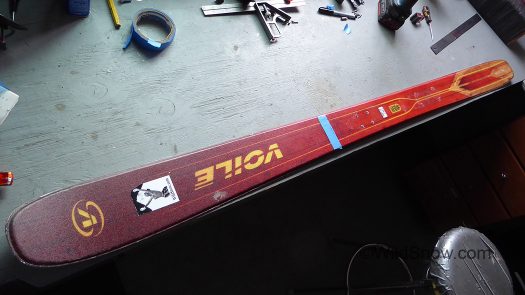
To draw a nice ‘square’ line across the ski, use edge of workbench to anchor your carpenter square, with tail of ski offset about a centimeter from the edge.
If any of you guys have tricky ways of finding ski left-right centers, let me know. In the old days with minimal sidecut skis I used a center finder made from a bar of steel with two pins through it and a hole in the middle of the bar. You just set it on the ski, rotated to snug, and marked through the hole. I keep thinking something similar must be available.
About the carpenter’s square: a large “framing” square works best, but that’s a specialized and unwieldy tool, so try doing it with something smaller. A tri-square is adjustable, useful for general DIY projects, and can also be used as a crude way of finding ski left-right center (same concept as the modified caliper, adjust length of tri-square blade and flip back and forth on ski top).
Lastly, is “longitudinal” the correct word?
WildSnow.com publisher emeritus and founder Lou (Louis Dawson) has a 50+ years career in climbing, backcountry skiing and ski mountaineering. He was the first person in history to ski down all 54 Colorado 14,000-foot peaks, has authored numerous books about about backcountry skiing, and has skied from the summit of Denali in Alaska, North America’s highest mountain.

