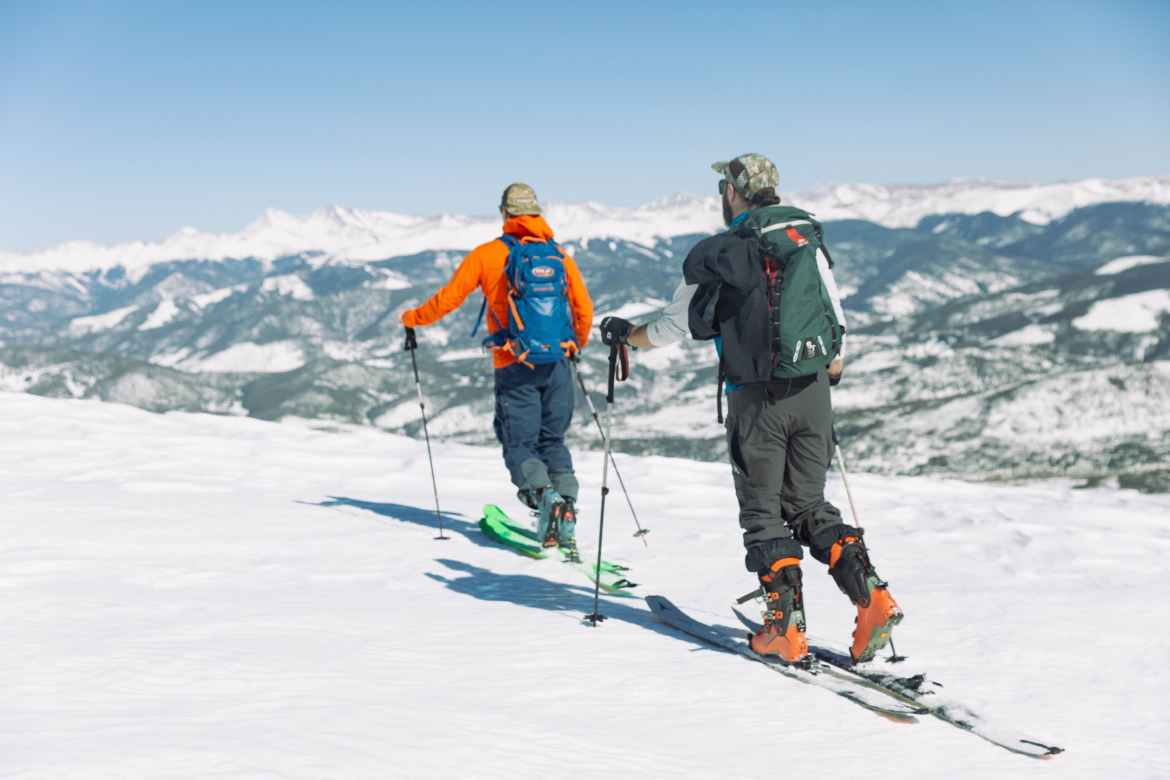
Photo: Andrew Maguire
Backpacks and the backcountry go hand in hand. Or, strap in strap, or whatever analogy you’d like to make to emphasize how naked you’ll feel in the backcountry without a pack to carry the necessary tools to rescue your friends should things go south.
As backcountry skiing and splitboarding has exploded in popularity, brands have taken notice and created touring-specific packs that can carry the necessary shovel and probe, as well as plenty of additional gear, while still remaining convenient and comfortable. But with no uniform standard for a backcountry pack, they each offer unique features that may or may not serve as an advantage in the backcountry.
As someone who has been exploring the backcountry for over 20 years, I have run the gamut of pack types, from school bags, to daypacks to technical guide-specific ones. It’s easy to get caught up in marketing fluff and hear from everyone how their pack is above the rest. But really the best backpack for touring is one that sits well on your torso, is easy to access key components in a rush, and can hold up in all kinds of weather conditions as a reliable lifeline to essential gear when in the mountains.
This list comes from months of testing in the field, with up to multiple years on some of these where I really got to know what they are made of. As a result, nothing you see here is anything I would casually recommend – they are all–in my opinion–the cream of the crop to help your time in the backcountry be more organized and more comfortable.
Airbag packs are another conversation (and price tier) altogether. We focused on non-airbag packs in this article to suit a wider budget range and to keep the testing criteria simple, but Wild Snow has reviews of individual airbag packs should you wish to explore some of those a bit further. If that’s your bag, check out recent reviews of the BCA Float 35 E2 or the Ortovox LiTRIC Tour 40.
I also mostly steered clear of multi-day touring packs for extended overnights. As much as we dream about it, most people are touring for a few hours, maybe a full day and they’re best served by the types of packs featured here. The oversized packs needed for sustaining yourself for days in the snow are another category for another day.
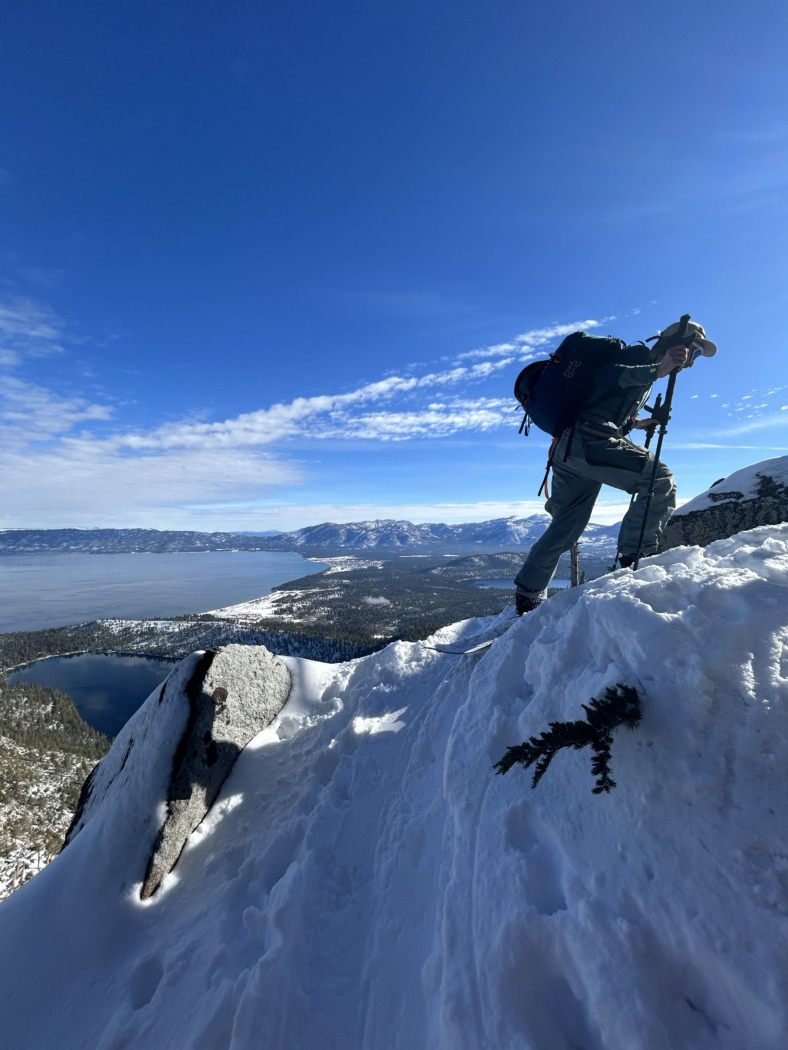
Contributor Drew Zieff touring with the Ortovox LiTRIC Tour 40 in Tahoe. Photo credit: Gloria Liu
What to Look For in a Backcountry Backpack
Capacity: The ideal capacity for a backcountry touring pack depends on the type and duration of your tour. These are all in the 25-38L range, with an average of around 32L. This gives enough space for an emergency overnight if needed. I keep extras like a guide’s tarp for an emergency shelter or transport and an emergency blanket and spare puffy. And don’t forget the all-important water and snacks to keep us going.
For shorter day trips, a pack (or even vest) in the 20-30L range is usually sufficient to hold your avalanche safety gear, an extra layer, snacks, and water. For longer tours or multi-day excursions, consider something in the 30-50L range, which can accommodate more food, a bivy sack, and additional gear for variable conditions. Too small a pack and you risk running out of space; too large and you may overpack or feel weighed down. For many people, 25L is plenty for a day trip that allows you to pack some snacks and have room for an extra layer to stash while climbing.
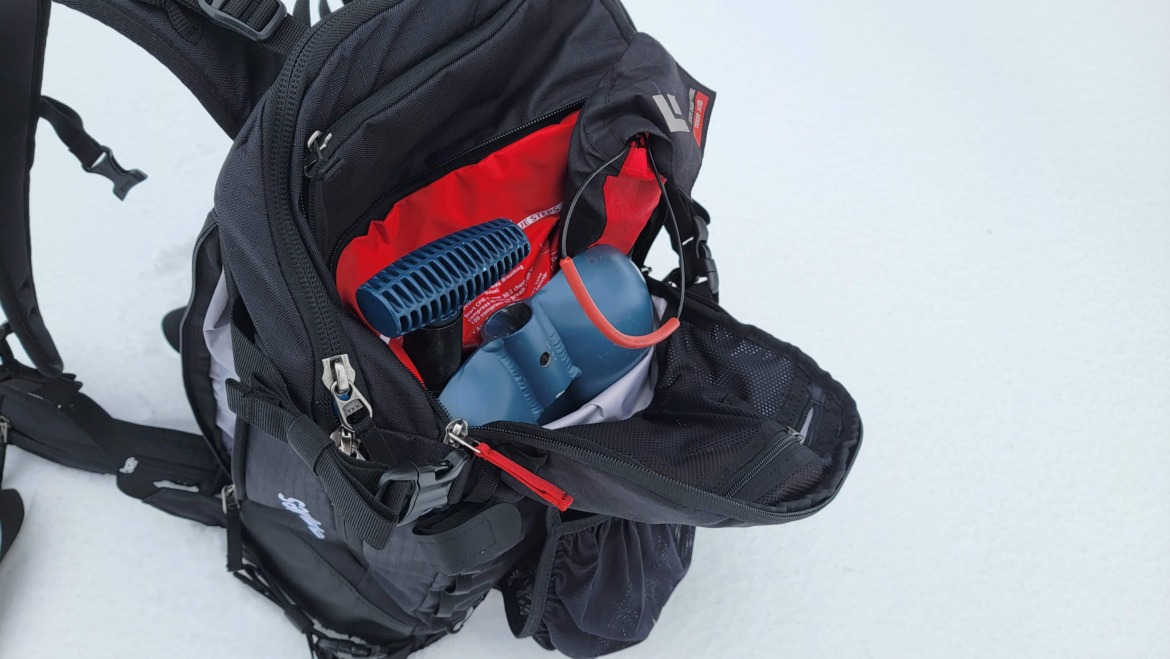
Pocket For Rescue Tools: When seconds matter in an emergency, you want to access probe and shovel as efficiently as possible. A dedicated pocket for the tools often makes the most sense to reduce missteps when needing to access it on a moment’s notice. Ski touring and splitboard-specific packs will almost always have dedicated space to hold a probe, shovel handle, and blade. Most of those safety gear pockets (with the exception of Mammut’s Trion) are on the front of the pack for efficient access. Jones, Mammut, and Ortovox take this a step further, color coding the zipper to minimize confusion under pressure.

Other Pockets:
Organization can make the difference between people including you in future adventures or not as it affects your performance in an emergency or simply getting through a break or transition. Having a place for everything in your pack and knowing where to get it keeps the flow of the day going well. Depending on your style, one big catch-all pocket or more compartmentalized is a big-picture decision to make. Gram-counters will often choose a minimalist “black hole” style pack to save weight, but most people will benefit from the organization of at least a few different pockets and storage compartments.
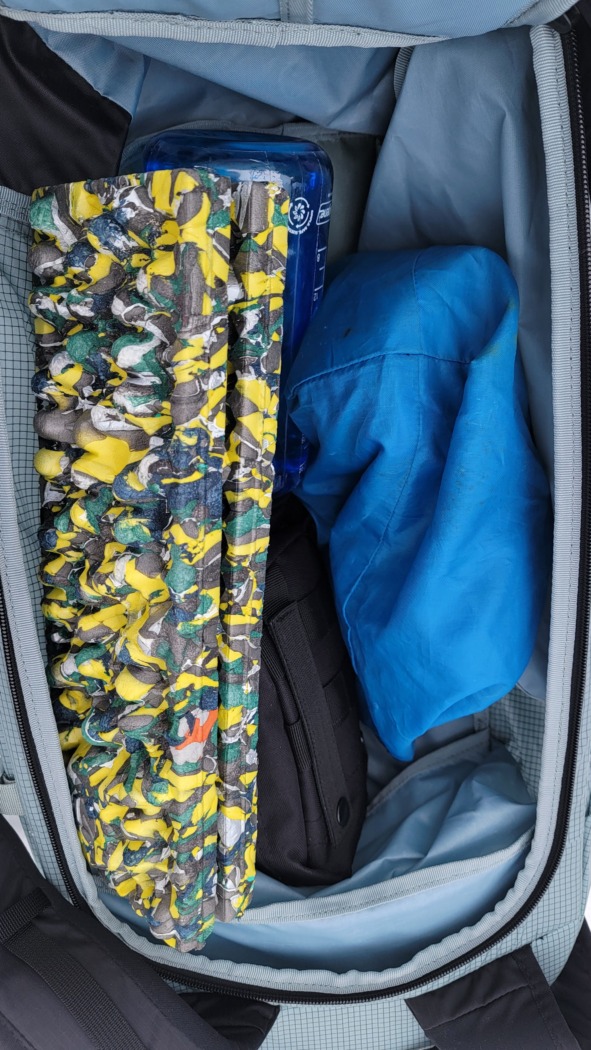
The main compartment is where you usually stash extra layers, food, a first aid kit, etc. This pocket is accessible through the top, back, or side. Most bags have a combination of two, but not all three. For example, the Mammut Trion, Jones Further, and Patagonia Descensionist have top and side access points for the main pocket, but do not have a back panel access. The other packs listed here have back panels, with the Deuter Freerider Pro offering top access while the others have a side zip.
A back-panel opening lets you reach your gear without having to dump the entire pack. It is also possible to keep the hip belts attached, accessing the contents without the bag needing to touch snow. This is done by leaving the hip belt attached, removing the shoulder straps, and rotating the bag from back to front. This makes for easy, efficient access on the fly.
Side zippers or front-panel access points give more options for access, and can result in less snow getting into the pack compared to opening the entire back panel when off your back and in the snow. Having multiple access points becomes even more useful when you mindfully pack your gear to have items that are more readily used within quick reach of those access points, and other less-often used items tucked further away. The more you go out, the more you’ll find out what works best for you and your particular needs.
Hip belt pockets are great for quick-access items such as energy bars, lip balm, or a phone. They allow you to keep moving without wasting too much time to take your pack off or dig around.
The top pocket often has a fuzzy padding for sunglasses or goggles, which can be helpful if you’re the type to lose those microfiber bags, but still want some padding for the lenses. Even if it doesn’t have soft padding, it’s good to have a dedicated space for goggles and glasses for easy, hassle-free access.
Helmet Storage: Stashing your helmet securely during uphill climbs keeps the sweat from building up and gives your head some time to breathe.. Many packs include an integrated helmet-carry system such as a mesh sling, and a dedicated space to stow it. Ventilated helmet holders are especially useful as they allow moisture to escape while you’re skinning up.
Ski/Snowboard Carry Options: Whether you prefer skis, a solid board, or a splitboard, having robust carry options can make a big difference, especially on steep bootpacks or technical ascents. Each use has its time and place.
A-Frame: A-frame is where you have your skis attached to the side of the pack, with the tips strapped together for a diagonal “A” shape. This is a great way to have a balanced load on your back, but could end up being a liability in steep and deep snow if you need to do tight maneuvers with a high center of gravity.
Diagonal Carry: A diagonal carry has skis strapped to one side and usually tucked into a loop on the opposite side on the bottom of the pack. This works if the skis are facing each other and aren’t too fat – splitboards and massive pow sticks usually won’t fit in the loop on the bottom. But when you need the clearance to sit a bit higher and not be as rigid as the A-frame, a diagonal setup might be best. The only issue here is an uneven load, which might throw some people off, especially if bootpacking a steep slope.
Vertical Carry: Vertical carry is for a solid snowboard where you use straps to hold the board upright on the back of the pack. This method works well enough, however it certainly raises the center of gravity, and can get into contact with your legs and rear if you’re not conditioned to having a wide beavertail strapped to your back.
Reinforced attachment points will add durability and flexibility, making sure that your gear stays secure and balanced while climbing. The premium ones will be making sure that your edges aren’t digging into the straps.
Comfort & Fit
No matter how many features a backpack has, it all comes down to fit and how a load feels on your pack for what is hopefully many hours on end over the seasons. Adjustable shoulder straps, load lifters, and hip belts allow you to dial in the fit, and are easy to change up based on the load. Most hip belts even double back for a more long-lasting cinch that doesn’t come loose as easily.
Breathable padding along the back panel and straps can help provide airflow, keeping you comfortable during long, sweaty ascents. Wider shoulder straps (such as on the Ortovox Switchback) will help disperse the weight more, which can help distribute larger loads.
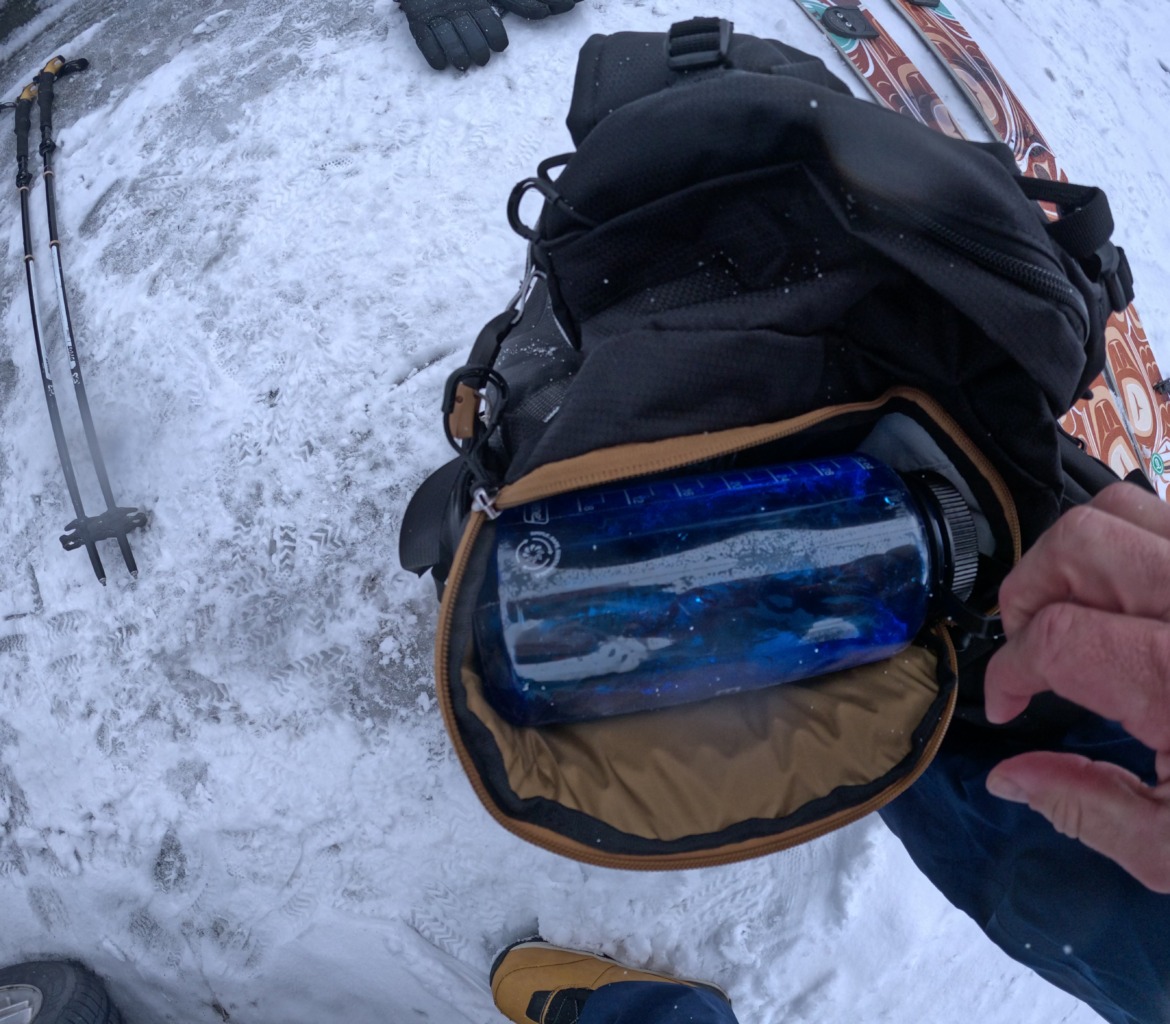
Hydration Compatibility: Hydration bladder-compatible packs provide a simple solution for your water, giving you quick access over the shoulder to several liters of water. However, not any pack will do well in the mountains, especially in the winter. Some touring packs have an insulated sleeve that can keep the cold out a bit longer, but sooner or later the cold will eventually cause troubles, especially if you’re out on multi day trips.
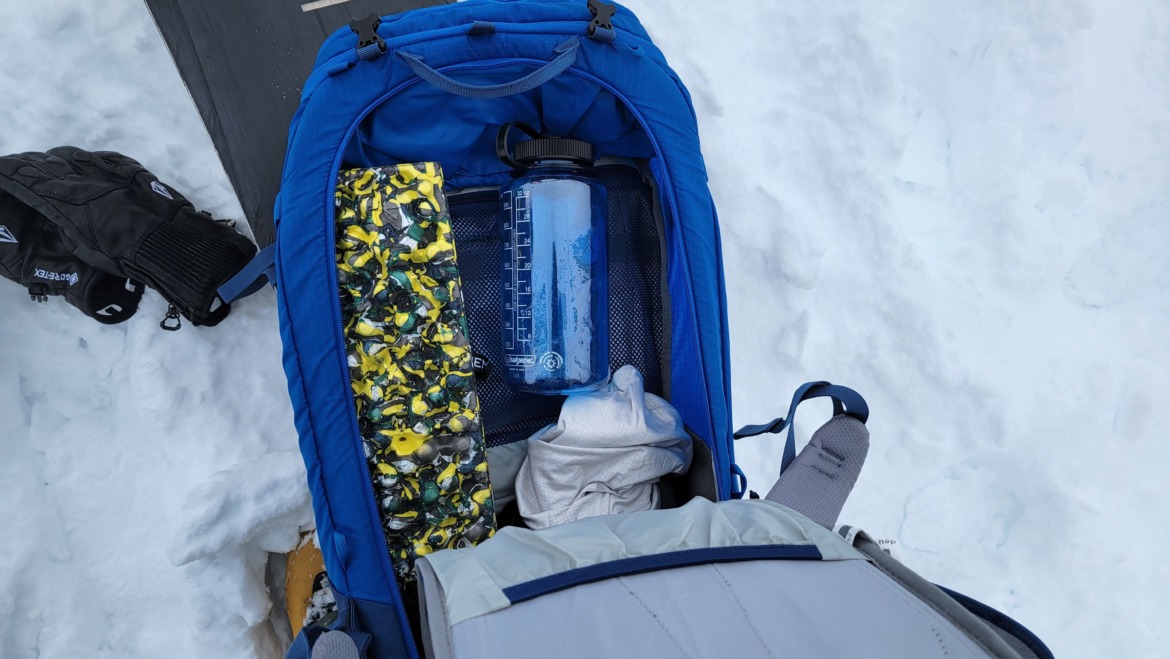
Alternatively, side pockets that can hold water bottles securely are a plus if you prefer not to use a bladder system. An insulated 32oz Nalgene bottle is often the preferred way to keep water cold. The wide shape of the bottle keeps the water moving around, slowing down the freezing process. But for some it’s better to keep a larger water bottle closer to the midsection, inside the pack. if quick access to water/snacks isn’t top priority, a larger pack like the Trion 38 would suit you.
The Best Touring Packs We’ve Tested
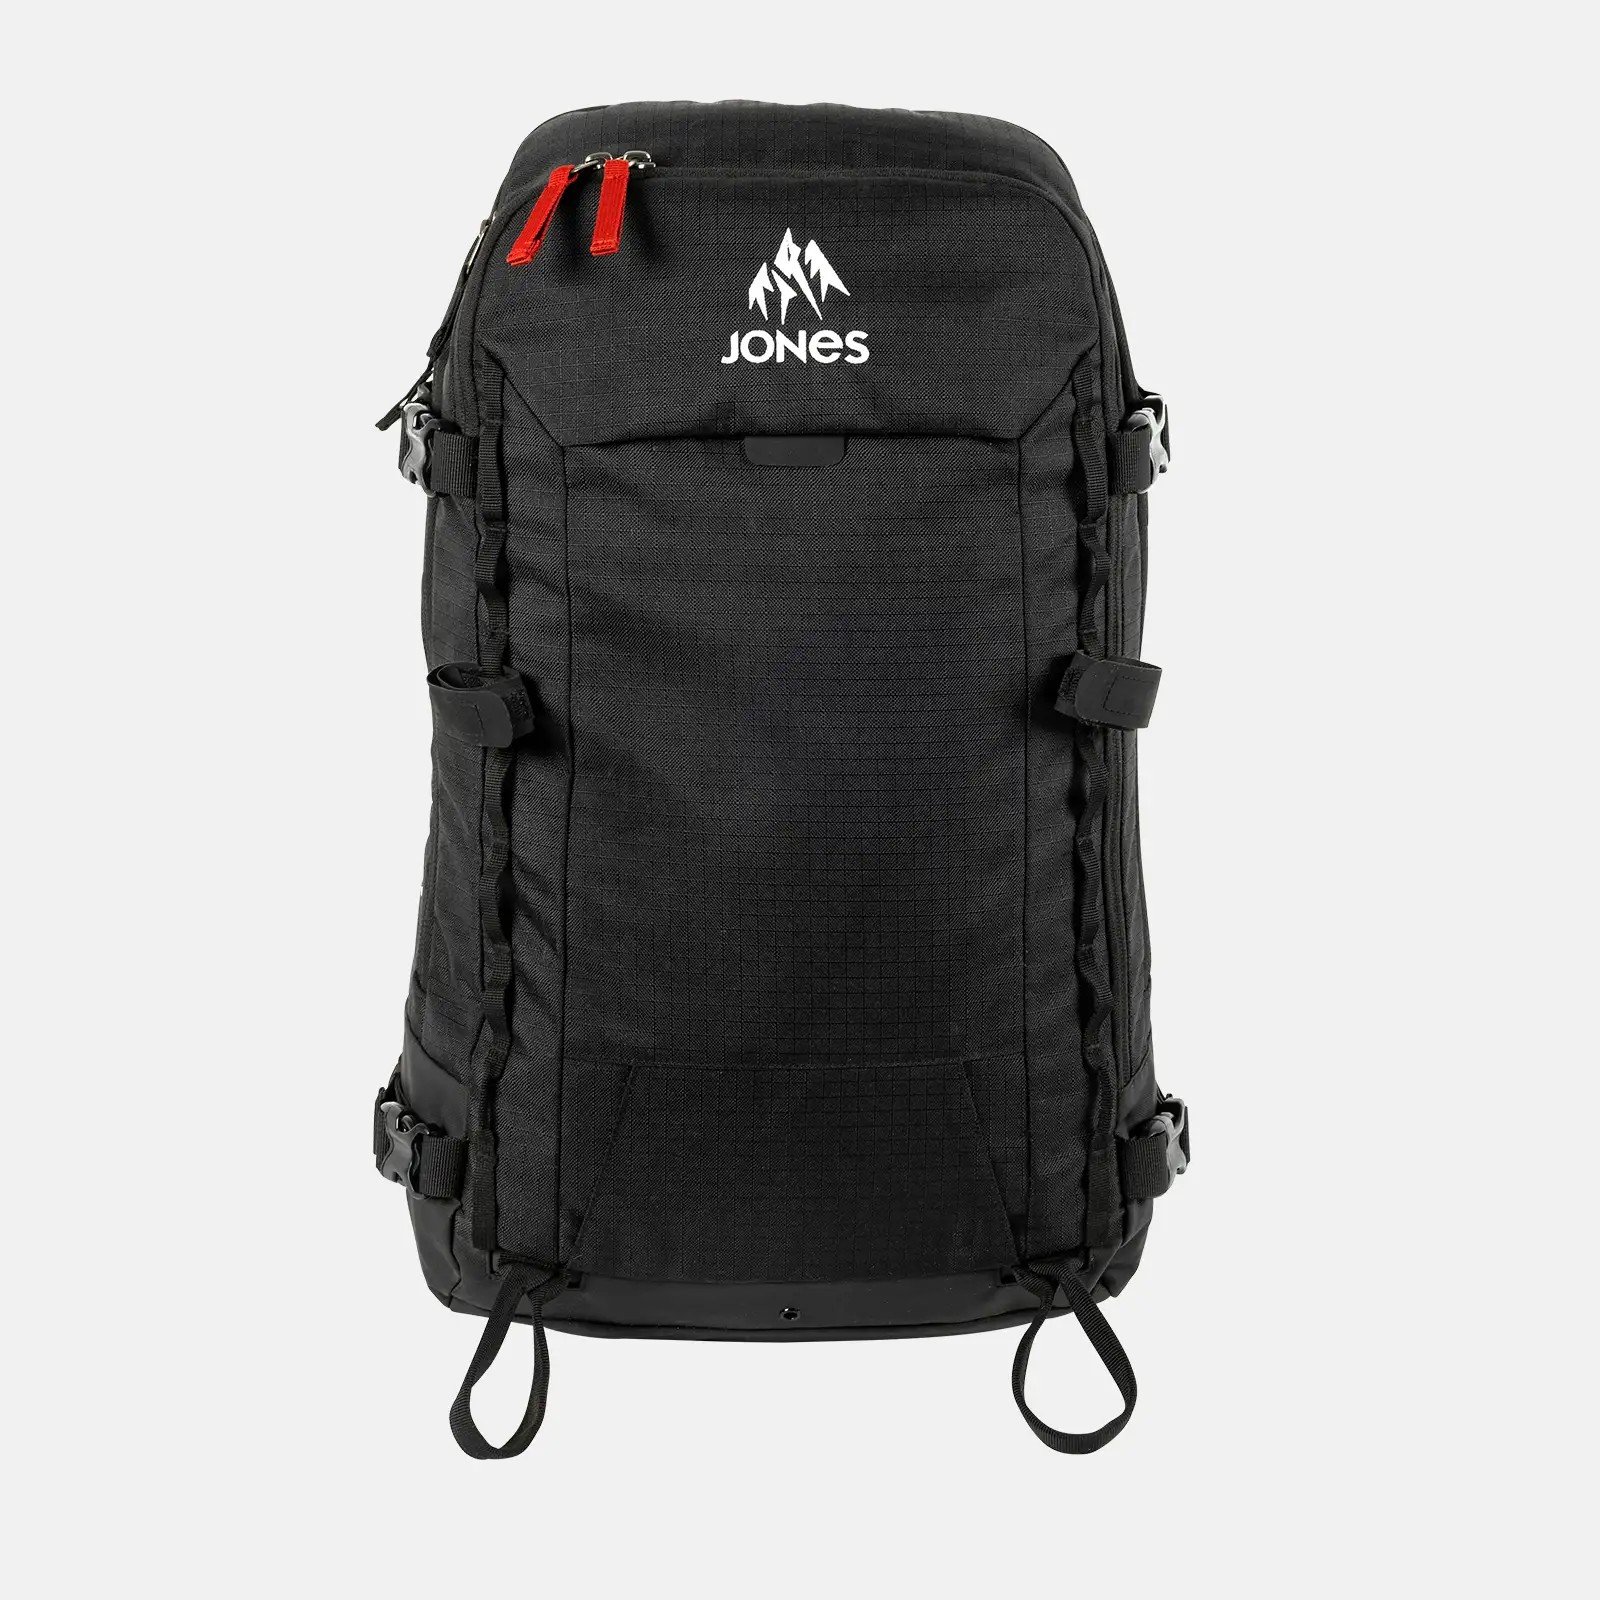
Best Daypack for Touring: Jones Further 25L
Capacity: 25L (19L and 32L available)
Access points: Top, side
Extra pockets: Safety tools in front, goggle stash on top
Helmet storage: Removable netting with stash pocket
Ski/SB Carry Options: A-Frame, vertical snowboard
Price: $275
Pros: Durable material, safety-focused design, 100% recycled materials.
Cons: No back panel access or diagonal carry option, pricey.
Jeremy Jones is as wise as it gets when it comes to exploring the backcountry. His resume includes some of the world’s most unforgiving lines, attained under his own legs’ power. With him involved in the design process, we are lucky to benefit from decades of experience using a pack in the backcountry and while snowboarders know the name and brand, there’s no reason skiers can’t make this their daypack.
I loved how rugged it felt. Of all the packs tested, the 25-liter Further I tested was the one that felt the most apt to be tossed around for years upon years and still be useful. The shape allows you to rest the bag upright, get what you need, and zip back up in an efficient manner. It was the only pack with a main pocket that zips up from the sides to the top, in an upside-down “U” shape, which makes for quick loading and unloading while still keeping snow out.
The pack is all about simplicity, with the safety tools being in easy reach and accentuated by a red pull tab for less messing around during an emergency. Other smaller zip pockets in the main compartment and the safety tools pocket allow for small items to be stashed out of the way, but still within easy, organized reach when its needed.
There isn’t much that I could find wrong with this pack, only that if you’re someone who prefers back panel access then this isn’t the pack for you. Depending on how deep the snow you’re using the pack in, this could be a benefit to not have the opening go so far down. But the way the pack keeps all the essentials within easy reach makes it an acceptable tradeoff, especially if you’re going to be taking the pack off when it’s deep and fresh.
The 25-liter Further may feel small for guides and folks that like to pack a lot of gear for longer days and for them, there’s a 32-liter version called Higher. If you keep it simple and would rather have as small a pack as possible for sidecountry and quick tours, there’s also a minimalist 19-liter size called Deeper. All three packs have dual ice axe loops and support vertical board carry and side straps for ski carry.
Consistent with Jones’ ethos to do better for the planet, the pack uses recycled polyester and nylon throughout. Having less plastic in the world is always a good thing, and while Jones (nor any other brand really) hasn’t solved how to deliver performance without polyester and nylon, at least they aren’t adding more of it into the ecosystem.
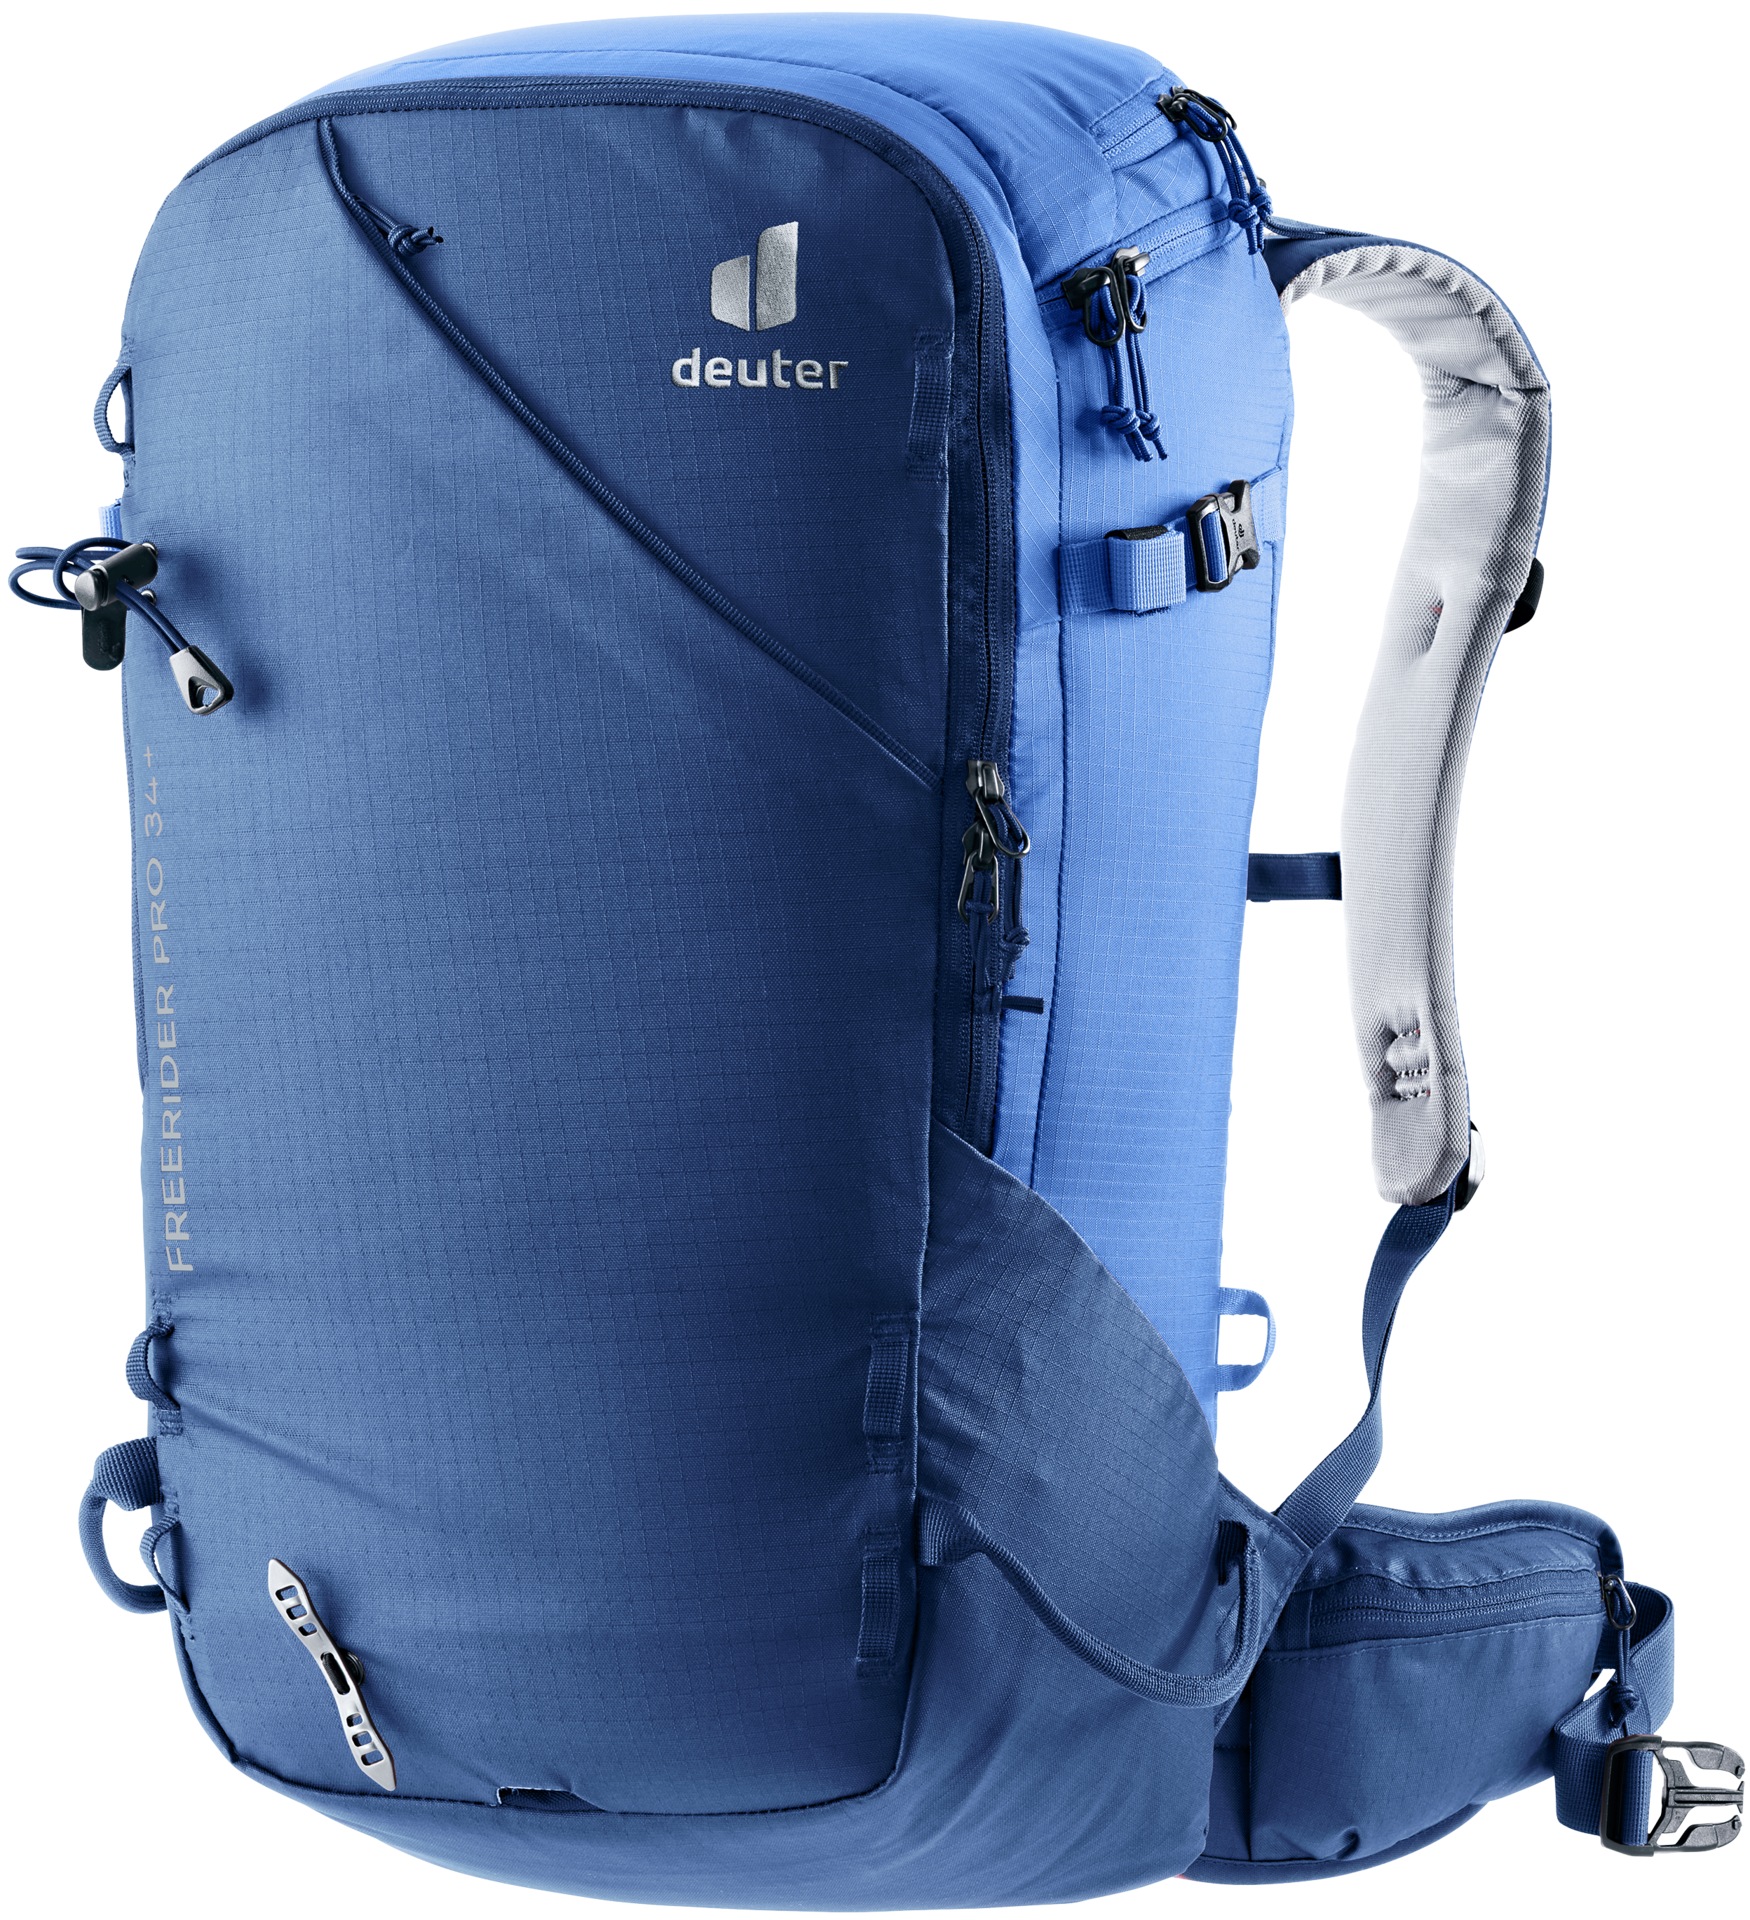
Best for Guides: Deuter Freerider Pro 34+
Capacity: 28L, 30L, 32L, 34L
Access points: Front pocket, back panel
Extra pockets: Top, inside front, outside front,
Helmet storage: Clip-on front
Rope attachment: Yes
Ski/SB Carry Options: A-frame, additional snowboard strap
Price: $190
Pros: Rugged, well-designed, roll-top easily adds extra volume when you need it.
Cons: Need to unclip shoulder straps for easy access to back zipper
Deuter makes great backpacks that last. I’ve had two Deuter packs over the years. One was an everyday hauler that I did use as a touring pack that I retired and donated after 12 years of service. The other was a pack I used for backcountry guiding for five years before it got stolen, but it had no signs of slowing down or wearing out. The Freerider Pro is no exception to that quality I’ve come to know and love, with the added bonus of being lightweight. It has two flexible stays on the side to keep its shape, while still nimble enough to roll with the punches in a tumble. The one catch here is that you need to undo the load lifters on the shoulder strap for easy access to the back, which is one extra step you’ll need. But for those who have used them, that extra degree of support when you have a heavy load can be well worth the extra steps.
This pack is ideal for professionals or those who stash a bit more than an extra layer or lunch on the journey, such as a rope and first aid kit, while still remaining nimble enough on the down. The rope attachment was one of the best we tested. You can also access the main pocket without undoing the buckles for the back pane through the stowable roll top, giving this pack a variety of ways to utilize the space, based on your personal preference and style. If you don’t think you need the extra volume and expansion capabilities, the pack also comes in a 30-liter model as well as a compromise size 32-liter women’s specific fit edition.

Best Large Daypack: Patagonia Descensionist 37L
Capacity: 37L
Access points: Roll-top, side
Extra pockets: Inside the front pocket
Helmet storage: Included clip-on attachment
Ski/SB Carry Options: Vertical snowboard, A-frame
Price: $270 (Currently on sale for $167)
Pros: Durable yet light fabric, easy access. Higher volume.
Cons: Limited attachment points on outside
Patagonia’s touring pack, the Descensionist, bears a simple, high-volume design that is light on bells and whistles, but ends up being reliable, lightweight, and durable, giving you just what you need to stash your gear and feel comfortable at the same time. And as leaders in the industry when it comes to responsibly sourced materials, it’s also good to know that their supply chain is fueled by fair-trade workers and a lower impact on the environment we all seek to enjoy.
I’ve been using their original Descentionist pack for several seasons but this year they have upgraded the design in a major way. (Read an in-depth field report of the previous version here.) Gone is the roll-top enclosure that had a G-clip to keep things secure, instead opting for a cinch-top with a zip on the side for full access. The newer pack holds its shape a bit better, allowing it to sit upright when off your back to access what’s needed without tipping over in the snow.
Safety tools have easy access in the front, and there’s a loop for ice tools if you need it. The upgrade makes getting what you need in a hurry even faster, yet doesn’t compromise in durability or comfort. This is a bigger pack, so if you stick to resort laps and shorter tours, it might be more than you need, but if you mix in longer tours or even light overnights, the Descensionist is worth a look. You can always cinch down a larger pack, but good luck adding volume to a smaller one.
Other Touring Packs We Recommend
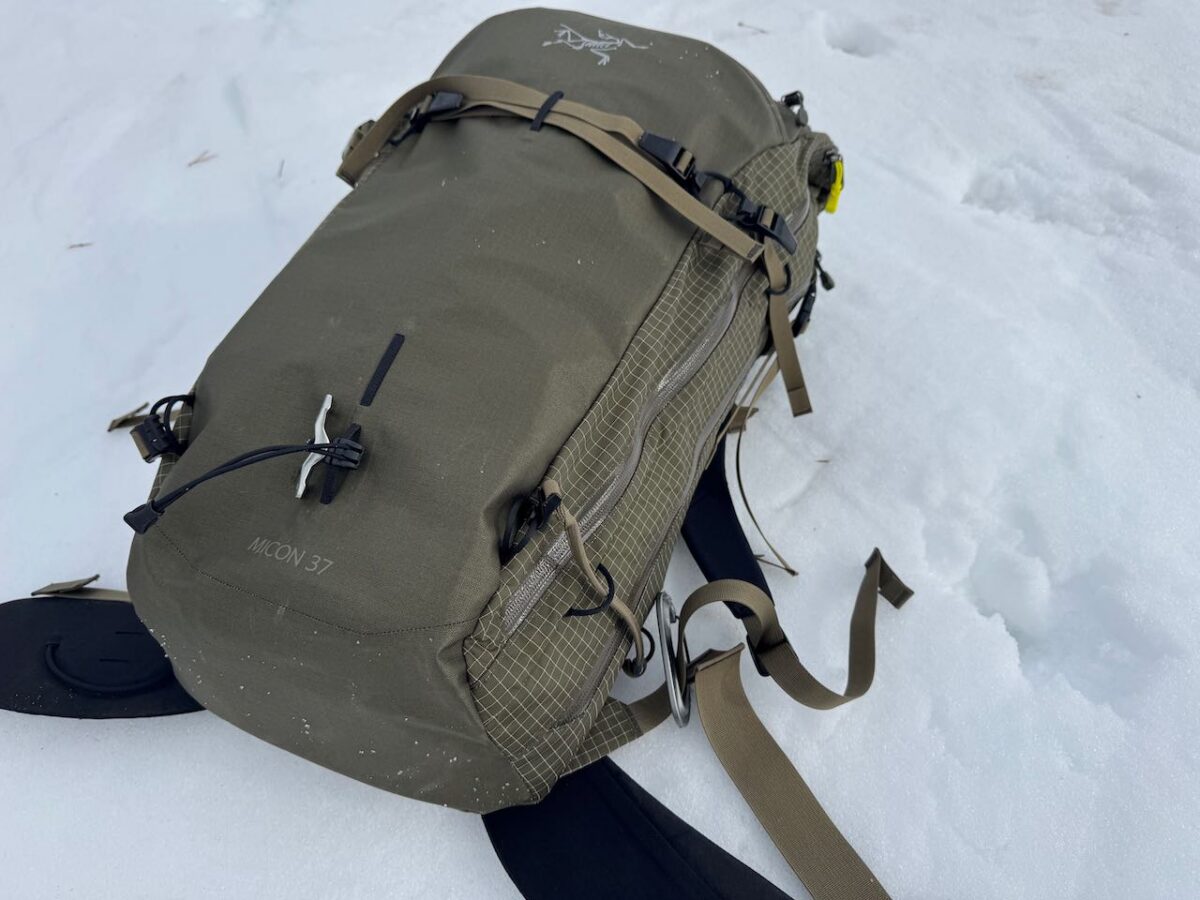
Arc’teryx Micon 37
Capacity: 37L
Access points: Roll-top, side
Extra pockets: Major Goggle Pocket, avalanche tools pocket
Helmet storage: Included clip-on attachment
Ski/SB Carry Options: Horizontal ski, A-frame
Price: $280
{Review by Bergen Tjossem}
I’ve worn Arc’teryx’s Micon Litric airbag pack more than any other over the last two seasons. It’s so dang light for an airbag equipped backpack (Read here for the full review). This season Arc’teryx launched the Micon 37, a new size for the dedicated ski touring pack sans airbag and an update to the previous Rush SK packs. I’ve been hauling it into the backcountry repeatedly this season. At first for the admittedly gorgeous aesthetic and gigantic goggle pocket, but I’ve kept with it for its robust simplicity, especially while storm skiing.
The new pack leans into weatherproofing that should appease even the most rain-drenched skiers among us. You’ll notice the roll-top first. It’s proven both protective and easy to manipulate with touring gloves on. I loved that it yielded a huge opening into the pack – big enough to stuff a helmet, chunky puffy, and anything else. And 37 liters can technically expand to more when you’ve got a big load out with fewer top flap rolls. Fiddly hooked side straps (that tend to pop loose from time to time when untensioned) allow it to cinch down to a much smaller daily driver size without feeling floppy.
The 210D Cordura Nylon body material is both weather resistant enough and thoroughly tough against scrapes, branches, and other abrasion so far. That sturdy feel is complimented by a sturdy, relatively unpadded back panel and simple hip belts. It’s a streamlined but burly package leaning into minimalist durability. And that’s how it carries in the mountains – It doesn’t overdo it with articulation or fancy fit systems outside a tried-and-true back panel and adjustable straps. It’s decently light, too, at just north of 1,000g. About double the weight of the brand’s new ultra-minimalist Alpha SL 30, but with double the features.
The Micon 37 offers two long side zippers – one to access the main body, the other acting as the main avalanche tool pocket access. You can also access the tools pocket from a zippered opening inside the roll-top, but it requires more fiddling. The side avy tool access will divide skiers given its diversion away from ski touring avalanche tool pocket dogma. It’s frankly not as easy to yank your tools out from the side as it is from the top or front of most backpacks, especially when the pack is full. And it’s important to note that your probe and shovel handle must be unsheathed from the internal loops or they straight up will not come out from the side. Once I got to know the system, it was fine. It didn’t bother as much as I expected during frequent snow pit deployments even if it’s not a quick-draw setup.
The last quirk is the ice tool carry. There’s a dogbone dongle on the bottom center of the pack’s exterior that hooks into a tool’s eye. There isn’t a keeper strap for the shaft, though. It just rides underneath the removable horizontal ski carry strap so be prepared to secure it with a ski strap. It technically works. But you know what works better? Using a short ice tool like the Black Diamond Venom LT and stuffing it into the avy tools pocket instead of carrying it externally. That setup won’t work for every skier.
The new Micon 37 has a few quirky details that some skiers won’t tolerate, no doubt about it. Still, there’s something about the Micon packs that keep me carrying them into the mountains. I like the rolltop design, simple and durable exterior, and the weatherproofing. The overall quality and design wins out if you can live with the side access avy tools pocket and incomplete ice axe carry.
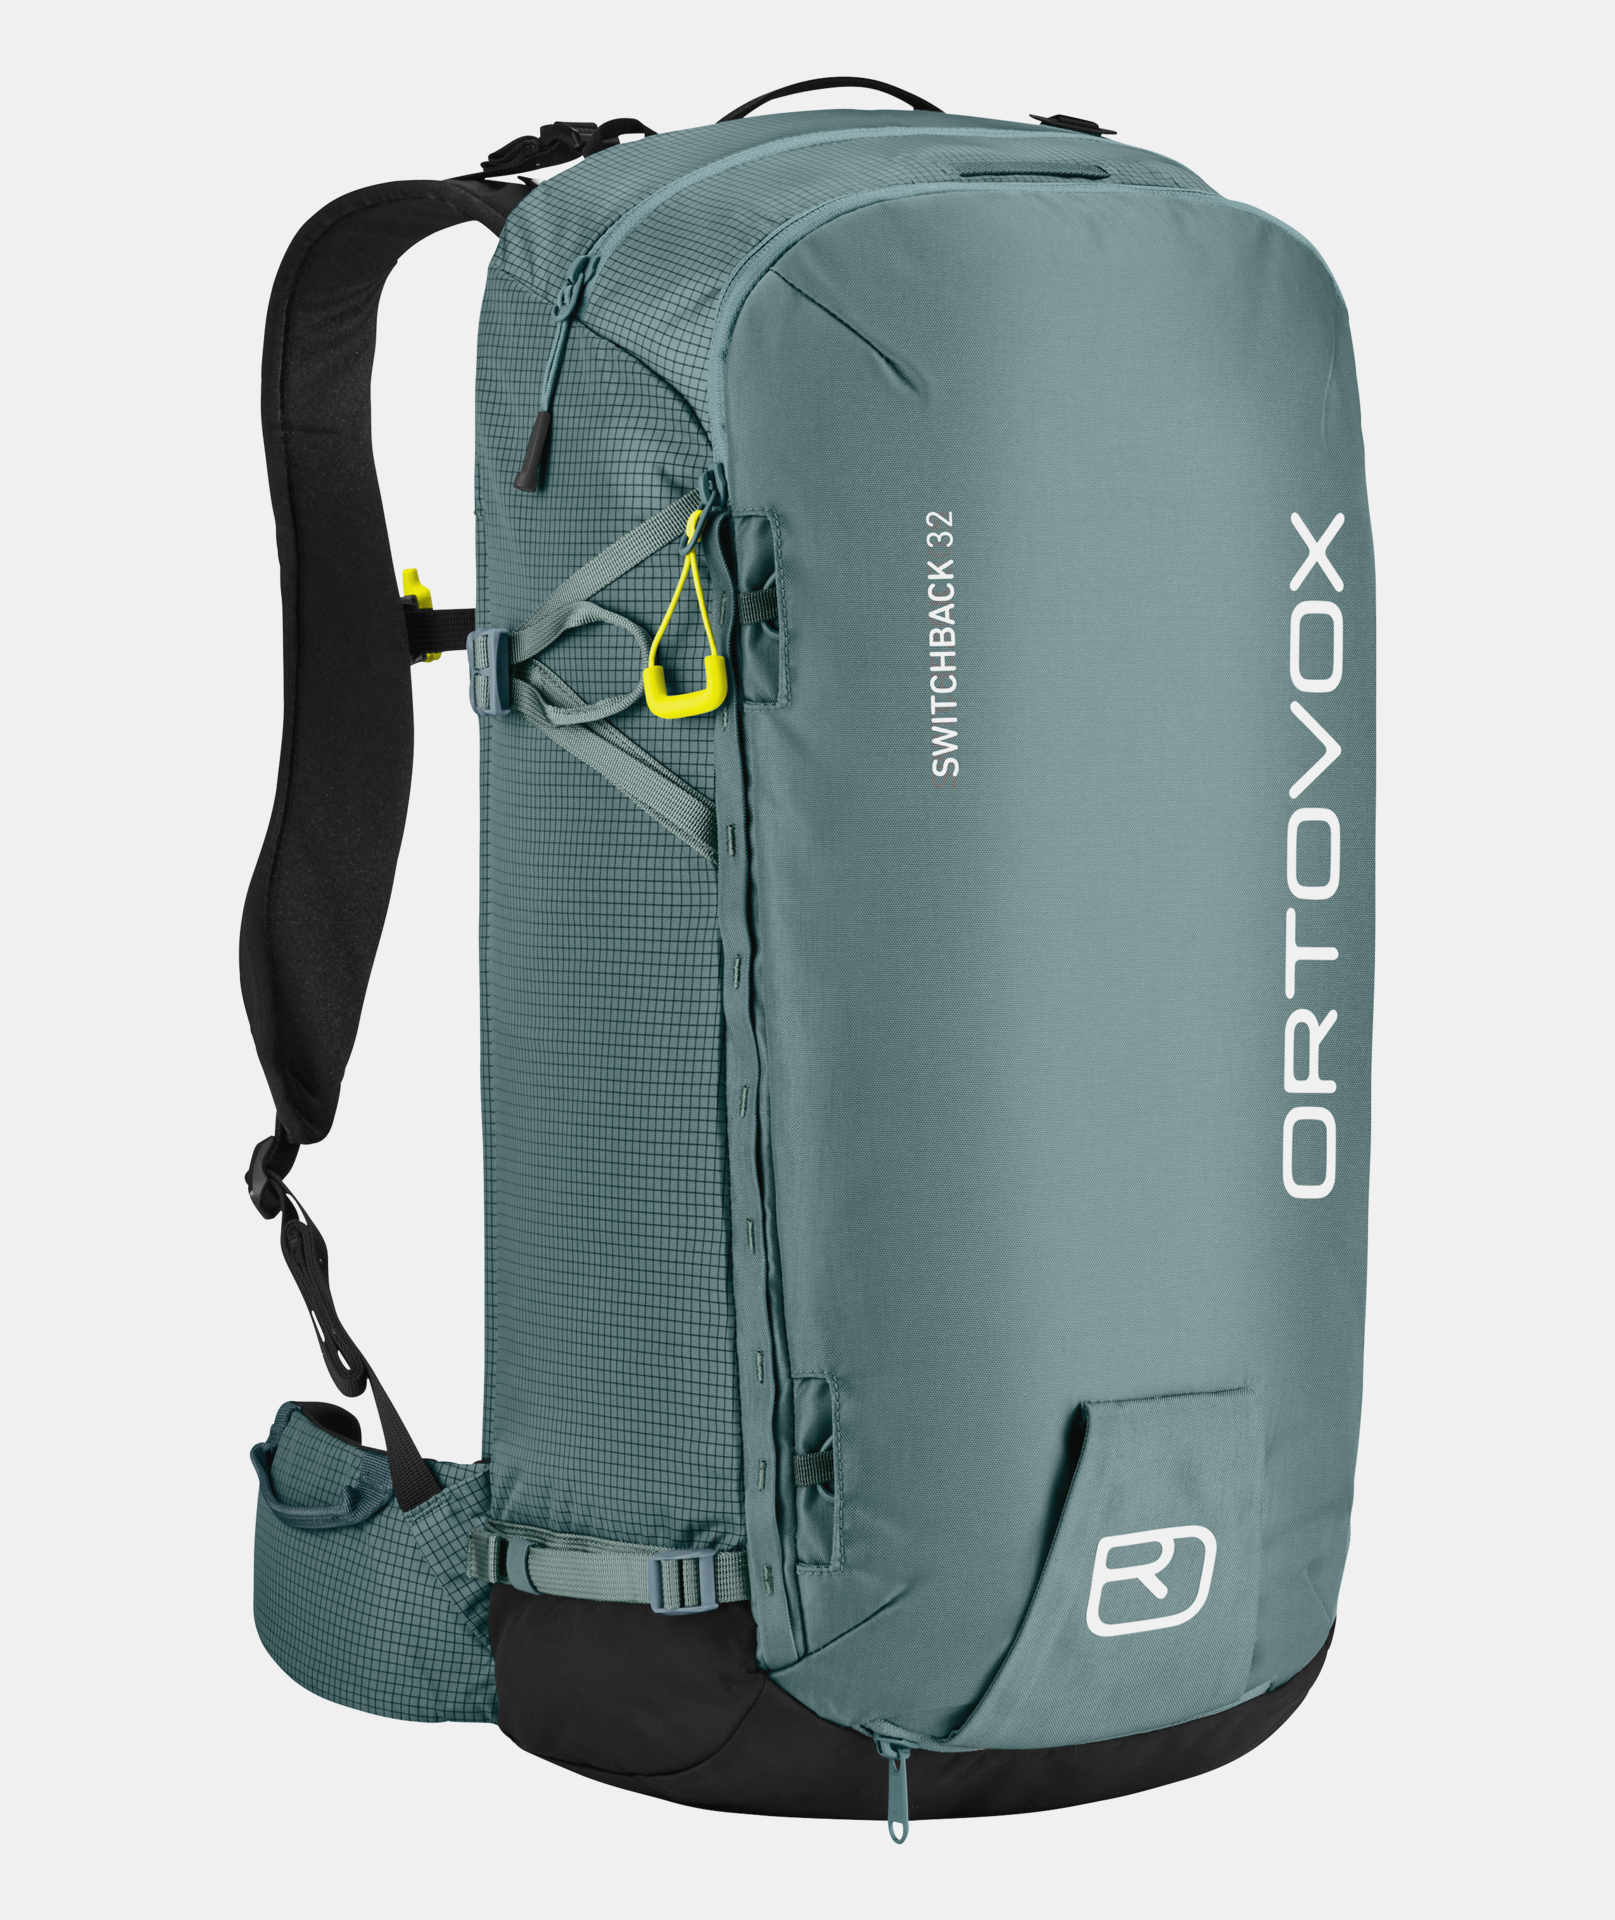
Ortovox Switchback 32
Capacity: 25L, 27L, 30L, 32L
Access points: Front pocket, back panel
Extra pockets: Side, waist straps, top
Helmet storage: Not standard
Ski/SB Carry Options: Diagonal, A-frame
Price: $220
Pros: Easy access to water via shoulder strap
Cons: No soft lining for goggles/sunglasses
Ortovox’s Switchback line comes in four slightly different sizes to suit any particular need. I tested the 32L version and found it to be the perfect volume for bigger days while not feeling bulky. The side pocket was awesome for stashing skins and easy access with the pack still on, without having to dig through the whole bag.
The back padding is flat, meaning snow won’t get stuck in it, and provides ample cushioning for a heavy load. The downside to a flat back is a lesser airflow, but the neoprene material gave enough padding while being able to breathe with the jacket where sweat wasn’t too much of a factor..
Although lightweight, the pack’s polyamide material felt strong, holding up well on heavy abuse. Overall, the pack has good conforming fit thanks to the back padding and flexible shoulder straps that shape well to the body. I’d recommend this pack for people who like to move fast and don’t need to access gear other than skins on the regular.
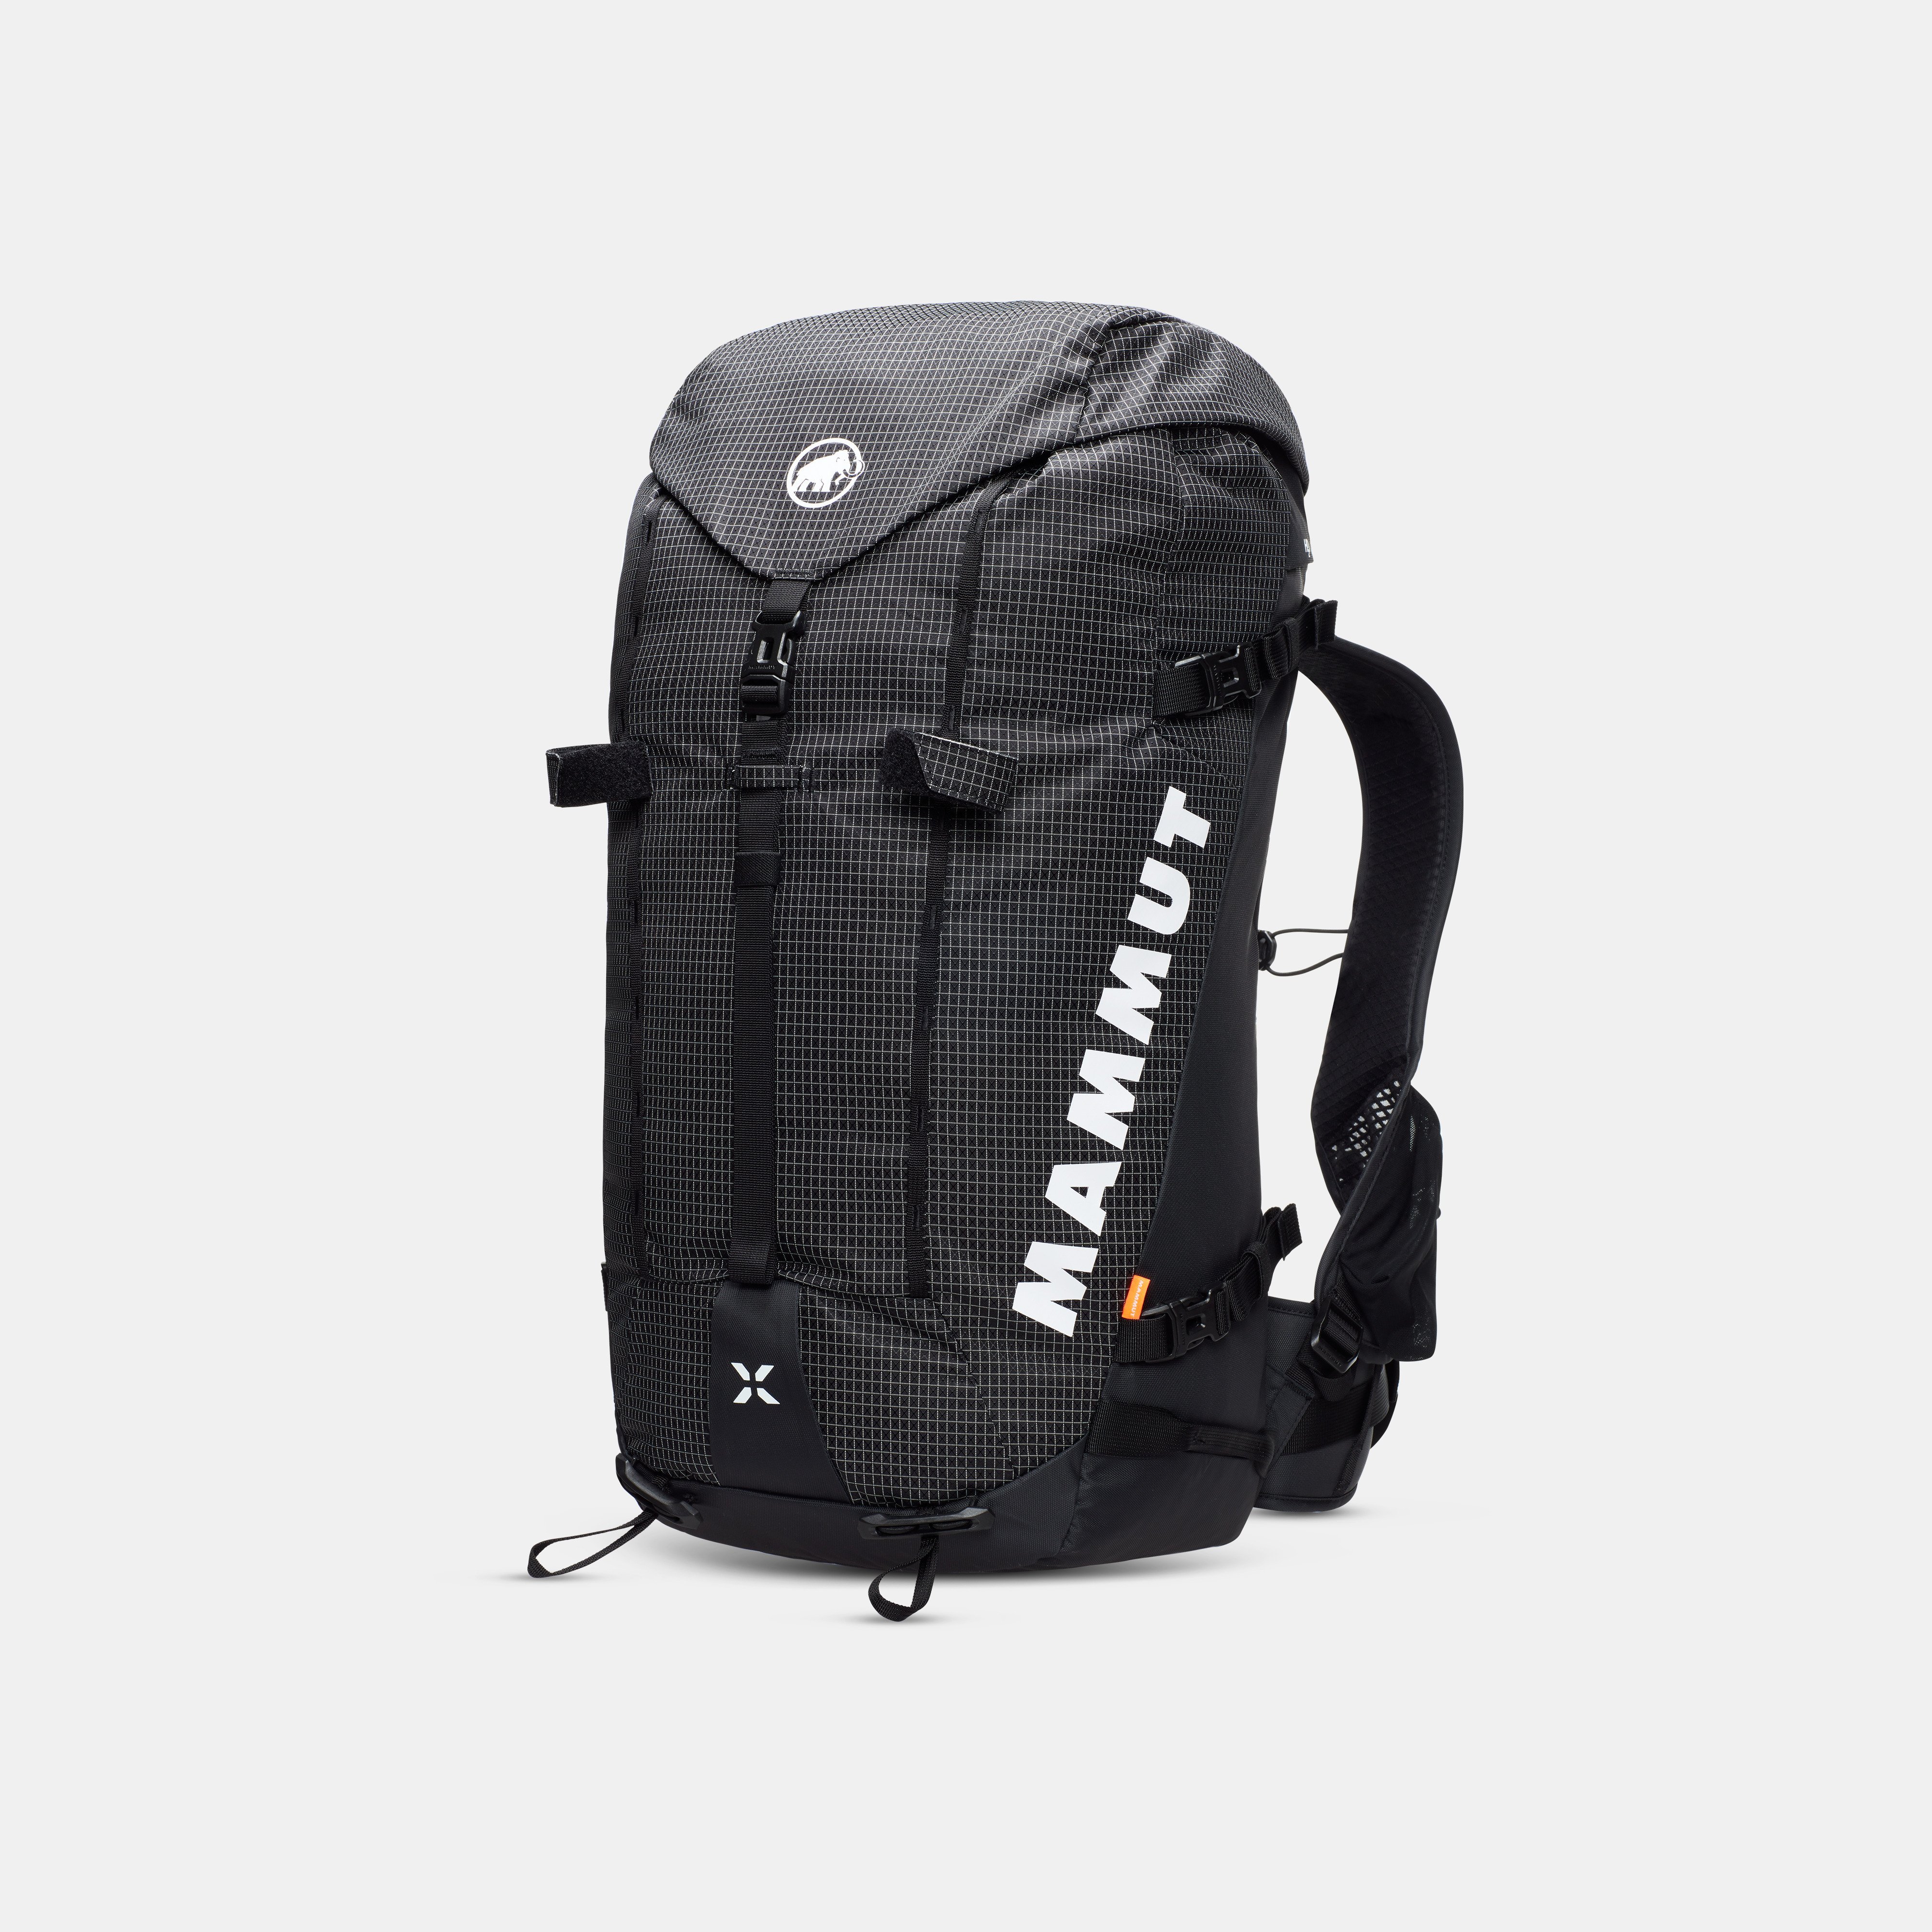
Mammut Trion 38
Capacity: 38L (can compress with roll-top)
Access points: Roll-top and side zip
Extra pockets: Both front and back on the inside, removable top
Helmet storage: Not included
Ski/SB Carry Options: Diagonal, A-Frame
Price: $190
Pros: Huge main pocket, durable, easy access. Compressible.
Cons: Safety tools need to be placed inside pack.
Mammut’s Trion is a huge pack at 38L. That’s enough to fit plenty of gear for an overnight hut mission if need be. The main compartment is the big feature, allowing space for pretty much anything you need for a good weekend tour. It has a removable top compartment for smaller items that can either stay on top, or fit in the pack and be out of the way when using the roll-top. The pack can also condense down for smaller tours, thanks to the roll-top closure. The main compartment is large and easy to throw gear in, and thanks to the full-length side zipper you can have easy access without digging through the top. But with the large opening on top, this pack is ideal for people who like to stash things quickly on the fly, without needing to worry about where every item is and instead like to quickly load and unload in a hurry.
While it has a dedicated space for safety tools, you need to access it from inside the main pocket, which can be a bit tedious in an emergency. But the space is there for those who like a bunch of extras such as a rope and camera without sacrificing comfort, thanks to the integrated frame. It might be too much pack for some given its capacity, but those needing extra space will appreciate its ability to roll down and remove the top compartment if you want a simple, lightweight design.
This pack is ideal for people who want to stash gear quickly and don’t mind having one large compartment, opting for ease of movement and comfort with a large pack, which doesn’t always come easily. With the ability to roll the top down, it’s good for people who have different itineraries, and sometimes need a larger pack but who appreciate the flexibility of using a smaller pack.

Peak Performance Vertical Pack
Capacity: 28.5L
Access points: Front pocket, back panel
Extra pockets: Top
Helmet storage: Dedicated zip pocket for easy stashing
Ski/SB Carry Options: A-frame, diagonal, Snowboard vertical
Price: $175
Pros: Great weather resistance, well-engineered to carry much more than it should
Cons: Size only suits day trips and side country. Limited North American availability.
Peak Performance is a brand out of Sweden that has been in the game for nearly 40 years. Whoever designed their Vertical pack put a lot of thought into utility, making a pack that can stash a ton of gear where it doesn’t feel like taking up a bunch of real estate on your back. Instead of a big footprint, the pack extends outward in multiple large compartments to allow for the pack to feel nimble, even with a large load. If you don’t have it fully packed, the back compartment can compress to take up less volume, giving this pack multiple options for day trips, but it’s not large enough to bring overnight gear with you.
The pack has extra protection around high wear areas on the top, which also increases its weather resistance thanks to an extra layer of polyamide for a rugged look and feel. Due to its low profile design there aren’t a ton of options for attaching gear to the outside, however it does include a loop for ice tools for alpine pursuits. For a smaller pack, it sits well on the back and has easy access, which makes it a great option for no-nonsense touring with a more minimalist feel.
One challenge is actually buying the packs. Peak Performance is new to North America and the pack is currently visible on the Swedish site but not if you switch to the US platform. This should improve as the brand gets established.
Osprey Soelden/Sopris
Capacity: 20L, 22L, 30L, 32L, 40L
Access points: Front pocket, back zip
Extra pockets: Top for goggles/glasses
Helmet storage: Dedicated stash pocket with bottom clips
Ski/SB Carry Options: A-Frame, vertical snowboard
Price: $180
Pros: Well-padded on the back, remarkable strength
Cons: Goggle pocket is not lined, no easy hydration access
Osprey’s Soelden (Sopris for the ladies) line is all about function. It has a more minimalist look than other packs, giving only a few pockets and two main attachment points on either side. The vertical snowboard straps are easy to stash if/when you don’t need it, with the same feature for a helmet. This makes the overall look of the pack clean and efficient.
The components are what make this pack shine. The zips all have extra large pull tabs for easy unzipping, even with gloves on, and buckles are large enough to not cause frustration when buckling up in a hurry. The back pocket is designed underneath the shoulder straps, which is a major differentiator from other back-zip compartments that have you needing to work around the shoulder straps, adding an extra step to the routine.
Where they might have missed the mark is that hydration access isn’t easy to reach, requiring you to take your bag off to reach for a bottle without an option for a dedicated reservoir space. Hydration reservoirs aren’t for everyone, and that is understandable they won’t include it in a winter pack due to it’s tendency for the hose to freeze. But as a replacement, it would be good to have easy water bottle access without taking the pack off.

Steve Andrews has been writing about outdoor adventure for over 15 years. A certified ski guide through the Canadian Ski Guide Association, Steve balances time chasing big lines with raising two kids to be powder hounds. Steve is a co-founder of Alpine Islands, a club dedicated to developing well-rounded mountain athletes where mindfulness is as important as the ability to shred.