
The Scarpa-f1-LT has been called a masterpiece. I’d agree, but unlike the Pietà, my version accepted a few tweaks.
In his WildSnow review of the Scarpa F1 LT, Adam Fabrikant gave us a thorough field test and analysis. Upon seeing what he’d written, and checking the specs, I realized this boot might be the one-kilo-class shoe I’ve been seeking to replace the heavier boots necessitated by my healing ankle (took a while, good now). I don’t seek redundancy with Adam’s coverage, but instead here is my first-look, fitting, and a few mods, all from my point of view as an older guy with a few physical problems. To begin, follow along as I make these puppies work for my feet, and my mind.
(Please note, I’m beginning my evaluation and fitting with a pre-retail version of the F1 LT, as Adam did. If I like them, I’ll shift to the retail-production version when it’s available, ostensibly in a month or two. To be fair to Scarpa, let’s assume the production version will be somewhat improved. I’ll edit this review when such information comes to light.)

Ah, the trials of boot testing. Because of the tight gaiter over the instep, I could not slide my right, none-fused foot into the boot without grunting like an Olympic weight lifter — and my fused-ankle totally refused to enter. Solution, surgery (on the boot, not my foot).
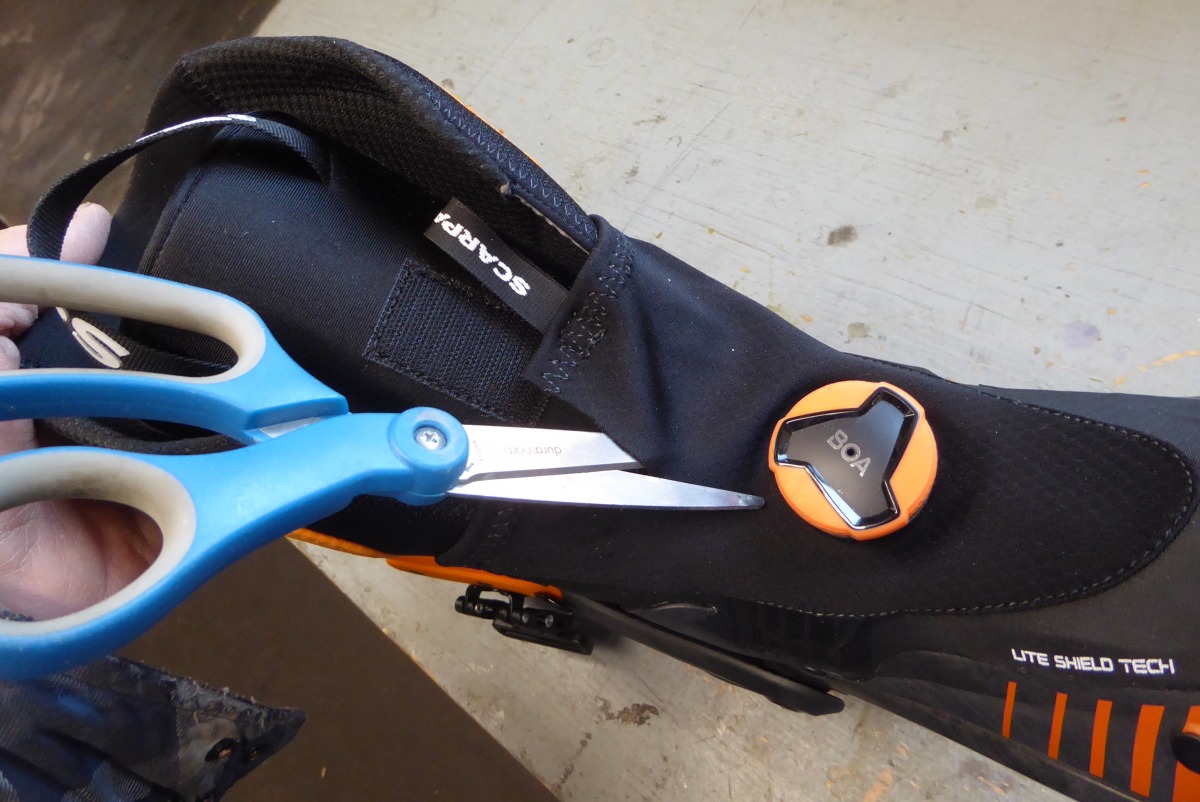
Nothing more than a relief cut solved the entry problem for the right boot. I located the laceration so the boot cuff covered it during normal operation. I also made a partial cut in the elastic tongue retention band on the liner instep.
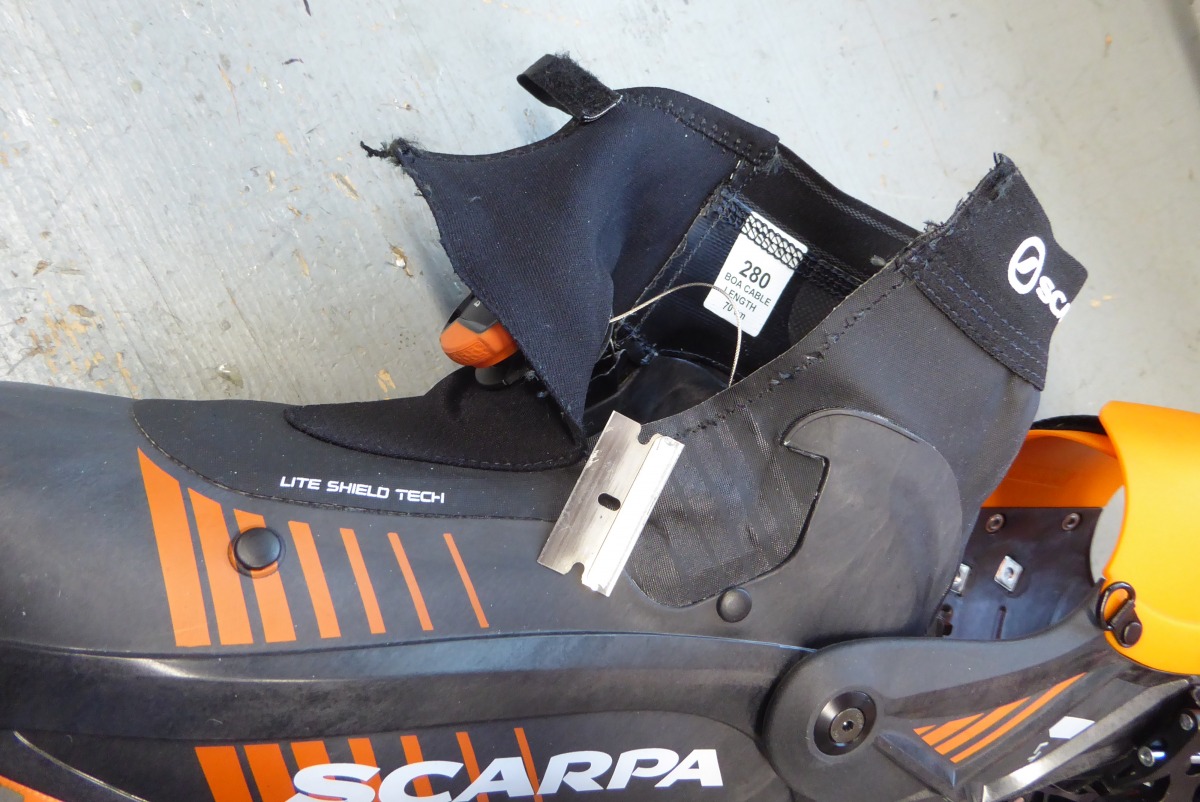
Opening up access for my left, fused foot was more a challenge. The laceration was a simple matter of removing some stitching, but the opening went well below the boot cuff. I needed a filler gusset to block snow entry. We had a hank of stretchy fabric in our sewing box. It’s not waterproof, but will suffice for testing. If I switch to a retail version of the boot, I’ll do the job with better fabric. Or perhaps Scarpa will add a few centimetres to the gaiter?
Activate the Speedy Stitcher.
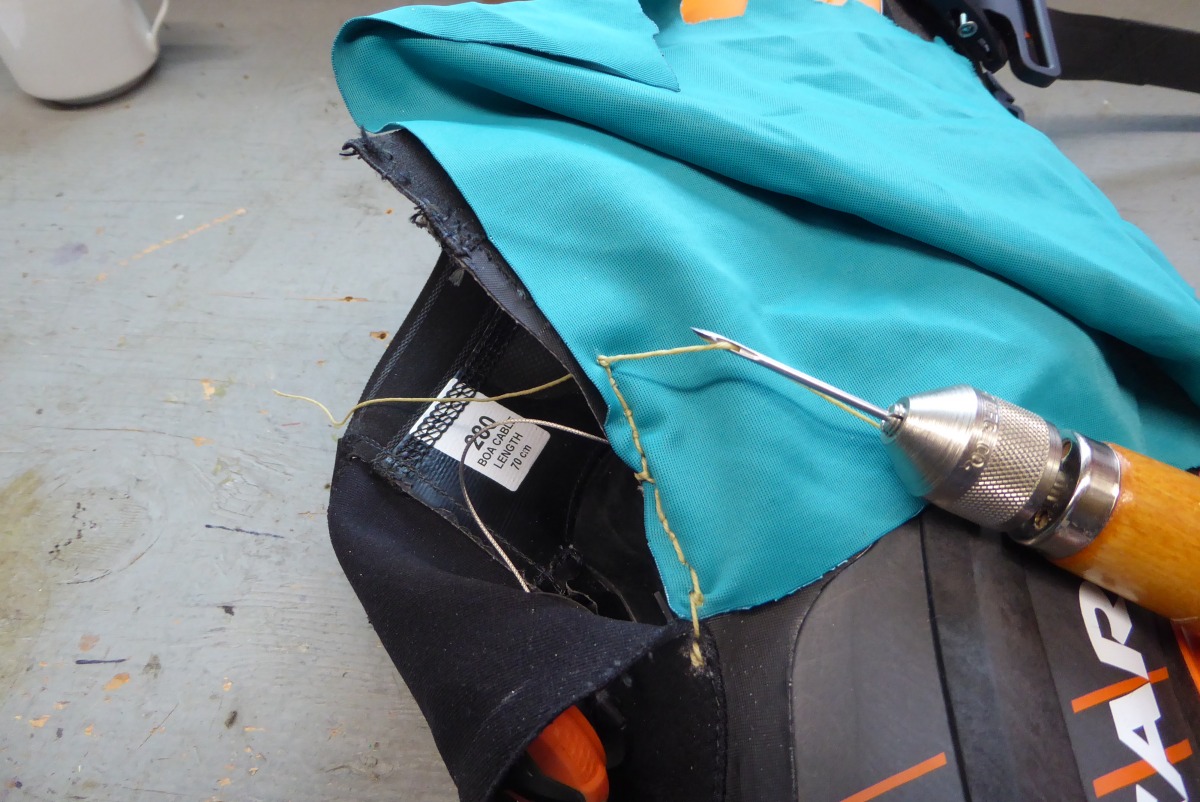
I tried to get fancy by doing an inverted stitch on the outside seam. So the gnomes of Montebelluna wouldn’t freak too heavily. Mainly, I hope they appreciate the color.

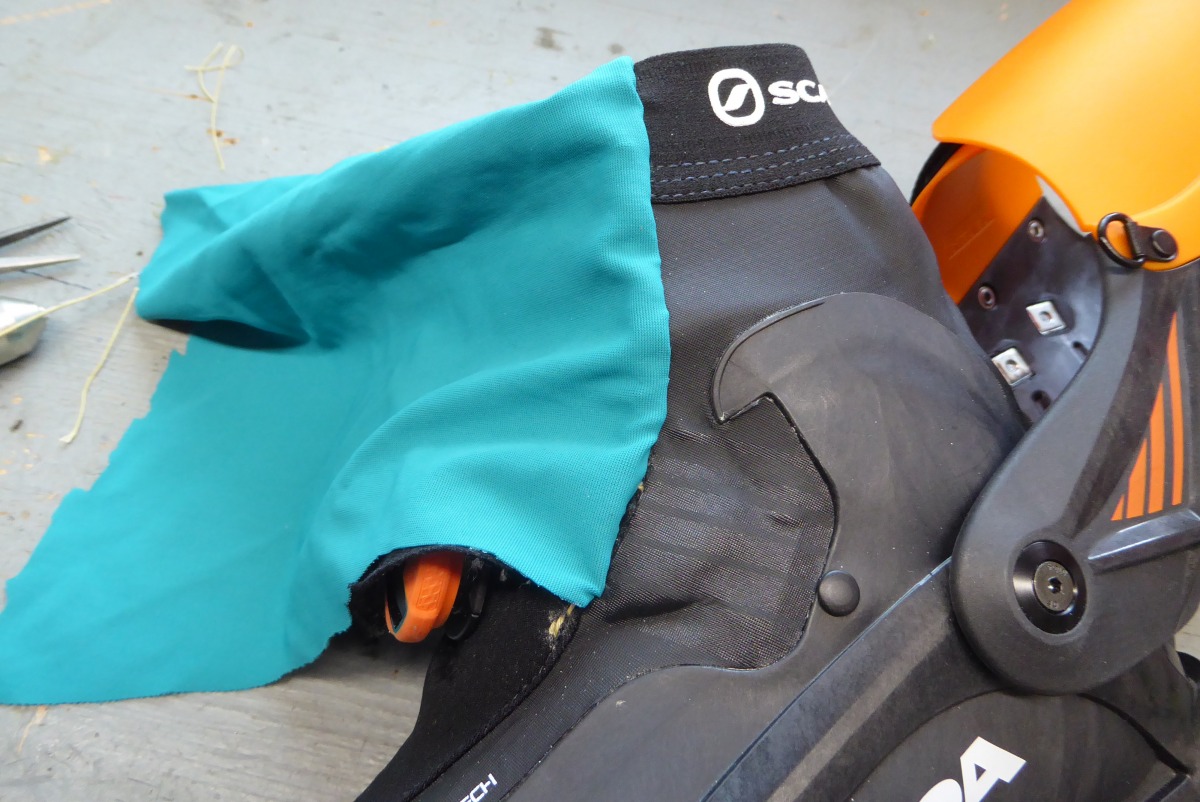
Result is adequate, though too roomy.
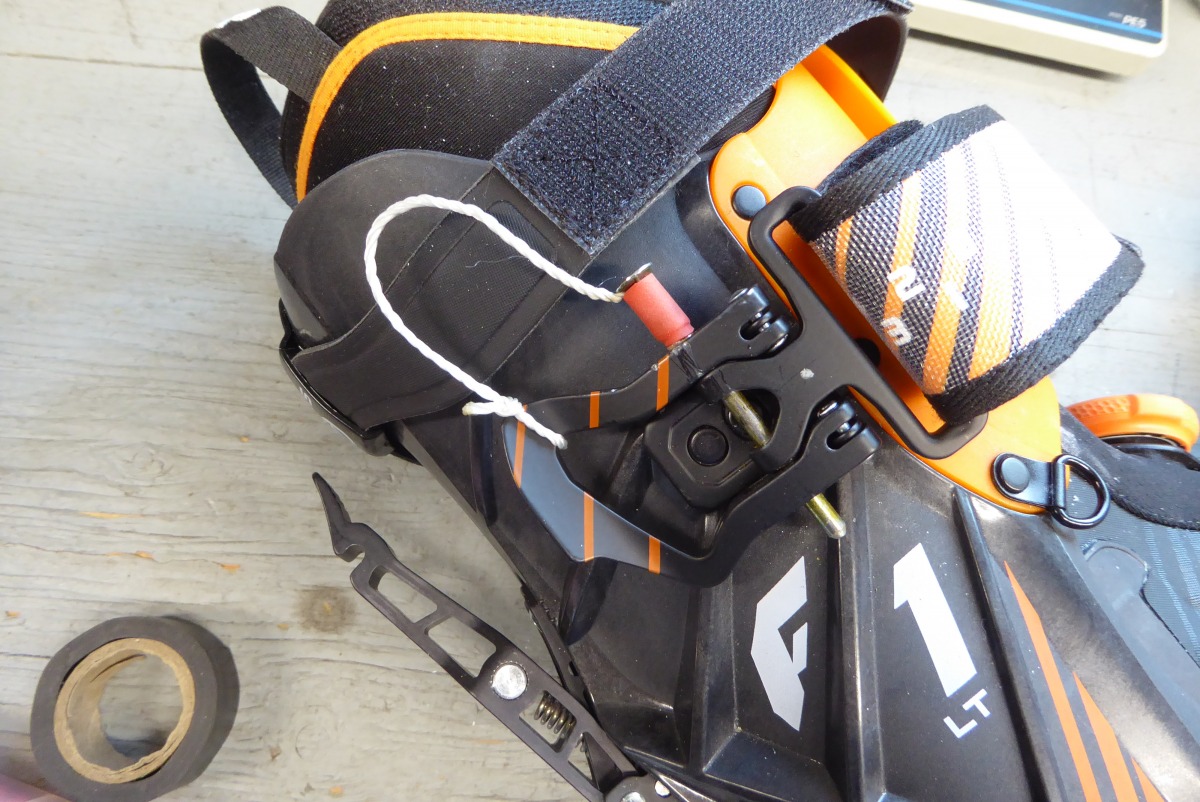
I was on the mod-trail and was not stopping. One thing I intensely dislike about this sort of boot design is the need to adjust the hook-loop buckle strap every time the boots go off, and back on. What’s needed is a way to unhook the buckle while leaving the strap adjusted. 16d nail to the rescue.

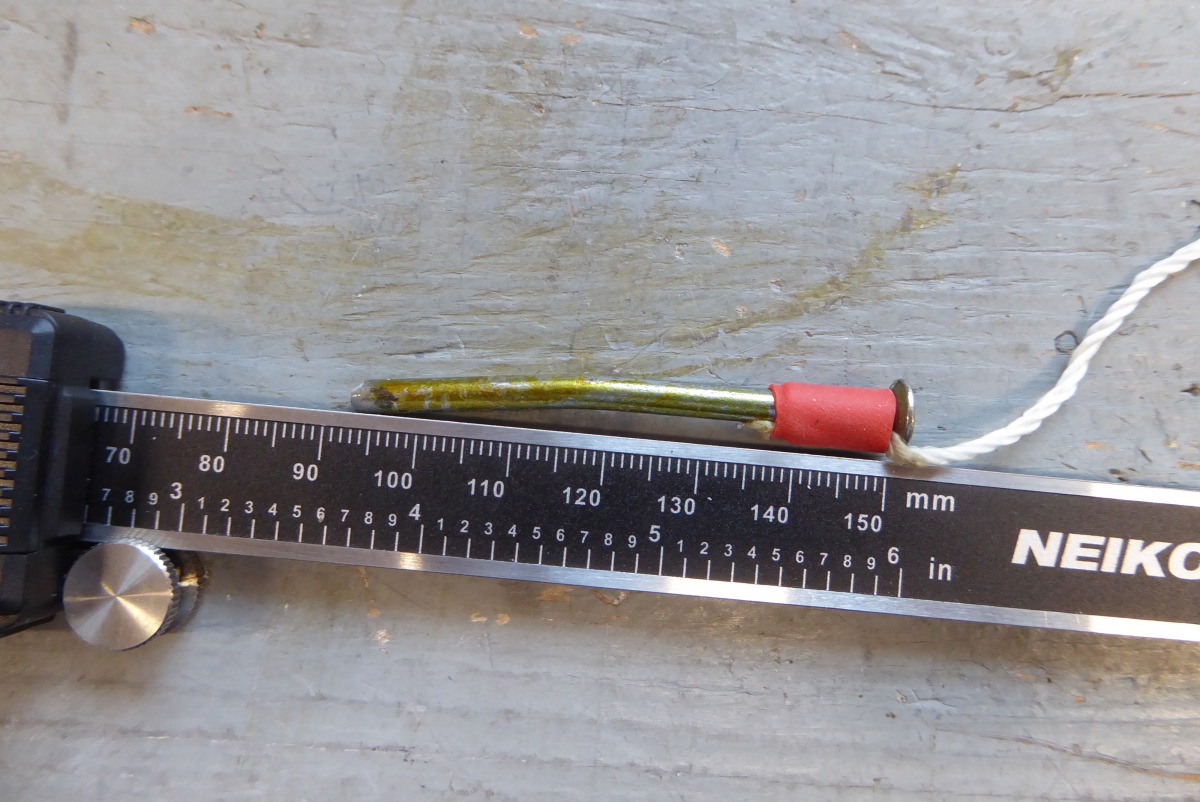
The existing buckle axle is 3.87 mm in diameter. A 16d nail is 3.79. Bingo.

I drilled the head off the axle pin, and removed it.
Test fit. Works. Yes my friends, Lou is nailing his boots. If this mod is viable, I sourced an M4x60 stainless steel clevis pin that’ll fit beautifully.
I cut the nail to length, added a bend so it resists coming out.

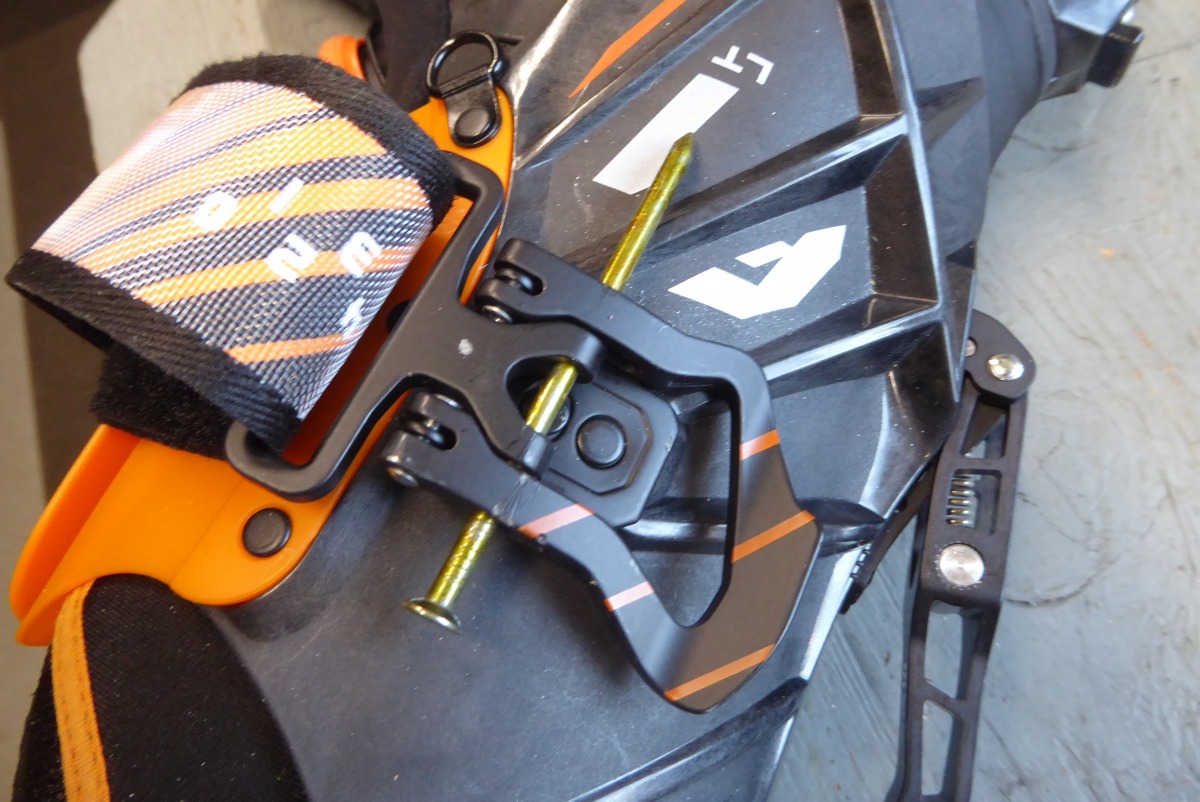
With my custom quick-release removed, the buckle looks like this. It appears to work well, and the entire mod takes at most ten minutes per boot. I can release the buckle in a second while the strap stays adjusted. Re-anchoring the buckle takes mere seconds; less time than fiddling with the hook-loop, and the mod will not disconnect unless you physically pull the pin. As I do with most of my boots, I’ll probably toss the booster strap, further simplifying things.

I managed to source these beautiful stainless M4 pins. Again, I bent the pin so it fits tight. I’m not recommending this mod until field testing. Please note. I’ll update this post when we get some tourable snow.
Now let’s fit these guys:
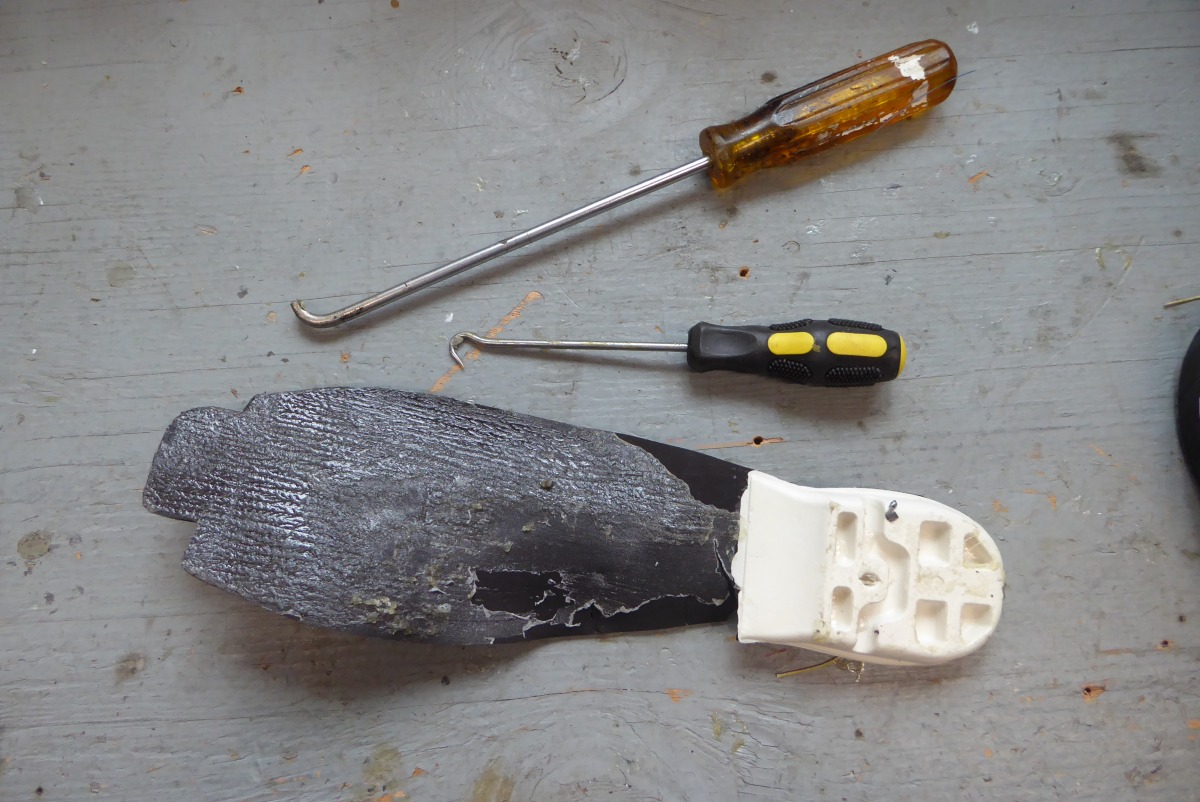
The F1 LT does have a thin boot-board glued to the inside of the scaffo. A heat gun and a few tools graced me with it’s presence. I’d like to know what kind of glue they used for this, it is gnarly, and would be a welcome addition to my supply of shop chemicals.
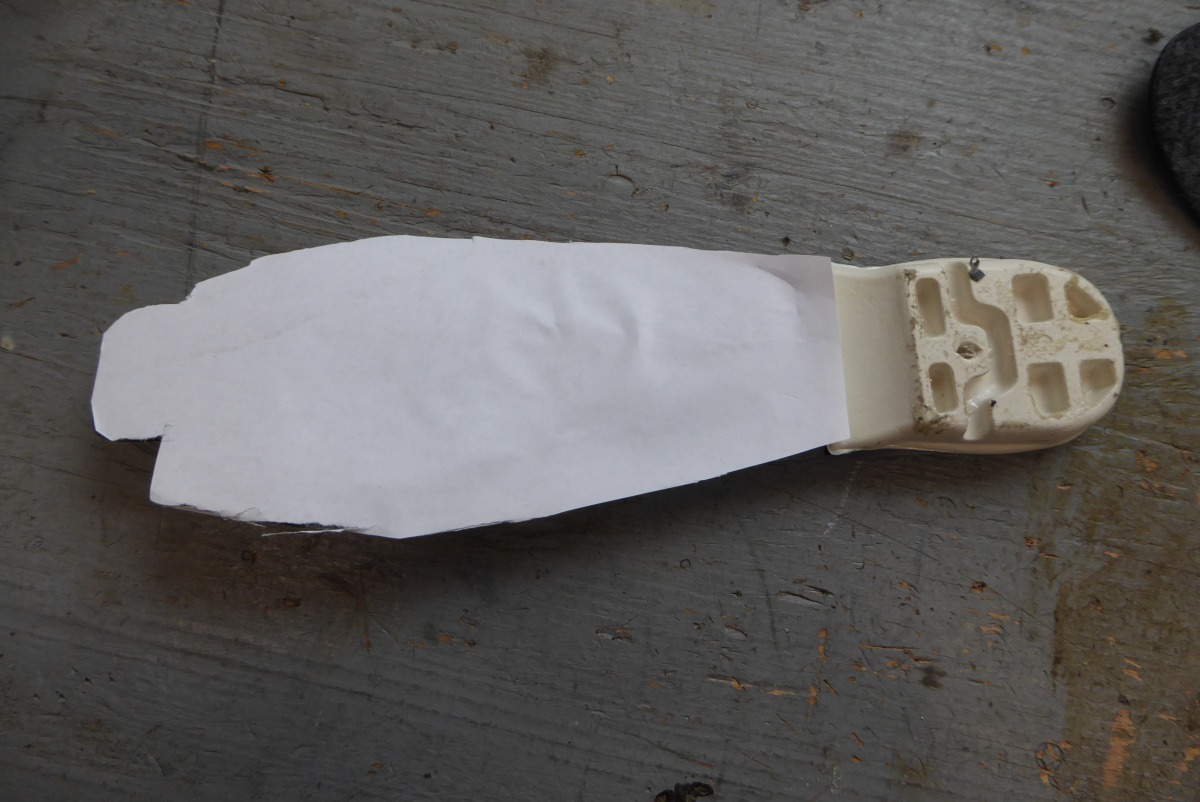
The glue was so sticky I resorted to laminating it with paper so I could handle the boot-board without it becoming part of my anatomy.
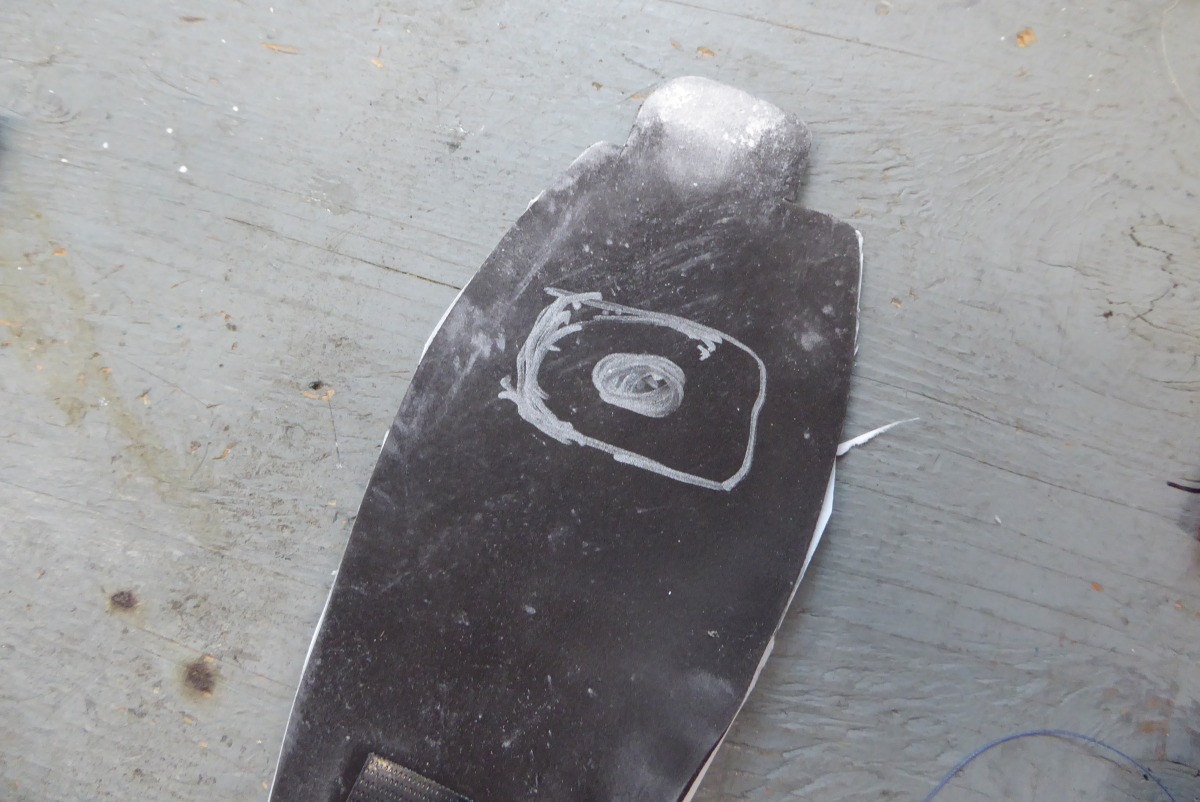
Next, grind out the boot-board to assuage my propensity to neuroma. Custom footbeds sometimes include a bump in this region to help open the metatarsals. I’ve found that doesn’t work for my personalized version of neuroma — it just irritates it. Instead, I do the opposite.
I’m all for custom footbeds, but not for every boot I test — that way would lie madness. After decades in the company of my own feet, I can tweak the funky furry Scarpa factory beds to do nearly the same thing as a fancy custom bed. Here I’ve ground out more space for neuroma prevention.
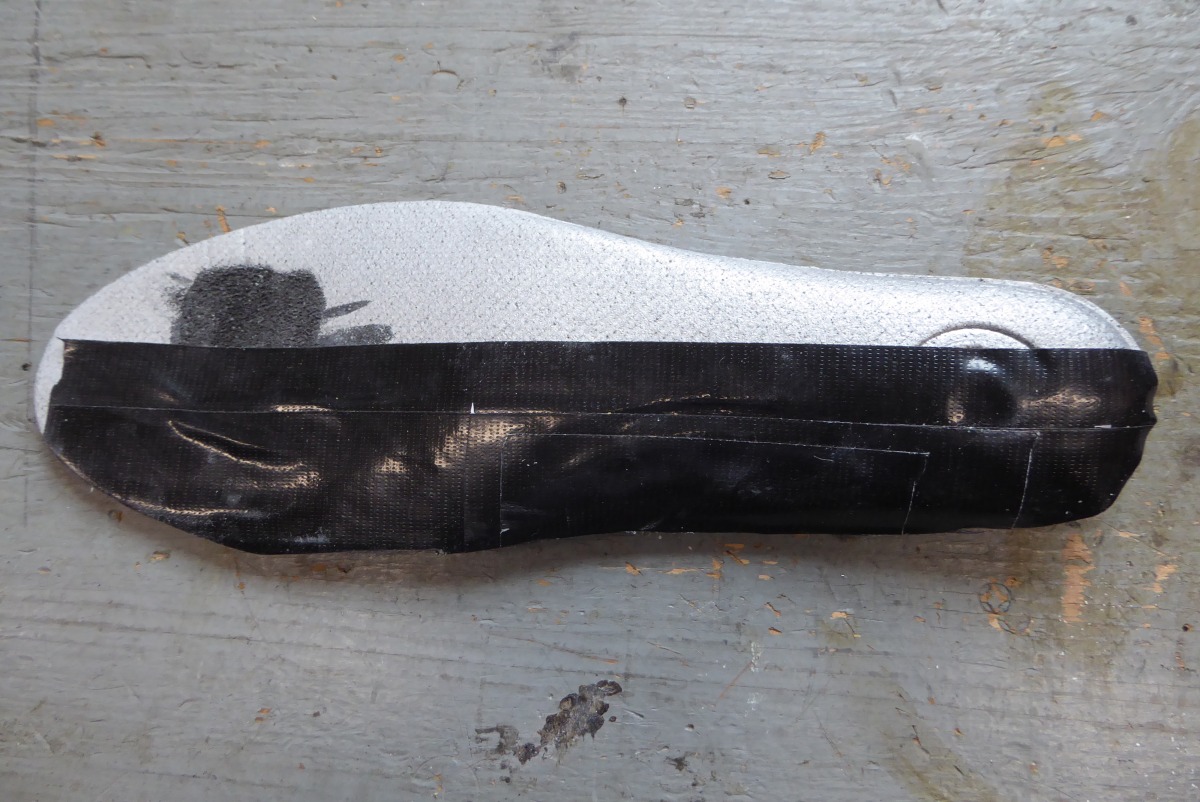
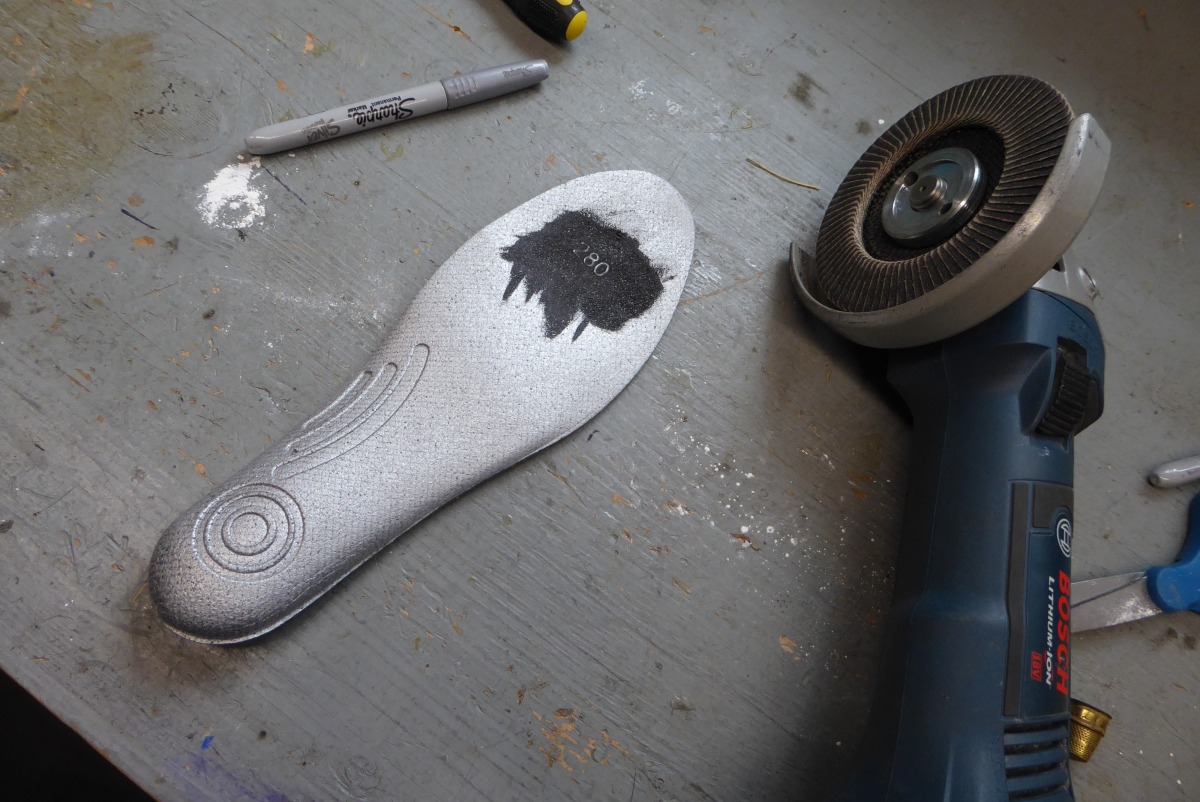
I need a bit of canting on the inside, and posting under the heel, as well as building up the inside arch. All accomplished with a Gorilla Tape build.
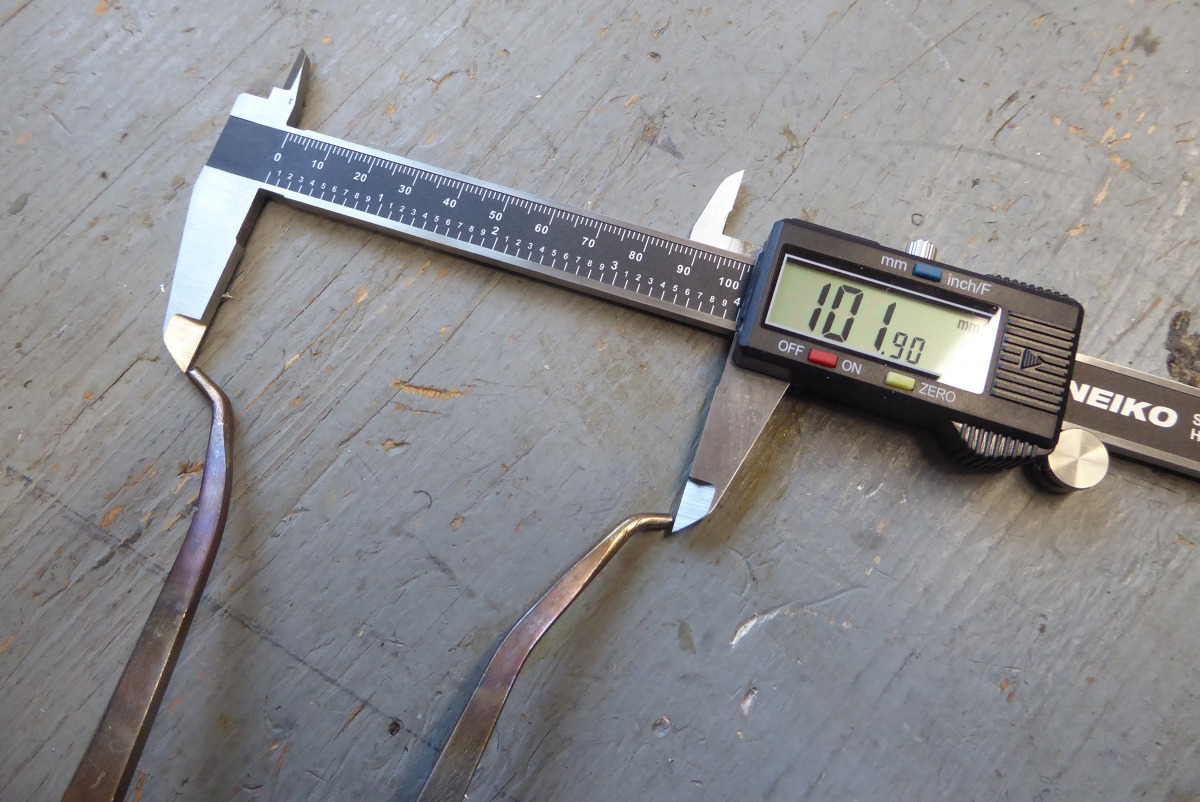
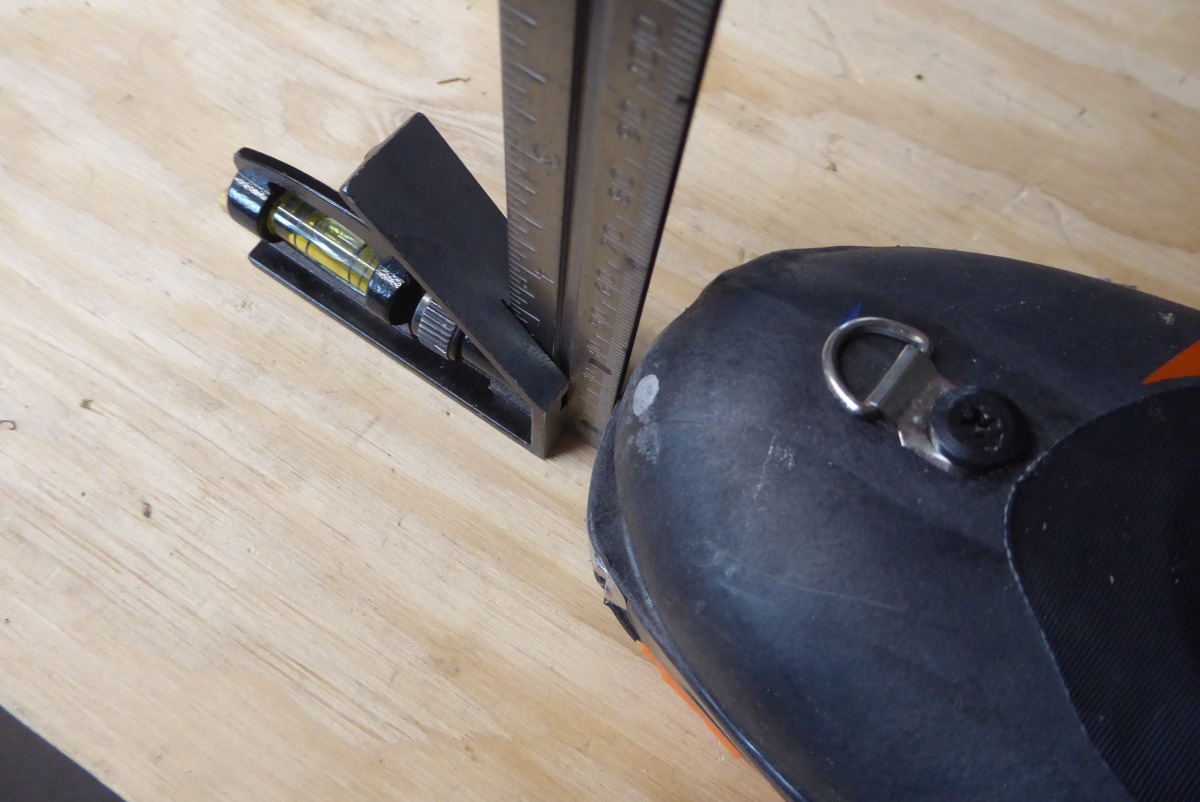
Time to mold the liners, or do I need a metatarsal shell punch? Fitting the shell sans liner revealed I had plentiful mets clearance — another critical thing to prevent or cure neuroma. Measuring the last confirmed. Claimed last is 100, as per industry informal standard, that’s probably for a size 27. My size 28 tester’s last measured 101.9. Makes sense, as the last scales up with size. Checking the fit without liner verifies; my metatarsals have oodles of space. The oodles mode on my digital caliper agrees.
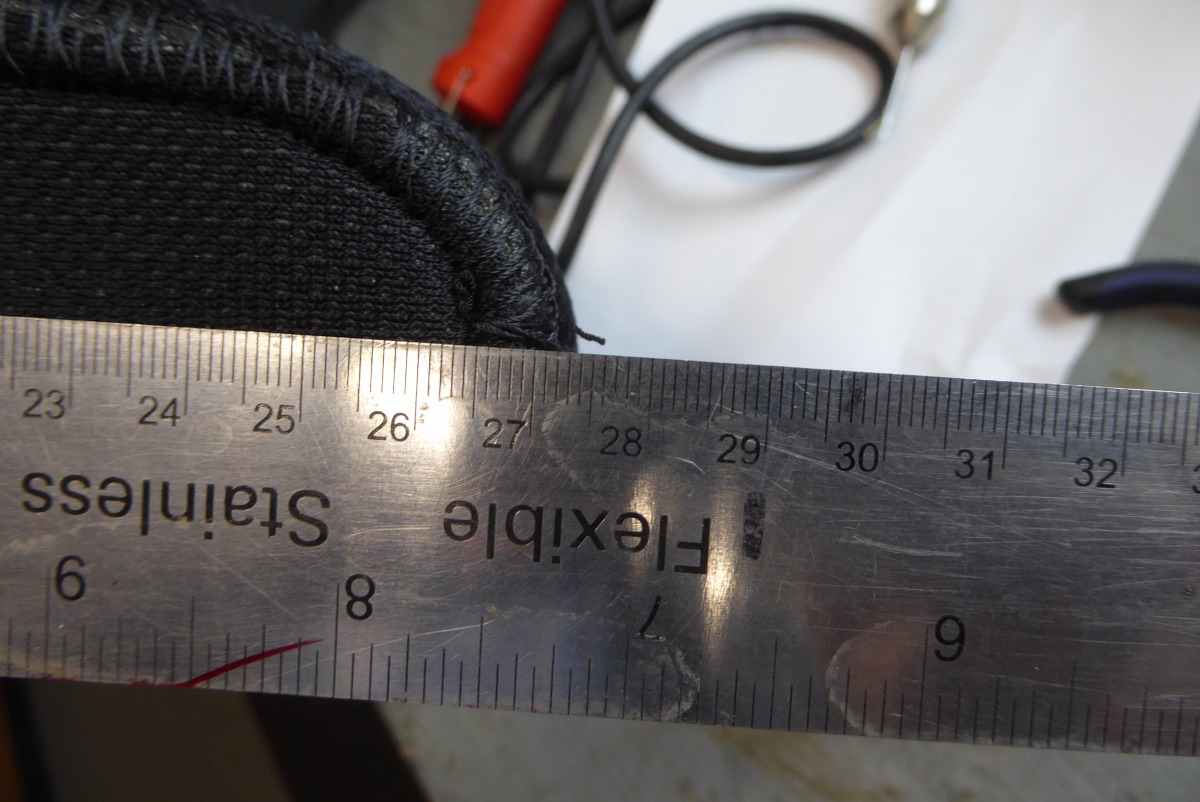
When I evaluated the non-molded liner fit, they felt short. Applying ruler to the strobel stitched liner sole bears this out. They’re slightly under 28 centimetres. During my shell fit I’d verified plenty of length, so onward assuming the liner will lengthen during molding.
Here we be cooking. I’m delighted to report that I got a snug, yet comfortable fit. No pressure points, plenty of length. While I might need a few tweaks to tighten the instep area for my bony feet, I’d give the F1 LT an A+ for comfort.
One caveat: I’ve always appreciated Scarpa as one of the few boot companies that provides a buckle strap over the true instep, resulting in exceptional heel hold and less pressure on top of your foot arch. Unfortunately, while the F1 Boa is a sweet thing, it seems to cinch slightly below the ideal spot at my instep. Instead, it behaves like most other boots, and squeezes down on my arch when I tighten. I can probably get used to this. If not, adding tongue padding at the instep might be all I need.
That was it for fitting. No shell punches, no added padding. Yet, anyway. I’ll close with a few observations, mostly having to do with fitting. Field testing will commence in November, clouds willing.
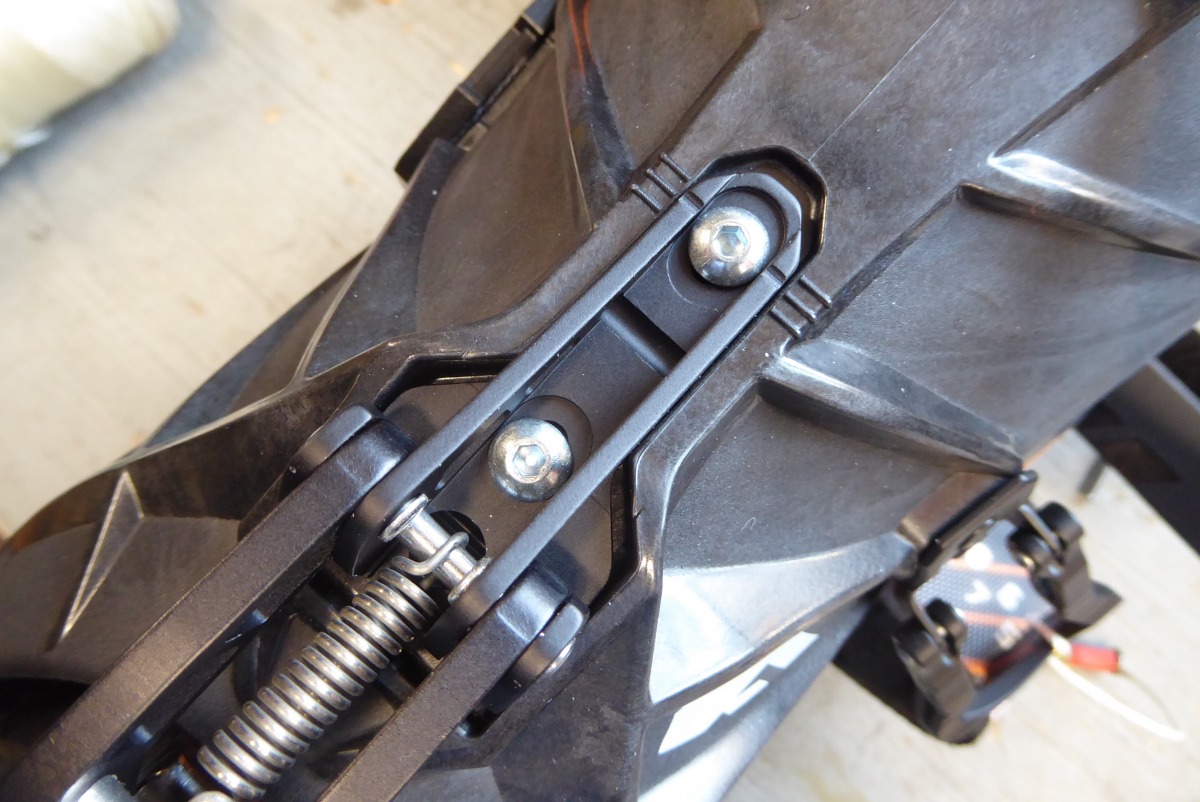
Cuff angle (lean) is slightly adjustable. That’s always a plus. You loosen the screws, move things around, then tighten.
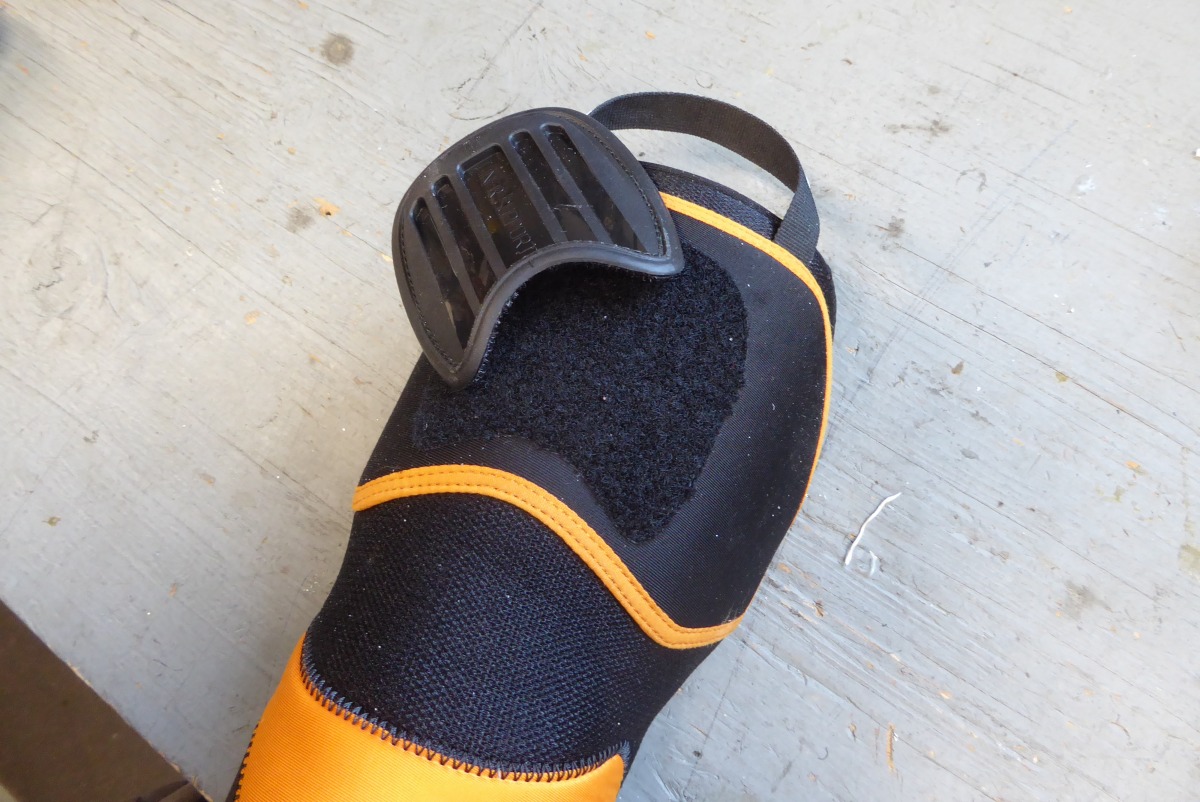
This hook-loop totally adjustable liner spoiler is excellent. Raise it up, drop it down, or just remove it. Or grind it thinner. The world is your oyster.
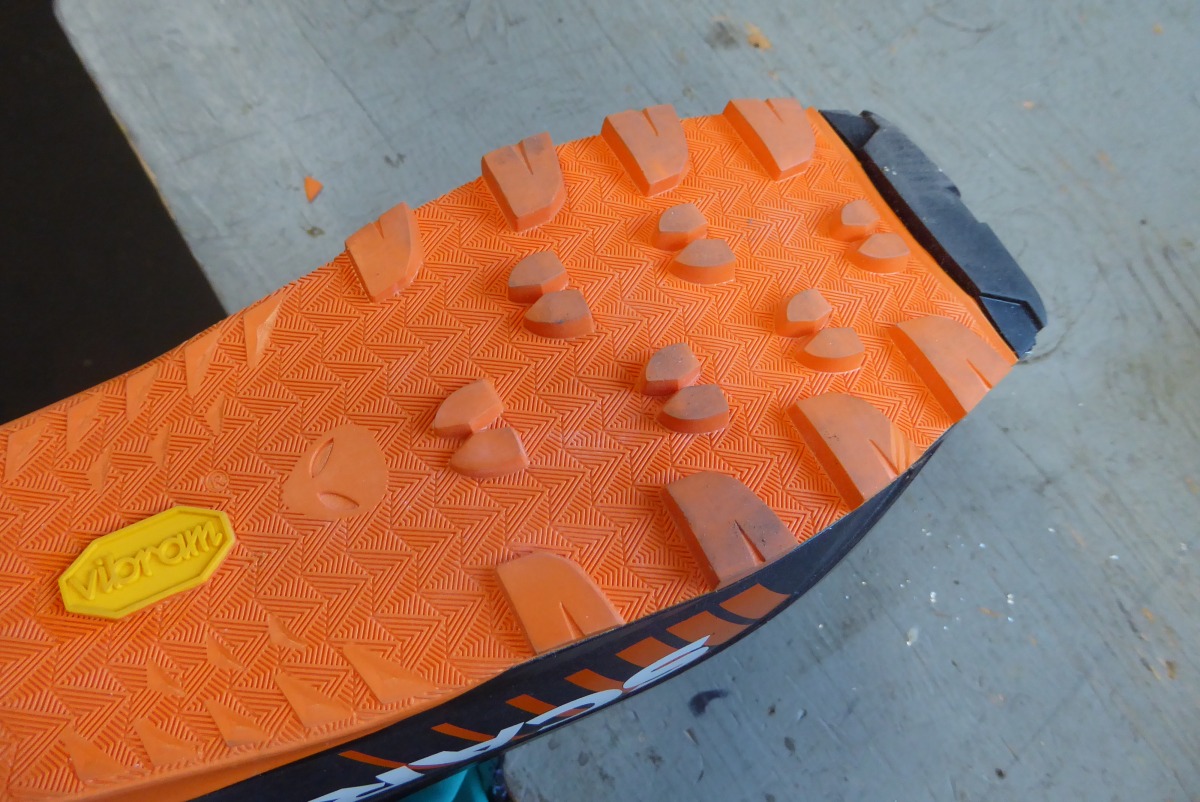
The extreme low-density sole has a sparse lug layout that trims weight, but will wear fast if you do much hiking sans skis.
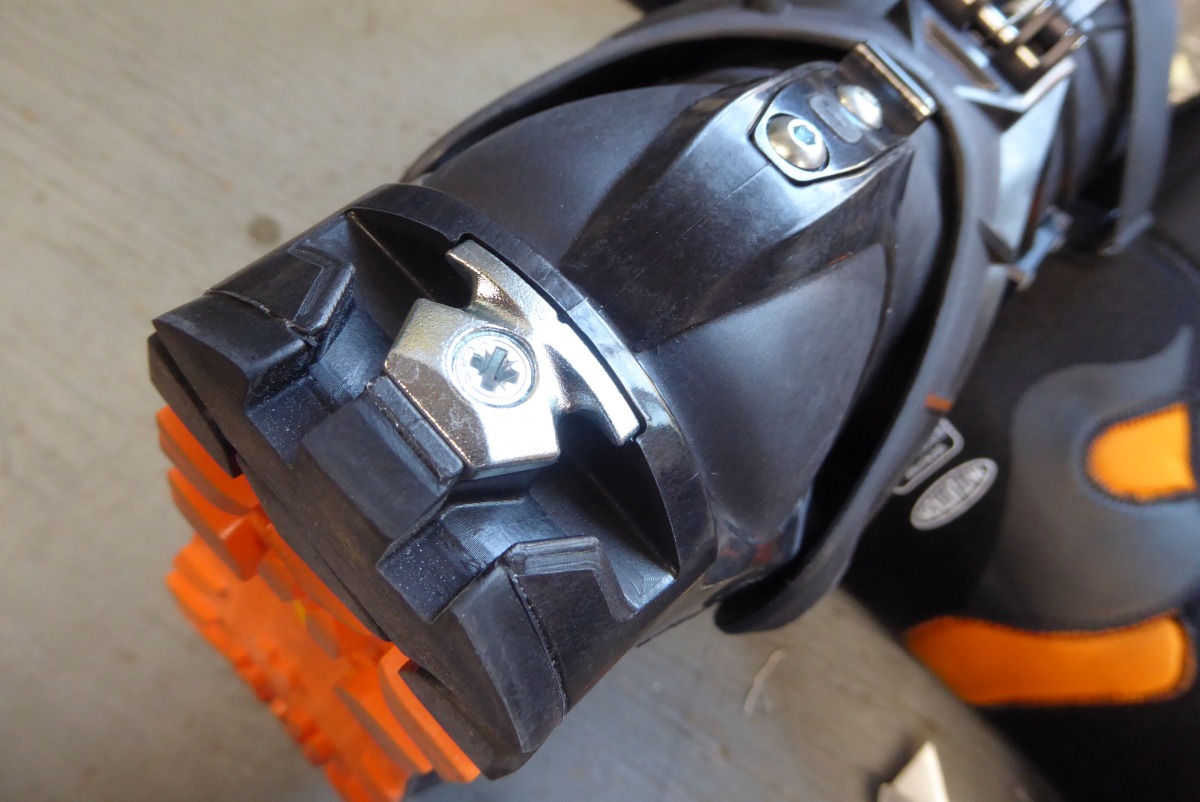
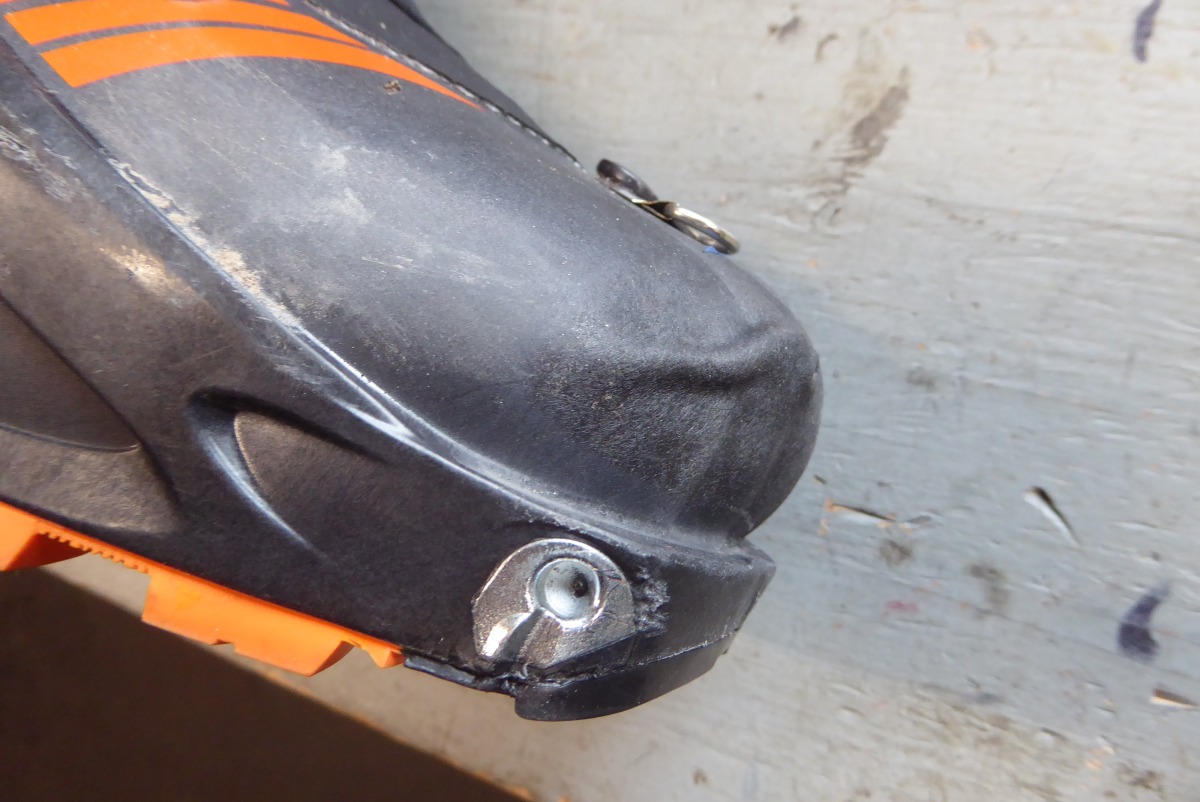
My only firm disappointment: Scarpa used the Dynafit Quick Step In (QSI) type fittings. I don’t know why, perhaps some sort of licensing issue. In my opinion, the best tech fitting system is a Dynafit Master Step heel combined with a classic “standard” toe. While the second best is the Dynafit Master Step, with it’s through bolted heel fitting. My whining aside, the F1’s QSI fittings will work for you, so don’t fret, though as always with the externally screwed heel fitting you’ll want to periodically inspect it for looseness and renew if necessary.
Conclusion: With its weight in the one-kilo range, an external lean lock (reliable, we assume) and simplified closure that eliminates the tricky nature of “one motion” race boot systems, we’re confident the F1 LT is a winner. Yes, you’ll need to ski them as you would other boots with a limit to their progressive flex, and you might find them overly roomy. But tweak the fit to your desired feel, fiddle with the cuff lean and give the Boa a chance. From all I can see, you’ll be fine.
Numbers:
Size reviewed: 28
Weight per boot, without footbed: 1084 grams
Availability: November
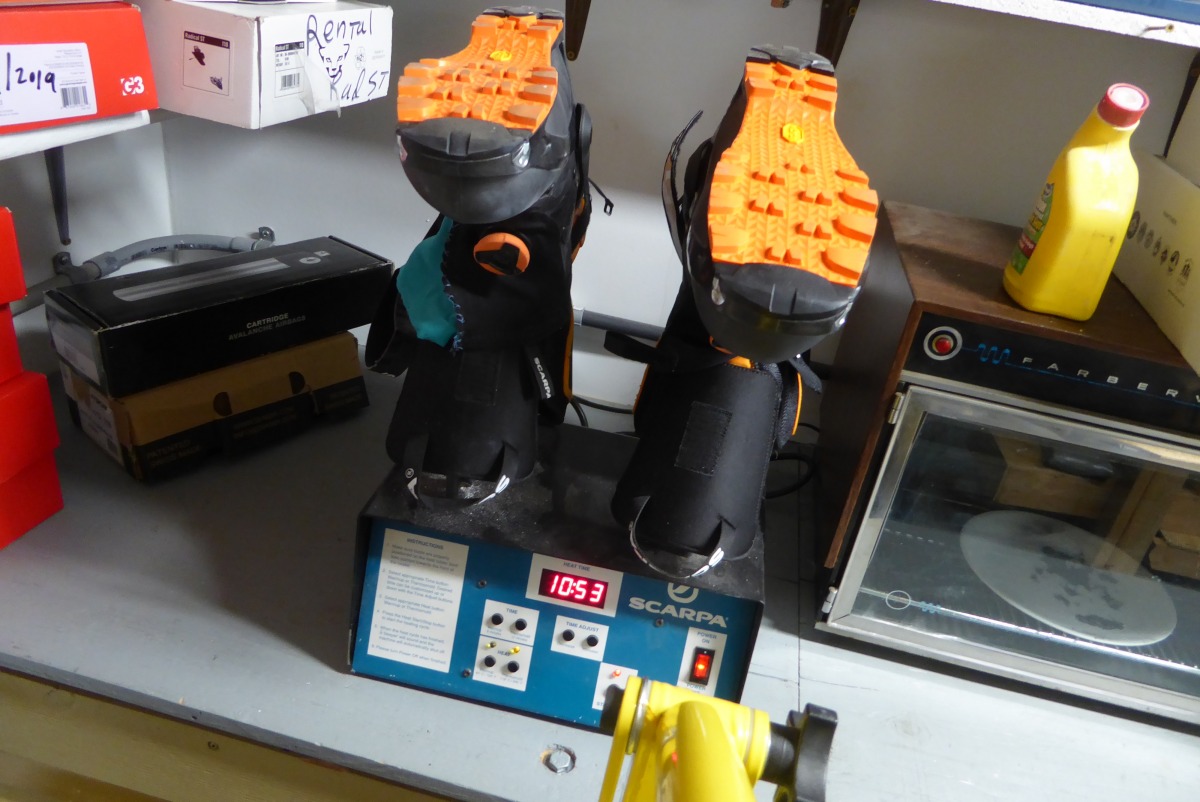
Heat punching results, pre-retail test boot
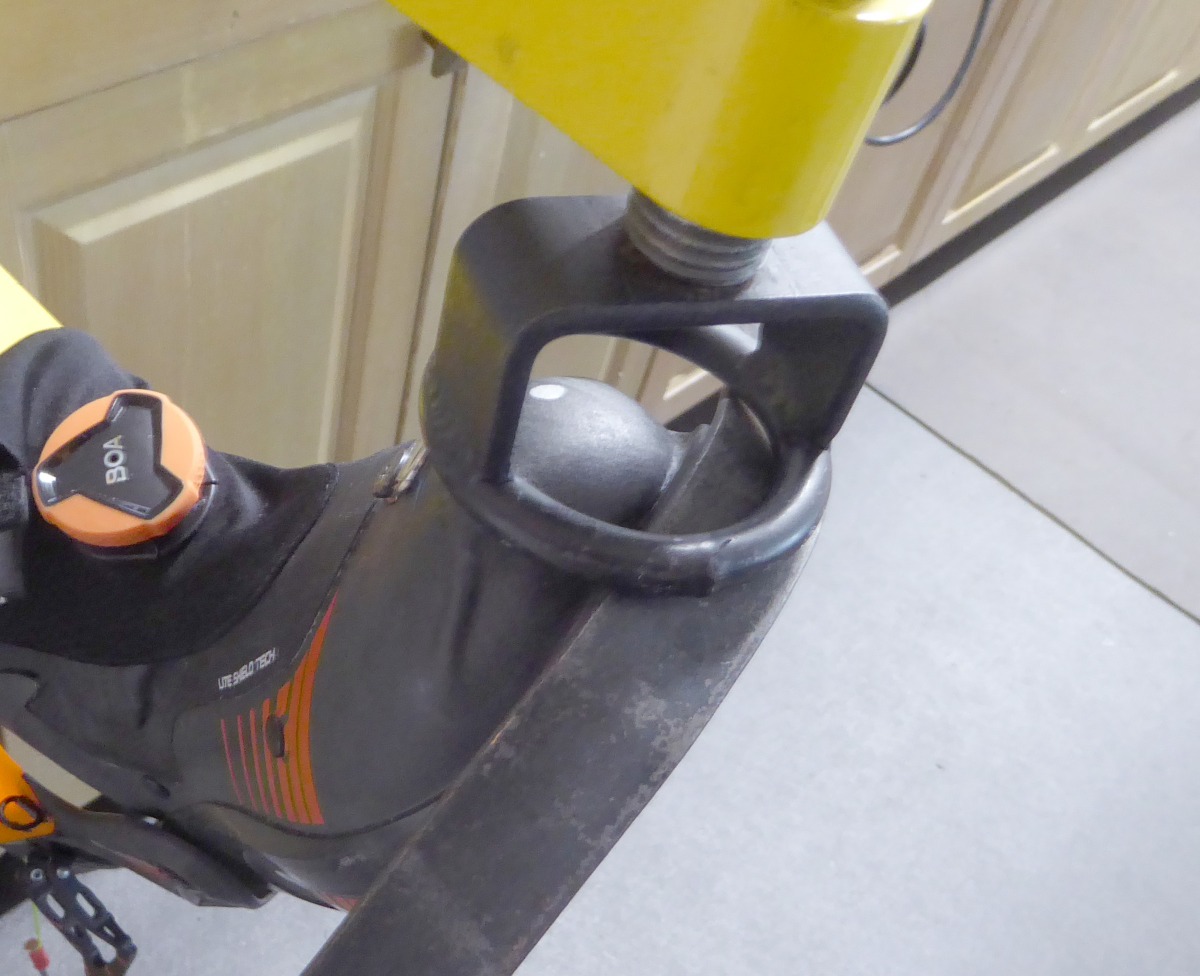
With my steel bearing surface over the toe duckbill, the F1 fit my Sun Valley press perfectly.
I got a 5 mm punch (pictured here) with a bit of odd wrinkling, 3 mm without any issues. If I’d taken more time with heating I might have have avoided the wrinkle. A better shaped toe punch mandrel might also be key. Aspen most noted: the need for lots of heat.
I was fairly aggressive with the heating. This happened when the plastic cooled. It’s located where the mandrel was not pressing. If I did this commercially, I’d acquire or make a perfectly shaped mandrel, using the toe of a molded liner as a template. Durability of the punch? I tested with my ANSI approved hammer, no issues.
WildSnow.com publisher emeritus and founder Lou (Louis Dawson) has a 50+ years career in climbing, backcountry skiing and ski mountaineering. He was the first person in history to ski down all 54 Colorado 14,000-foot peaks, has authored numerous books about about backcountry skiing, and has skied from the summit of Denali in Alaska, North America’s highest mountain.