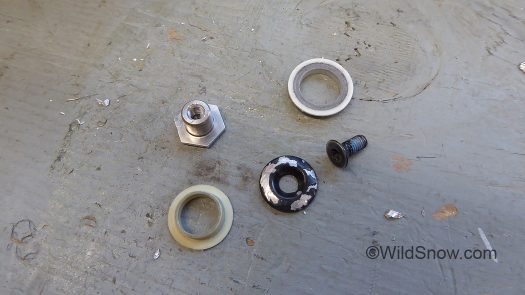
Classic WildSnow modshop crazy-ness. Take it as you will. First concept: Scott Cosmos III is VERY nice (available fall 2017). Second concept: Scott Cosmos III does not include cuff alignment. Third concept: Cuff alignment, as witnessed at Atomic FIS shop and as many of you readers know, is valid. Fourth concept: Atomic Backland and Hawx reversible cuff bushings will be available as a retail SKU. Fifth concept: We have the tooling. Sixth concept: We are bloggers. Enjoy.

Yes Virginia, this is a somewhat virgin (skied once) Cosmos 3. I like these boots. External lean lock, fit my feet (with a few tweaks), probably a 125 flex. Easy on and off due to tongue shell construction. But dang, the cuff alignment rivet present in version 2 is gone. Not so much of a disaster, actually, as those things are problematic (they move, come loose, etc.). What’s better is to simply drill the cuff pivot-rivet holes where you want them so the cuff aligns with your lower leg bone — otherwise known a the tibial shaft. Like they do for World Cup racers at Atomic in Austria. And we do here at WildSnow dot com in podunk Colorado.
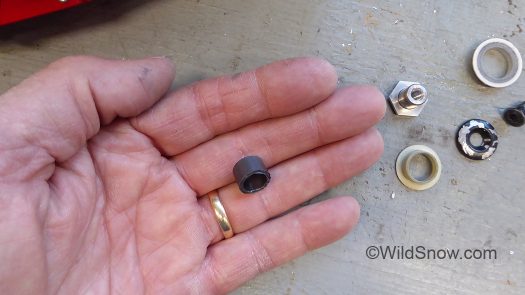
Key to using Atomic ‘Frictionless Pivot” system is this little guy. Purchased from igus.com,
this is part number MSM-0912-14, iglide M250 sleeve bushing, shortened to match Atomic T-nut. What makes this all work is the diameter of the M250 is greater than that of most boot pivot rivet holes. (Modder beware, however,some boots might require more extensive modifications than those shown here for the Cosmos.)
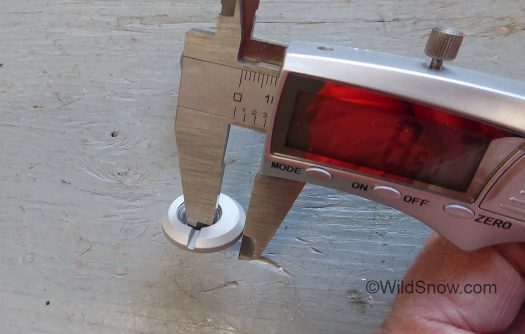
Regular cant rivets such as this one from Scarpa move your cuff up and down by about 2 mm, or in this case 1.83 mm to be exact, thus changing the right-left angle of the cuff. That means that simply offsetting the rivet hole in the boot shell by a bit more than the bushing wall thickness of 1.67 mm results in an cuff alignment tweak that’s entirely adequate for most people needing this sort of thing. If you want more, you can do this mod on both sides of the cuff (though doing so could compromise operation of the lean lock, so take care).
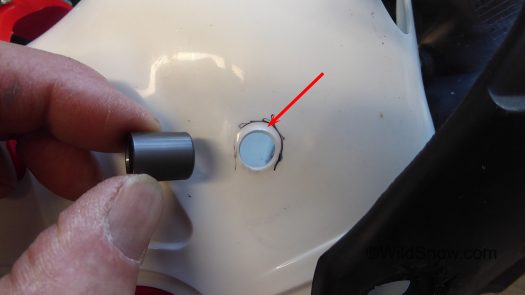
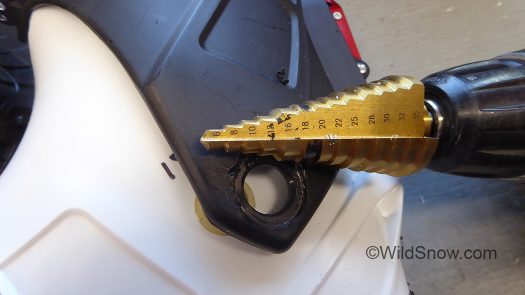
Smaller hole will be ‘egged” then cleaned up so the bushing ends up offset from original pivot center.
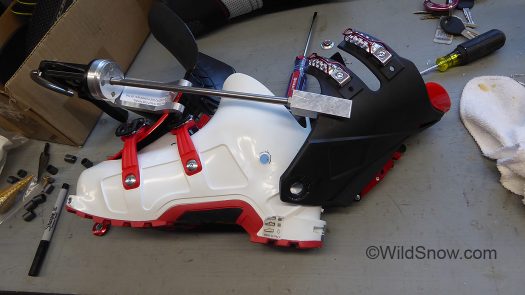
Boot fitter tooling moves the cuff so we can access OEM rivet hole. Removing rivet is perhaps the hardest and most time consuming part of these operations. A large burr grinder works best, cooled with water spray. My method involves drilling it out, again with water cooling and a few tricks to stop thing thing from spinning.
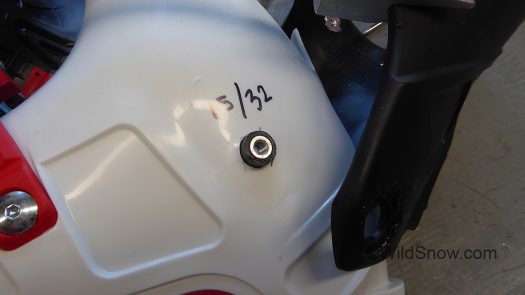
Egged hole has been cleaned up, shown with bushing and T-nut inserted. A 15/32 step bit seems to work well for final tuning of the hole, after egging with a rotary cutter bit.
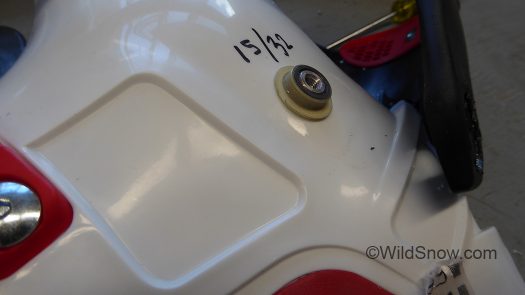
Atomic bushing installed. At this point the system often goes together in minutes, but the process can stall if boot shell and cuff thickness make the OEM Atomic system need mods (problems could come up if your boot shell plastic is significantly thicker than what the Atomic system is designed for) . In this case it all fit together perfectly. Once you know everything works, assemble with blue Loctite, but of course.
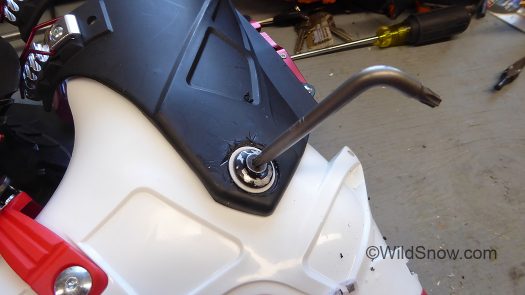
Final assembly is easy. Again, remember to Loctite. If things don’t go together the way you think they should, you might need a longer screw or an extra bushing to space the cuff away from lower boot shell.
Note, some boot models have built-in positive cuff angle, others do not. Before obsessing on tuning your cuff angle be sure to evaluate your actual needs. You might need nothing, or at the most a small amount of thickness added to one side of the liner cuff to match the curve of your tibia.
Related Links
Install a cant rivet, works in some boots.
WildSnow.com publisher emeritus and founder Lou (Louis Dawson) has a 50+ years career in climbing, backcountry skiing and ski mountaineering. He was the first person in history to ski down all 54 Colorado 14,000-foot peaks, has authored numerous books about about backcountry skiing, and has skied from the summit of Denali in Alaska, North America’s highest mountain.

