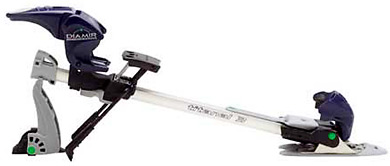
Fritschi Diamir binding with brake installed.
Ski brakes are state-of-the-art in ski safety. Safety straps (AKA leashes) should only be used when weight saving is critical, or in terrain (such as a crevassed glacier) where a ski could be permanently lost. Many people buy Fritschi bindings without brakes, try to install them later, and discover it’s a bit tricky to do so.
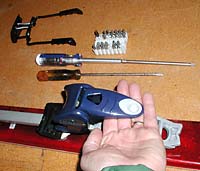
Flip the binding lever up to de-cock — do so without any flesh in front of lever, as it moves at supersonic speed!
Follow along as we install a set of brakes on a pair of Diamirs. (*Diamir ski brakes are interchangeable between models Titanal 2, Titanal 3, and Freeride. The Freeride is sold with brakes included, but this how-to will apply if you need to repair the Freeride brakes, or swap widths.)
Removing this boot heel support plate is the hardest part. If you’re not planning on using straps ever again, skip all other steps and just pry the thing off, possibly damaging it, but you’re throwing it away.
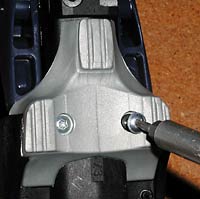
Removing support bumper from bottom of binding. Pry off after you remove the screws.
Tools required:
WD 40 lubricant
#10 star drive screwdriver
#2 philips or #3 posi-drive screwdriver (posi=better)
medium/small size regular screwdriver (used as pry)
1. De-cock the binding to save your fingers from being whacked by inadvertently de-cocking the binding while you’re working. In other words, if the binding is set to receive a boot, lift up on UNDERSIDE of the cocking lever until it snaps up and changes the binding to the closed (boot in) position. While doing this, keep your hand and fingers UNDER the lever as shown in the photo, because it snaps up with high velocity and can hurt you if your flesh is in the way.
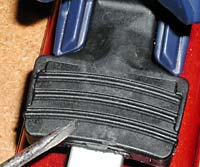
Removing this boot heel support plate is the hardest part. If you’re not planning on using straps ever again, skip all other steps and just pry the thing off, possibly damaging it, but you’re throwing it away.
2. Using #10 star drive, remove support bumper from bottom of binding (see photo).
This step is only necessary if you’d like to preserve the boot heel support plate (see photos). If you don’t plan on ever using straps again, skip removiing the support bumper, and just pry off the boot heel support plate with a flat blade screw driver, possibly damaging the plate.
3. Now the hardest part, if you’re trying to preserve the boot heel support plate. The black boot-heel support is attached to the binding by 4 plastic pins and 2 small plastic catches.
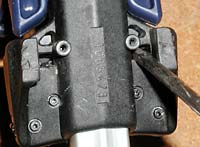
Prying the clips. Lube everything first, and examine with flashlight if you’re mystified about how to pry.
Working from the bottom, you can insert a small screwdriver and release the catches, then gently pry the support up off the binding.
FIRST, from the underside, thoroughly lubricate the pins and catches with WD 40 or penetrating oil.
Next, insert the small screwdriver blade in the catch access holes (see photo), and attempt to release the catches by prying towards the center of the plate. As you pry, press down on the screwdriver.
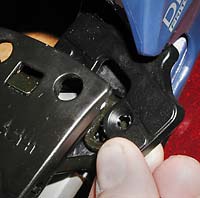
Slip the new plastic boot heel support in and around the new brake.
If you’re blessed the plate will separate from the binding, making a small crack you can use to continue prying it off. In the end you’ll get the plate off, but you may end up damaging it. Not to worry, as it’s unlikely you’ll go back to using safety straps instead of brakes,and the plates are available as spare parts.
4. Next, simply drop the brake into the hole where the boot-heel support was located.
Slip on the small plastic boot-heel support provided with the brakes, and run in the screws.
Don’t forget the boot heel support, it’s essential to the correct function of the binding.
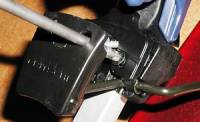
Final attachment, use the screw access holes or slots in actuator pad.
5. Replace the support bumper on the bottom of the binding (the one you removed as the first step.) Tighten the screws gently, so you don’t strip them as they thread into the plastic.
Done!
*Fritschi Diamir ski brakes are interchangeable between most models. They come in various widths — be sure to get the correct width for your skis. Freeride bindings are sold with brakes.
Shop for Fritschi bindings and brakes.
WildSnow.com publisher emeritus and founder Lou (Louis Dawson) has a 50+ years career in climbing, backcountry skiing and ski mountaineering. He was the first person in history to ski down all 54 Colorado 14,000-foot peaks, has authored numerous books about about backcountry skiing, and has skied from the summit of Denali in Alaska, North America’s highest mountain.
