UPDATE November 2, 2015, Latest ION 2015-2016 hole pattern is virtually the same as before, slight difference is the 2015-2016 version we have here measures 40 mm wide at the toe, while older versions measure 39.5. This difference would result in drilled holes only being off by .25 mm, which is within tolerance for ski mounting. Even so, we checked our template for accuracy, it is fine and dimensions are clarified in blog post below.

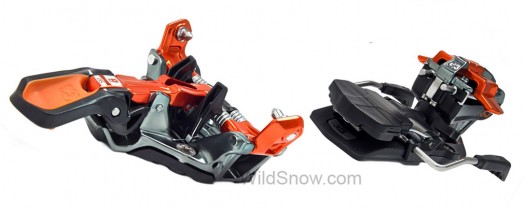
G3 ION tech ski binding, based on the standard tech binding but with many small changes and definitely a different screw mounting pattern.
Word from G3 is they designed ION screw pattern (and mounting position on ski) to have the least overlap possible with existing tech binding mount patterns. Moreover, the layout is wider than most tech binding screw patterns.
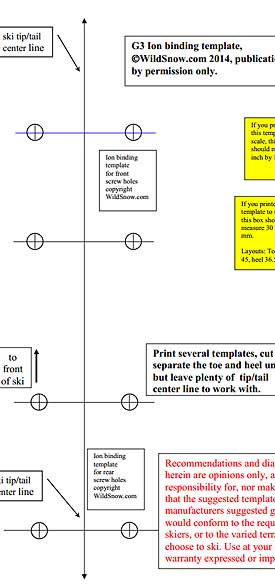
2015-2016 ION pattern is 40mm wide x 45 long (mm) mm at toe, and 36.5 wide x 52.5 long at the heel. Earlier models may be 39.5 mm wide at the toe, this template is intended to match the latest bindings, easy to check by setting your binding on the template and seeing how the holes line up with marks on template. Be aware, however, that manufacturing tolerances combined with slight variations in how the template is printed (paper even expands and contracts with humidity and heat) can result in slight variation. Don’t obsess, if for example a pair of holes is .5 mm off, that’s only .25 mm per hole, easily within the variations caused by hand drilling.

Our ION ski touring binding mount mount template. Grab it here.
Major brand popular tech binding model is 30 mm wide x 40 long at toe, and 32 mm wide x 53 long at the heel. That may sound like it’s still close, but ION appears to place the screw holes in significantly different positions in the forward/back direction once the boot is matched to its correct position on the ski — thus preventing overlap if you want to change binding models/brands or buy used skis with the ubiquitous tech binding screw holes. (I’d make a graphic comparing the two screw patterns, but it would be misleading since they end up quite differently in terms of fore/aft, depending on boot size as well as optional adjustments in fore/aft binding position.)
For those of you concerned about how wide your binding mount pattern is, note that ION is significantly 10 mm wider at the toe, and insignificantly wider at the heel.
MOUNTING TIPS for do-it-yourself: The ION heel unit is unforgiving of mistakes in screw hole positions, and is likewise unforgiving of screw hole “volcano-ing” wherein the top of the screw hole bulges up as you insert the screw. After drilling holes, we’d recommend a slight countersink of the screw hole in the ski to compensate for volcanoing. The G3 OEM stainless steel screws are weak, in skis with metal top sheet or metal binding reinforcement plate you use a 9.5 mm long ski drilling bit, at 4.1 mm diameter. Otherwise while inserting or removing the stainless steel screws you can damage or even break them. G3 recommends using the 4.1 diameter drill bit for all mounts. In our experience you can cheat to a 3.5 mm bit in skis that don’t have metal, but we agree that using a 4.1 for all mounts is fine. Waterproof white wood glue is fine for sealing the holes, though we recommend epoxy that can be reversed by heating. Five minute epoxy is said to be brittle, with one-hour versions being better, best being “flexible” epoxy such as Hardman Orange.
If you want to play around with ION mount pattern (or mount IONs once they’re available), here is the link to our WildSnow ION paper mounting template.
WildSnow.com publisher emeritus and founder Lou (Louis Dawson) has a 50+ years career in climbing, backcountry skiing and ski mountaineering. He was the first person in history to ski down all 54 Colorado 14,000-foot peaks, has authored numerous books about about backcountry skiing, and has skied from the summit of Denali in Alaska, North America’s highest mountain.
