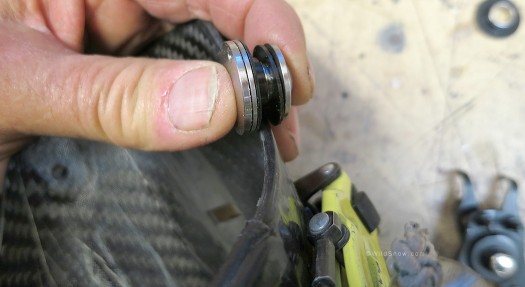
Update, November 21, observations on fitup to different boots:
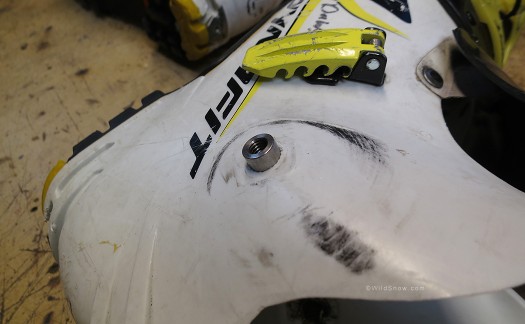
First, know that for the Ultimate Cuff Pivot (UCP) to work with a boot, the interior needs a flat indentation for the inside head of the cuff rivet, in the diameter (or larger) of the UCP T-nut. As observed, it appears most if not all Dynafit boots have this. So that’s the first step in evaluating. Diameter required would be 22.2 mm.Beyond how the interior T-nut head seats, thicknesses of both cuff and lower shell need to be within a certain range.
The system as designed for TLT5/6 Performance models assumes a lower shell (shoe, scaffo) wall thickness at the rivet hole to be about 2.7 mm. That’s thin, and is such due to use of Grilamid and this being a boot designed to save weight. Carbon cuff thickness at the rivet hole on these boots is about 2.38 mm.
In my testing UCP appears to work with TLT Mountain, which has virtually same scaffo thickness but a thicker (Pebax) cuff at 2.9 mm. If I was installing UCP-TLT on my own or a boot fitting customer’s pair of TLT Mountain, I’d simply thin the Pebax cuff rivet area down about .4 mm by sanding the inside or perhaps hot seating/pressing the shoulder washer into the cuff a bit to make a land (which would actually be a quite nice way to do this).
I tried the system on a pair of Zzero Green Machines, with a 4.5 mm thick scaffo and 4.8 mm thick cuff. No workie. Both the shoulder washer as well as the T-nut need more depth for this application.
As for working with boots such as Vulcan, my guess is the UCP-TLT will work for that, but don’t force it. All, please remember tens of thousands of TLT5 boots are in play, along with a growing cadre of TLT6. Many of those boots receive incredibly huge amounts of use — a subset of those will be interested in Bill’s solution. Could be ten, or ten thousand. We’ll see what Bill has to say in a few months. If it’s 100,000 he’ll probably be answering that email from a well financed retirement in Belize, as next to snow skiing I heard snorkling is an option.
Original blog post:
The Tetons will eventually fall, seas will rise. Whatever. Until the day we recompress to singularity, the aftermarket WILL come through.
Enter B&D Ski Gear Ultimate Cuff Pivot for the Dynafit TLT Boot (for both the Performance carbon cuff model and the Mountain model, though the Mountain appears to be less needful of this mod).
Follow along oh ye owners of $1,000 boots with excessive cuff slop from one season of use. Or just do an upgrade for a stiffer shell and friction free pivot. For a small weight penalty, you can tighten up those cuffs, make them totally user serviceable — and reduce friction to the point of compensating for the extra mass of this mod. (Click all images to enlarge).
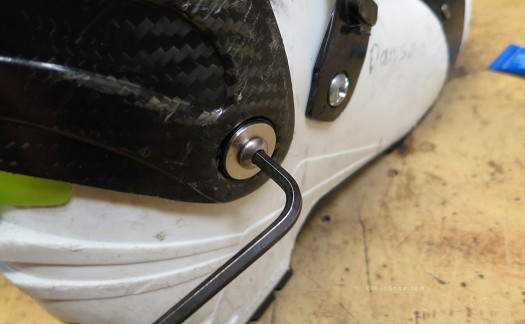
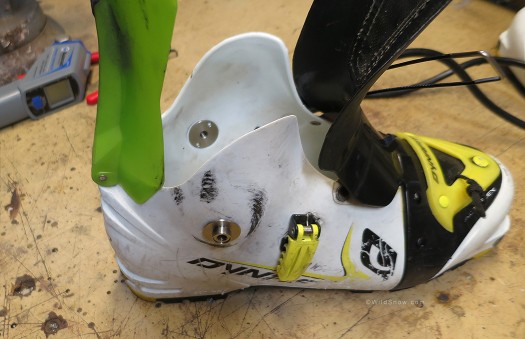
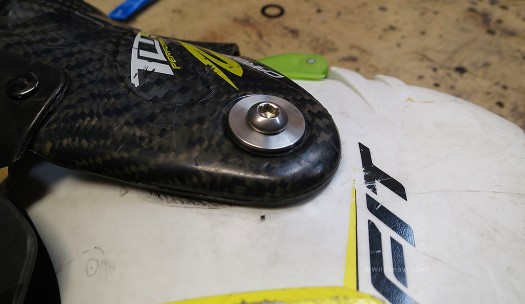
This how it looks after the install. Final step, tighten the screws, with Loctite of course. The tightening process is key, as the B&D Ultimate Cuff Pivot sandwiches the Grilamid of the TLT shoe. This sandwich is pure genius on the part of designer Bill Bollinger, yet too tight and you can damage the boot, too loose and the T-nut and washers may rotate and damage the boot. We recommend professional installation.
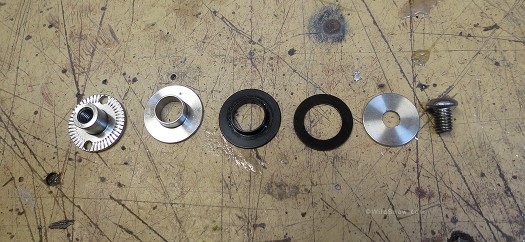
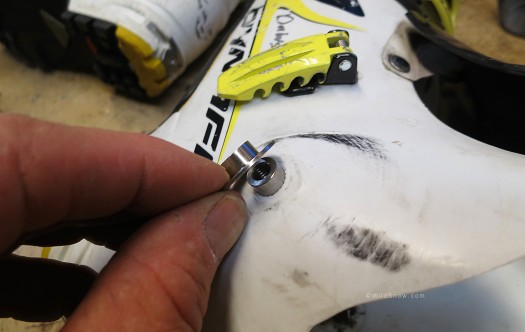
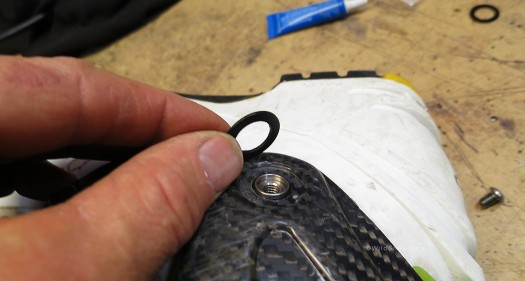
Parts for one corner of a boot from left to right: T-nut inserted from interior, requires moderate amount of force for press-fit. Shoulder washer ends up being compressed to sandwich the Grilamid shell in a beautifully solid way. Black Delrin shoulder bushing, is inserted into boot cuff pivot hole. Exterior Delrin plastic washer. Stainless exterior washer and socket head cap screw.
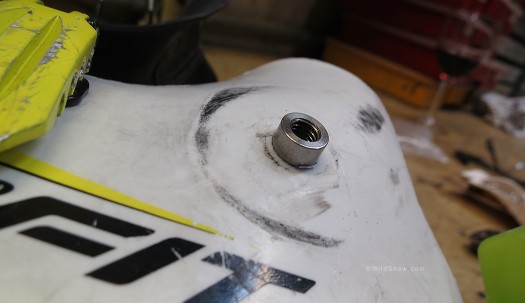
Boot prep for this system consists of removing OEM cuff rivets and trimming small boss (rim) off rivet hole in the boot shoe. See this post for details on that, as well as some of the ideas that led to B&D’s ultimate solution.
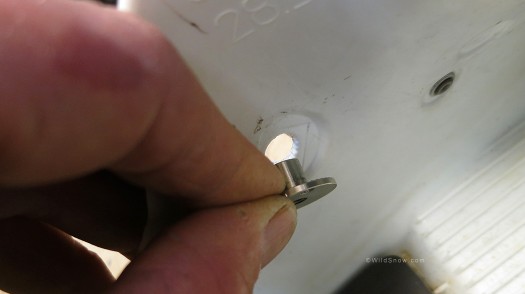
T-nut is inserted from the inside, original OEM hole may be as large as needed but can be bored out to .375 inch if necessary. The idea here is the T-nut is press fit, but also incredibly stable due to it being strongly sandwiched once the whole system is tightened.
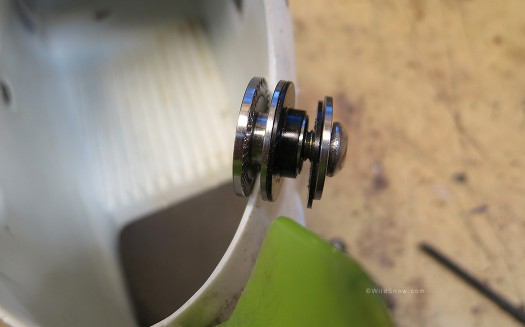
Illustration of the sandwich formed over white Grilamid of shell shoe. Cuff fits in the slot to right under the far right washer and screw.
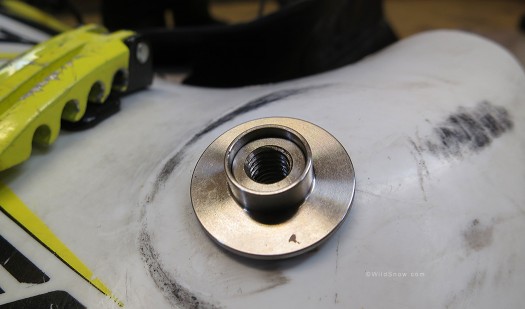
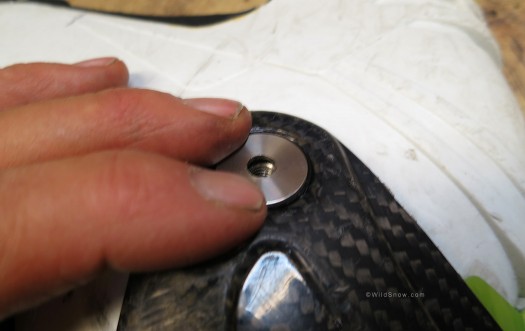
Exterior shoulder washer over the T-nut, this whole assembly doesn't move after everything is grinched down. Instead, the included Delrin bushing glides on the stainless steel.
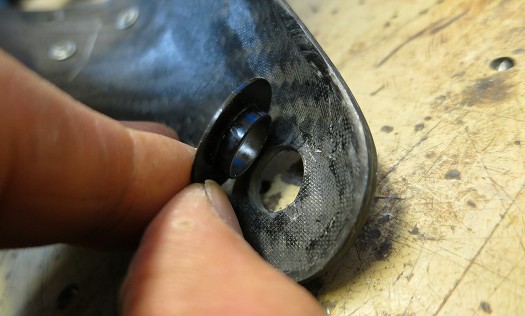
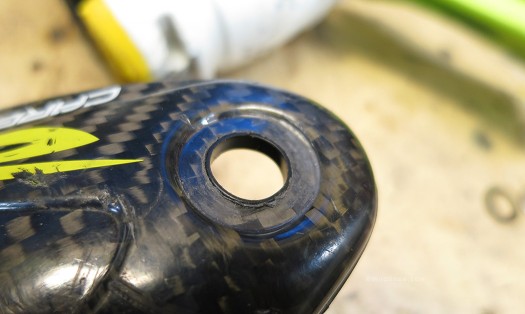
Delrin plastic shoulder bushing is pressed into cuff hole. With normal wear this will be a perfect fit but may require a small amount of enlarging with sandpaper wrapped around a drill bit shaft. If the hole is destroyed, B&D may provide an oversized bushing.
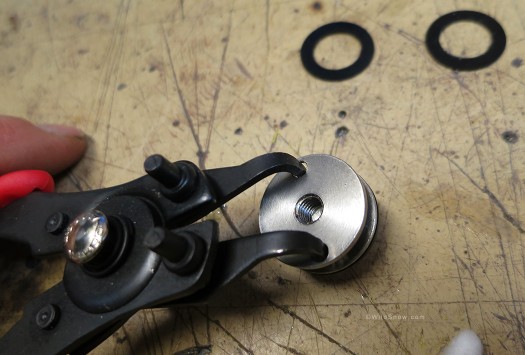
B&D provides a nice little spanner wrench to hold the interior bushing from rotating, or use a modded circlip plier like this. It's important to allow NO rotation of parts while tightening the cap screw. We may start recommending use of a small dab of plastic enabled epoxy on the interior, but not sure about that. Loctite on the screw threads is a must of course, and add parts to your repair kit in case things come apart while on a tour.
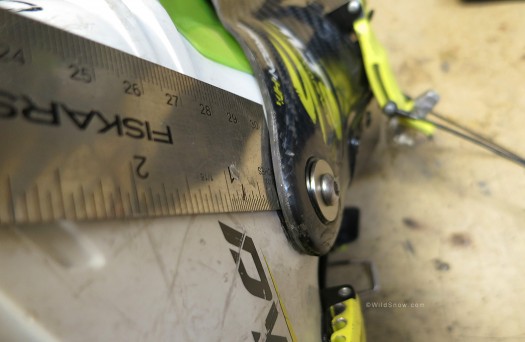
Due to bushings and shoulder washer between scaffo and cuff, you get a small gap. I found that by heating this area of the boot to 200 degrees F during tightening of screws, I could not only seat the T-nuts nicely but also slightly mold the shell to take up some of this gap. It's probably an aesthetic issue more than anything, and considering how the larger internal washer shoulder beefs the boot shell (as well as how buckling squeezes everything together), any loss in stability is tiny to nil.
Weights and cost: OEM cuff rivets weigh about 8 grams per boot. They’re quite light. Our beta tester Ultimate Cuff Pivots weigh 36 grams per boot. That a 28 grams (1 ounce) weight penalty per boot. Worth it? In my view, if installed properly the lack of friction and added stability of the Ultimate Cuff Rivet easily makes up for hauling mass that’s probably less significant than how much snow you have piled on your boots. But you be the judge. You don’t need these when your boots are new. When they wear out, will you throw away $1,000, or spend $110 to make them new again and an ounce heavier?
Yep, the Ultimate Cuff Pivot might be the coolest thing to happen to skiing since Fritz Barthel invented the tech binding. B&D will probably have a beta test period with limited availability of this product. For details contact B&D ski gear.
With demand, this product will also be made for boots with thicker shell wall dimensions. Ideal for boot fitters removing cuff rivets and wanting an upgrade instead of just re-riveting. More, if demanded by consumers B&D will make this product from titanium, at about $200 a set. That’s all WildSnow.com will use, but of course.
Assembly notes:
1. When tightening, be aware that extra torque will squeeze the sandwich together but make no difference in how the cuff is held under exterior washer. To hold cuff tighter, use optional external .040 bushing or stacked bushings. Be aware that if external bushings are too thick the sandwich effect will not work and the whole assembly may end up rotating on the boot shoe, eventually causing irreversible damage.
2. Effective installation of this system requires a certain amount of practice and ideally, training. Luckily you can practice without damage to boots if you’re careful. I’ve already been over at our local shop Cripple Creek Backcountry and got them up to speed on these, so contact them for installs if you’re in our area, or want to ship.
3. I recommend lightly (very lightly) lubing plastic surfaces intended to rotate and rub against the stainless, to encourage correct operation of the system. Use binding grease that won’t attack plastic.
4. I heated shell and steel to 200 degrees F before tightening, thinking that would help seat the knurled interior bushing nicely. Not sure that’s necessary. A better way to configure interior fitting (shoulder washer) to resist rotation is to use thin double-sided carpet tape on the side of the washer that presses against the interior of the boot. The tape combined with a firm tightening of the system should eliminate rotation. Nonetheless, observe you pivots now and then in real word use, seen from the exterior, the metal screw head should not rotate. If it does, immediately re-install with more care.
5. For heavy users, I’d recommend this product be installed on new TLT boots, both models 5 and 6. That’s better than egging out your cuff pivots and subsequently messing with oversized bushings and oblong holes. Moderate to light users should just wait till they notice obvious but not excessive wear.
6. The system can be configured to be a simple threaded T-nut to replace OEM boot rivets, as in the case when stock rivets are removed for boot fitting work. Much nicer than hacking together T-nuts from the hardware store.
7. When installing on TLT Mountain model I had to spin a 1/2 inch twist bit into the cuff holes so the shoulder bushings would pop in. When doing so, be gentile and quick or you’ll ream the holes out too large.
8. Carry a spare screw and washer in your repair kit so you can lash your boot together if the screw happens to rotate out due to defective thread lock.
9. Once you know everything is working, cover inside with Gorilla tape to prevent liner wear and for more resistance to rotation.
10. Shoppers, please be aware this system consists of custom machined parts that are not available in the fastener market, hence the price, which is reasonable considering Ultimate Cuff Pivot consists of 4 units, each of which have 6 components, for a total of 24 parts, not to mention various oversize bushings that Bill will have available for extra worn or out-of-spec boots.
11. Proper use of Loctite is essential. Clean threads with lacquer thinner before Loctite. Be sure cuff moves without resistance, and without forcing rotation of screw and washer.
WildSnow.com publisher emeritus and founder Lou (Louis Dawson) has a 50+ years career in climbing, backcountry skiing and ski mountaineering. He was the first person in history to ski down all 54 Colorado 14,000-foot peaks, has authored numerous books about about backcountry skiing, and has skied from the summit of Denali in Alaska, North America’s highest mountain.

