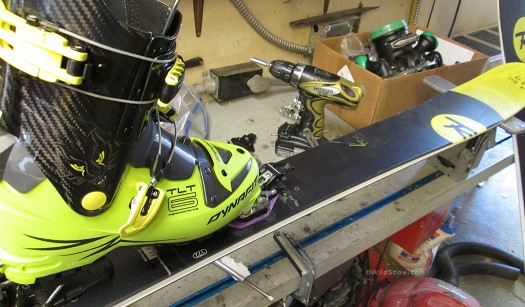
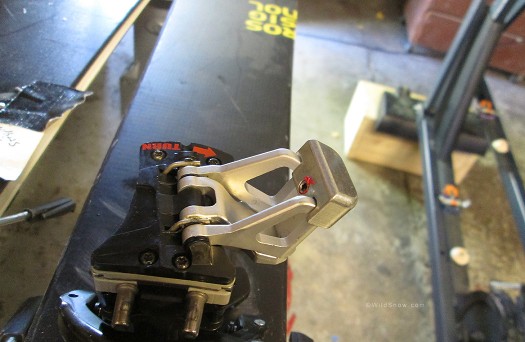
Want to take that Dynafit Radical FT/ST backcountry skiing binding (or for that matter, any tech binding) back to a reasonable ramp angle? Cut a cutting board. Sure, skiers have been doing this for years, but always room for another how-to at WildSnow.com! Time: about 1 1/2 hour including pulling and replacing bindings. Moderate tool challenge, mostly due to the screw shortening procedure.
According to our measurements, shimming the Radical toe up 3 mm brings you to the same ramp of the venerable TLT binding models. We like that amount of ramp, but slightly less would be ok as well. Lo and behold, we found a cutting board model at Wally World that measures 4.5 mm thick. Perfect.
Before we get started, gear list:
– Longer 28 mm screws from B&D (we’ll trim a millimeter or two off tip)
– Cutting board
– Hand saw, fine toothed
– File or disk grinder for shortening screws.
– Bench vise (optional)
– Binding mount tools, the usual.
– Drill bits, 3/8 & 5/16
– Countersink
– Sharpie
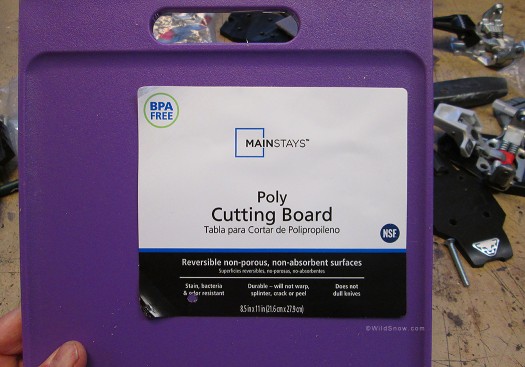
The cutting board we purchased has raised edges but a center area that's 4.5 mm thick. It being BPA free is extremely important.
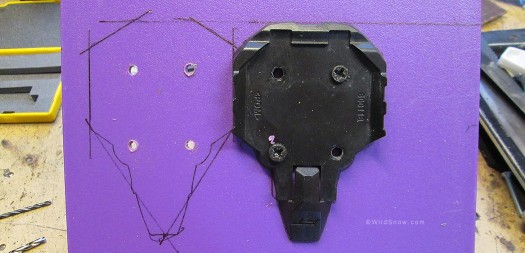
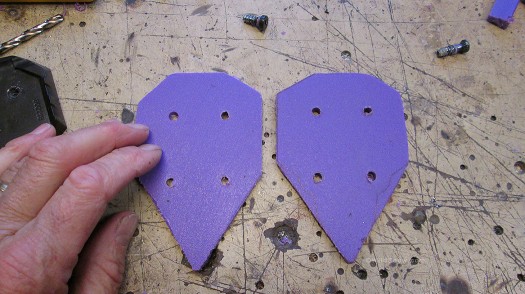
We traced a Radical FT base, which is slightly larger than the ST base, resulting in shims that'll work for either binding. For the easiest and most accurate trace, drill 3/8 inch holes and screw the plate to the cutting board with binding screws. The holes need to be aligned well with the binding plate, so drill and screw one hole at a time so you so you get them all accuratly positioned.
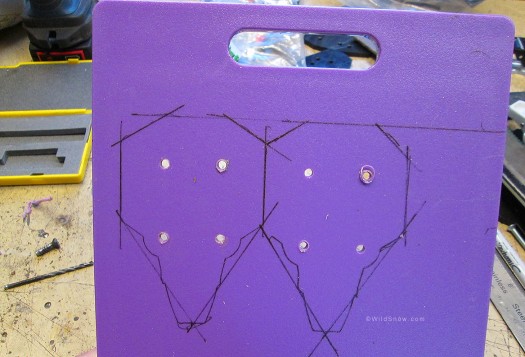
Pair of Radical backcountry skiing binding shims, traced out. A bit crude I know, but the idea was to spend less than a day making the things. As you can see in photo, I penned in stratigher lines using a straight edge, rather than trying to cut the exact shape of the Radical toe plates. If you wanted, you could use a router with a flush cutting bit to make shims that were pretty much an exact copy of the OEMs, but doing so would be somewhat time consuming -- though fun.
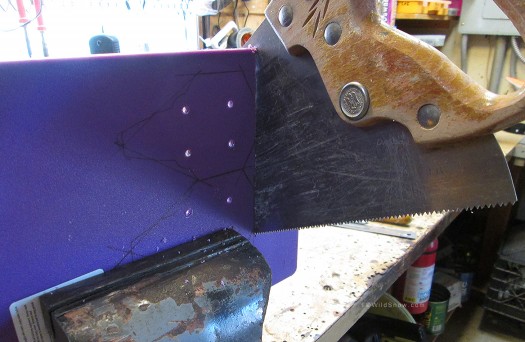
With the straight lines drawn, sawing is relatively easy. A bench vise helps, but isn't mandatory. Important to saw the poly cutting board during warmer temperatures so as not to shatter the plastic. Incidentally, if you ski tour in extreme cold, test your cutting board material before going to the trouble of making and installing shims. Cold soak the plastic board in a freezer, then give it a bashing to see how it holds up. Binding toe shims are not in a particularly vunerable location, but still, having one break apart in the backcountry would be unpleasent.
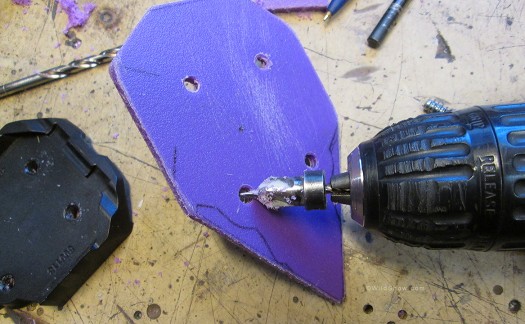
Use your 3/8 drill bit to enlarge the holes in both OEM plates and your DIY shims, to prevent 'jacking' or 'double threading' when you do the final mount. Lightly countersink the bottom side of the holes to allow for raised ski surface around screw insertions. I did this on both sides to remove plastic burrs and so I didn't have to remember top from bottom. Don't overdo it.
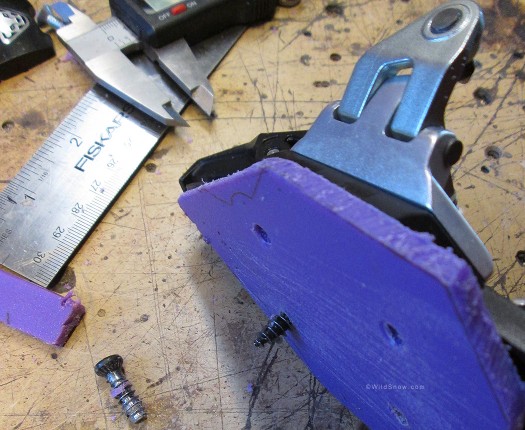
Crux of the project is your screw lengths. Stock are too short. Longer screws were obtained from B&D and shortened to taste. While optional, a caliper is incredibly useful for figuring out screw lengths. You can quickly measure thickness of ski, then check how far the screw protrudes from your shim stack, and adjust screw length accordingly. How to shorten screws? You can go low-tech and hand file the tips off a few millimeters. Me, I wear a pair of leather gloves to prevent extreme manicure and hand-hold the screw as I lightly push the tip against a sanding disk in a disk grinder. If I take much off, I switch to holding the screw with vicegrip plyers and re-sharpen the tip by lightly rotating against the disk grinder.
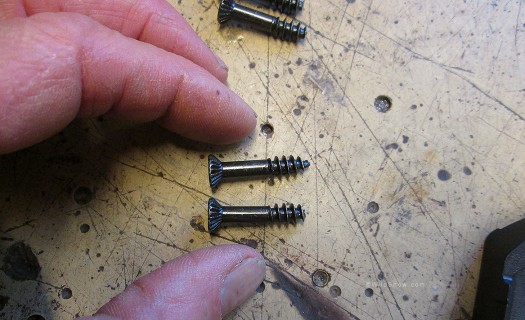
28 mm screw at top, one below is shortened about 2 mm which made it fine for the thickness of the skis we mounted. Be super careful with screw length. Too short and you'll have the obvious problem of the binding pulling off your ski. Too long and you'll damage your skis due to the screw pressing towards the ski base. Most certainly use epoxy when you mount, as the longer screws are more sensitive to leverage.
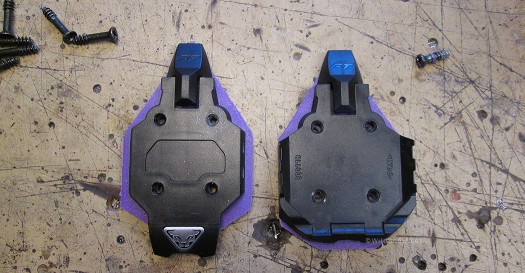
This version of toe shim works for both Radical FT (right) and ST. Whatever binding model you have, just pull the toe off a ski and use the OEM binding base plate for your trace.
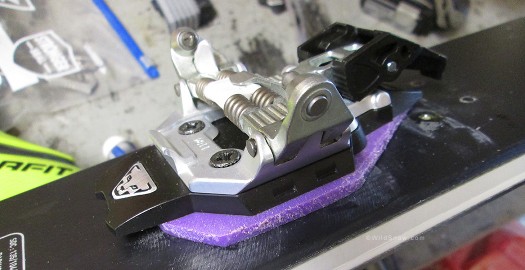
4.5 mm toe shim installed, Dynafit ST Radical ski touring binding. I like the ramp angle, not so sure about the color.
Please see our previous posts covering ramp angles and shims. More, if you want to experiment with greater reduction in ramp angle, thicker shims sold by B&D fit the bill.
WildSnow.com publisher emeritus and founder Lou (Louis Dawson) has a 50+ years career in climbing, backcountry skiing and ski mountaineering. He was the first person in history to ski down all 54 Colorado 14,000-foot peaks, has authored numerous books about about backcountry skiing, and has skied from the summit of Denali in Alaska, North America’s highest mountain.

