Please see Part 1 of this review.
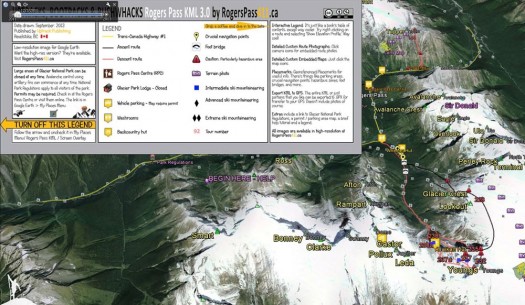
Part 1 of this review dealt with an uncontroversial topic — a guide to a ski touring/ ski mountaineering region in e-book PDF format. Part 2 assesses Rogers Pass North as a constantly improving, iterative content bundle of information delivered in a KML file closely integrated and layered in Google Earth. The KML file is freely available here.
Be warned that if you start looking at this it is a MASSIVE TIME SINK especially if, like me, you are a fan of big mountains, huge glaciated terrain and Google Earth. Some of the guidebook content integrated with KML/Google Earth functionality that Rogers Pass North includes:
– Topo – route map overlay
– Terrain photos with routes embedded as clickable pictures
– Satellite terrain as a layer
– Parking, facilities, and access point locations
– Services finder
– Embedded map legend
Moreover, this allows you to import your GPS information and integrate it with Google Earth. This requires another third party app and is frankly something I’ve not delved into. Read more about it here.
In most circumstances, this functionality would have limited use as Google Earth’s full suite of services and terrain detail requires Internet or mobile data access. However, much of the terrain at Rogers Pass within the day tour purview is serviced by cell towers and has high-speed internet connectivity. If you have a TELUS phone you’re in luck and you can play with Google Earth and the guidebook KML as you chill on a peak preparing to descend thousands of meters of pow. Otherwise watch your roaming bill or geek out on mountains in the comfort of where ever you’ve poached a connection.
After you download the KML file from geobackcountry you get the standard Google Earth view of Rogers Pass. Mountain names are in my version of GE only because I’ve downloaded the BC.kmz placenames file from this site.
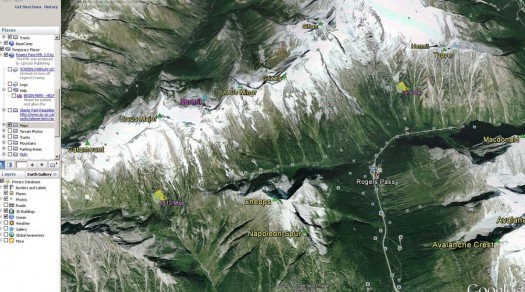
Open up your GE sidebar and you can select what map information layers you want to appear. In this I've unchecked the Geobackcountry map legend and checked off the "Maps" function.
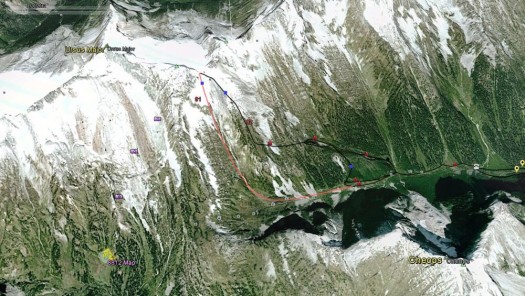
This is what the 8812 Bowl section of the Connaught Creek drainage looks like with all of Geobackcountry's layers enabled. There's a wealth of information including "Maps" and "Terrain Photos" for example.
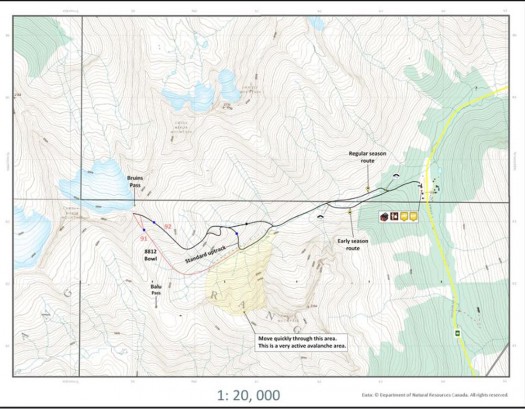
Clicking on the 8812 map legend in GE brings up a pop-up window with this map of 8812 Bowl. It should look familiar as it's straight out of the guidebook. This function is seamlessly integrated into Geobackcountry Rogers Pass KML file.
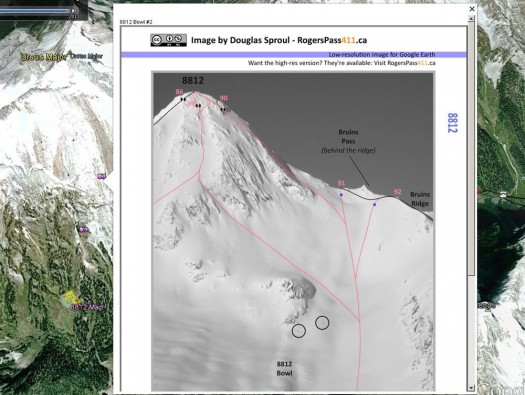
Clicking on one of the photo icons in GE then brings up terrain photos from the guidebook; again this is seamlessly integrated into the KML file.
Google Earth is all very well while you’re researching trips or looking at things in the comfort of home on a large screen in comfortable temps or in range of a cell tower. Obviously unusable without internet connectivity GE has limitations and that is where the mobile feature of Rogers Pass North comes in handy.
Basically for $30 the guidebook is provided in mobile format
i.e. the same content from the PDF guide but broken down into folders which can then be viewed on a mobile phone. The folders are arranged by geography in the convention used by the author. The mobile guide can be viewed on an IOS or Android phone and viewed on said phone thus obviating the need for an always-on connection as a local copy of the information required is present on your mobile device.
Downloading the mobile guidebook directly to an Android phone is easy. Simply follow the instructions here. The download itself is big (the 1st edition of Rogers Pass North is 333MB so make sure you have a fast connection on an internet hotspot so you don’t blow through your cell data plan. Downloaded output is as a ZIP file thus preserving folder structure.
If you choose to download to computer first, the process of then getting the content to the phone is pretty simple but not without quirks. First I got my computer to recognize the phone as a drive (it’s a LG G2 and I understand with Samsung phones its is even easier). Instead of using the native LG PC Suite application as a file manager I uploaded the entire “Rogers Pass” folder to the top layer directory of my Android phone ie at the same level as “Music”, “Amazon” etc.
(Editor’s note: Be very careful hooking your Android smartphone up to your computer for the first time. If you’re used to the process, fine, but sometimes your phone will be loaded with grenades in the form of adware and malware waiting patiently for that first time connection to your PC. A safer method is to purchase a pigtail SD card reader for your phone, place the files from the computer on an SD card, and go that route.)
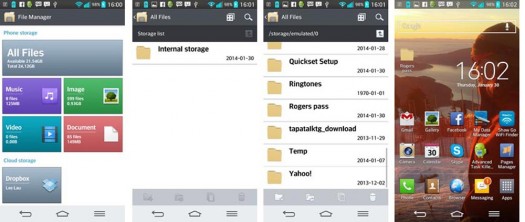
Now that the mobile guidebook is on my phone here are the steps to get it to show where I want. My phone has a “File Manager” in the Apps. To find the “Rogers Pass” directory then place it on your home page I used the steps below. Alternatively to make your life easier, one can download the link directly to phone by following the steps outlined in the Geobackcountry link specific to Android phones
This is where it gets interesting and where I frankly haven’t made my mind up. Doug Sproul has some interesting thoughts on the future of guidebooks and is free with ruminations on GeoBackcountry’s FaceBook page. He’s an old school paper map guy but obviously more willing to be open minded than most and thinks that we are possibly at the stage where we can dispense with maps and just use a phone for navigation. I don’t think that’s a practical reality as yet (phones can die, batteries run out, glare from bright light) and other’s share this caution for other reasons (people are used to viewing maps in large format, ease of use etc) but it’s an interesting and perhaps, controversial topic.
1. Open the “File Manager” app. If you don’t have “File Manager” download it so you can manage files as folders. Click on the “All Files” grey tile
2. “Internal Storage” then appears (intuitive names huh?). Click on that.
3. Scroll through the mess of files and locate “Rogers Pass”
4. Press down on the “Rogers Pass” folder until a drop down menu appears. Move that folder to wherever you want; in my case I selected my phone’s home screen.
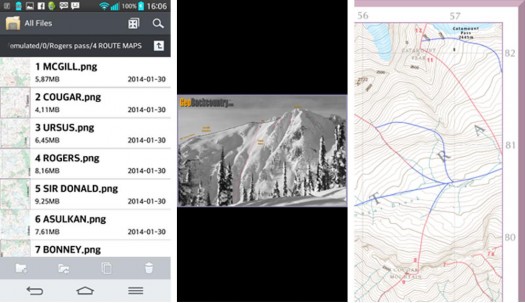
Navigation through the folders is like a PC desktop. You can bring up mountain terrain shots or maps.
Doug is an old-school hippie. He believes that knowledge is power. That ethos is in his guidebook. Frankly for the amount of information presented Rogers Pass North is underpriced but Doug doesn’t want to hear anything about it. He wants people to read the guide, dive in and enjoy the immersion. He knows Rogers Pass North doesn’t lend itself to casual browsing but then the guidebook is complex because Rogers Pass is complex and mountains are complex.
It is not just an invaluable and definitive guide to Rogers Pass, it is also a work of art–so much so that I’ve ordered a print copy for myself.
If you want to get your hands on a copy (and anyone who loves mountains should at least look at the free KML file and blow your mind); head over to the Geobackcountry site and get your virtual paws on the guidebook for $25 or the mobile version for $30.
Please see Part One of this review.
Guest blogger Lee Lau is an avid skier and outdoorsman embarking on many adventures with his loving, and sometimes concerned wife, Sharon. He has over 15 years of experience skiing, ski-touring and dabbles in mountaineering. In the “off-season” he is occasionally found working in his day job as an intellectual property lawyer when he is not mountain biking. As a resident of Vancouver, British Columbia, Lee’s playground extends mainly to Western Canada, including South West B.C. and the Selkirks.

