Tony Nitti
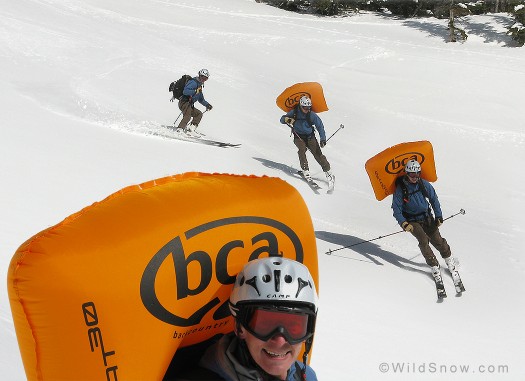
The best airbag triggering test is done in the field. Tony finds the pull fairly easy and the results gratifying. Click image to enlarge.
April in Colorado’s Elk Mountains had the winter persisting — with lingering instabilities in the snowpack. Thus, an opportune time to research airbag packs, as I’ve been considering purchasing one for next year’s backcountry skiing adventures. To that end, I spent the past few weeks touring with a WildSnow.com demo BCA Float 30, kicking the tires to see if this would be my choice. (Please note, especially anyone who is particularity interested in this father’s personal safety, I did NOT test the Float 30 in any avalanches. Sorry about that to those of you who expect the ultimate in WildSnow hands-on gear reviews.)
Overview
Before you even slip the Float 30 on your back, it offers one clear advantage over its competitors: price. The Float 30 retails for $699, making it between $350 – $450 less expensive than similarly sized offerings from other companies. Needless to say, a 30% savings in a tight economy makes the Float 30 an appealing option.
Aside from the price tag, the lingering concern keeping many from committing to an airbag pack is the weight penalty. And while at around 8 lbs the Float 30 is twice as heavy as my other ski touring pack, it is within a few ounces of most other airbag backpacks. In other words, if you want the added security of an airbag, you’re going to have to sacrifice a few pounds. But as with the cyclist who pines for the latest carbon frameset, you can either agonize over the additional weight, or pass on supersizing your Value Meal #4 and make up the difference elsewhere.
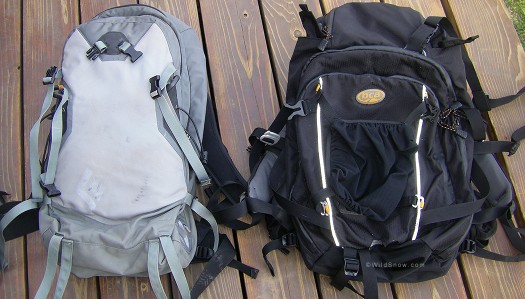
Covert Avalung backpack (left) and Float 30. One question: should one strap an Avalung to their airbag backpack? I doubt that's necessary.
The best way to describe the carrying weight of the Float 30 is this: it looks heavier than it feels. It appears cumbersome at first glance, with a boxy shape that appears inspired by air travel luggage, and I assume will improve in later iterations as the ergonomics are dialed in. More, it is obvious that by using lighter weight materials, weight of this pack could easily be reduced by a few ounces. Where it counts most, however–on your back while backcountry skiing–the Float 30 does not feel appreciably heavier than my other touring packs, even when fully stocked with all the necessities for a day tour, and even after 4,000 vertical feet of climbing.
Setup
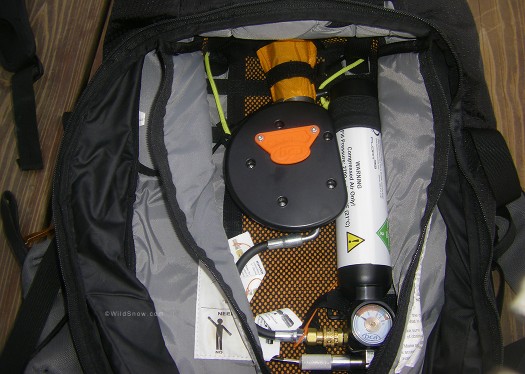
Prior to touring, you’ll have to install the compressed air canister. The process is simple, requiring you to make two quick connections: attaching the trigger nut to the trigger pin and a quick connect fitting to the body of the air cylinder.
All Float 30 packs come with a filled air canister. Getting your canister refilled after testing or use, however, could prove to be a hurdle. While some have had success using local fire departments or scuba shops for refills, if you plan to go through the formal channels and send the canister back to BCA, it will cost you $10 for the refill and an additional minimum of $30 for the hazmat shipping. Since BCA recommends every owner deploy their pack at least once a year, be aware that you’ll have a recurring annual cost of $40-$70 unless you find a cheaper local option. (Deploying at least once a year is important, not only to keep yourself comfortable with pulling the ripcord, but also to make sure everything really does work as designed.) More about refilling BCA Float 30 backpack.
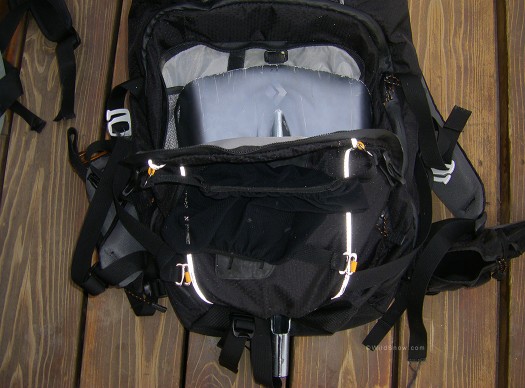
The layout of the Float 30 is straightforward. On the exterior of the pack, a zippered pocket accepts your shovel blade. If you’ve got a particularly long blade or ferrule, you’ll have to flip the blade upside down and insert the ferrule through a hole at the bottom of the pack. There’s also a mesh divider within the shovel pocket, leaving room to store any smaller objects you’d like to keep out of the main pocket.
Your shovel handle and probe fit into sleeves on either side of the pack, giving you quick access in the event of an emergency, a feature I prefer over the zippered probe compartments of my other packs.
A nice bonus feature offered by the Float 30 is a lined goggle pocket on the top of the pack. Segregating eye wear from other items is always a good idea, and while a soft case may prevent scratched or snowy goggles, it’s not going to stop cracking or breaking should the heavier contents of your pack shift during a tour. Some may question whether the extra zipper or fabric necessary to build the pocked is worth the added weight, but I simply leave the soft goggle case at home and call it even.
An outstanding Float 30 feature is the mesh helmet carrier, which attaches to the rear exterior of the pack and can be easily removed. It will accommodate a helmet of any size, and is unnoticeable while touring, with no jostling or slipping. It should be noted, since the design of the Float 30 air bag is such that it inflates only behind the head when deployed (thereby preserving your peripheral vision), a helmet should be viewed as essential on any tour where you’re concerned enough about avalanche danger to tote along the pack.
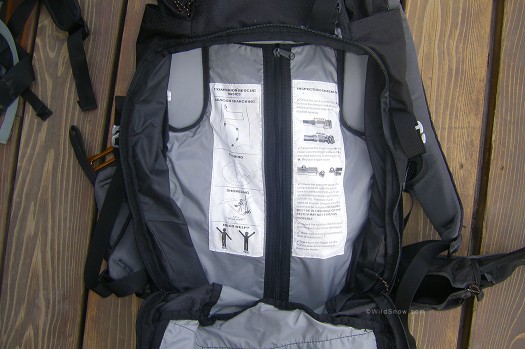
The main body of the pack is comprised of one large pocket. The plumbing of the air bag system is encased behind this pocket, accessible via a zipper as seen below.
One of the chief complaints I’d heard concerning the Float 30 is the lack of available space in this main pocket. I find this difficult to address, as desired volume is a function of so many things: the duration of your tour, the weather, your need to carry snow science or other additional gear, etc… That being said, it would be difficult to use the Float 30 on a multi-day tour.
While you could create additional gear space within the pocket containing the plumbing, I would prefer to avoid having any gear come into contact with the essentials of the inflation process. If you agree, you’ll be left with the main pocket of the pack and whatever you can attach to the exterior, leaving you scarce room for anything longer than a day tour. For those shorter tours, however, I found the size of the Float 30 perfectly adequate, easily accommodating food, water, additional layers, and first aid equipment.
The 2010-2011 version of the Float 30 was updated to be hydration compatible, mainly by adding the sip tube sleeve in the shoulder strap. When I use a bladder, I prefer to have it isolated from the other items of my pack, similar to the sleeve offered on other packs I’ve used. The Float 30, however, merely provides a chord you can use to hook onto your bladder, suspending it in the main pocket of the pack and thus more susceptible to damage and allowing a leak to have higher consequences.
Touring
As mentioned earlier, the Float 30 tours well despite its unwieldy appearance. Several observers have asked if I found the metal waist strap buckle or the leg harnesses uncomfortable, but truthfully, I never noticed either while climbing or descending. Of course, even if I did, both are necessities to keep the pack in it’s necessary position in the event of an avalanche, so I’d just have to grin and bear it. A leg loop system and beefy buckles are essential for any airbag backpack that will actually save you in an avalanche, so that’s something we simply have to get used to. That said, the type of leg loops provided is a factor. One simple loop around one leg would be adaquate. Yet a lightweight but complete “climbing rated” harness system is probably more logical as such would provide everything from a clip-in for a long line heli rescue, to being very nice for glacier travel.
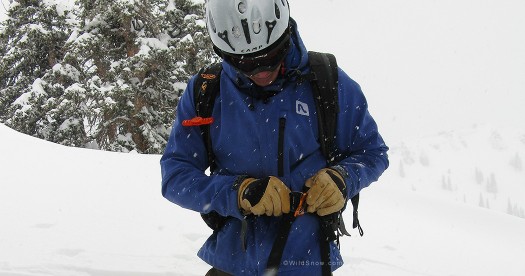
Waist buckle on airbag backpacks mush be strong and secure, hence they can be a bit fiddly. We expect noticeable improvements in this during coming years.
You won’t find much in the way of additional amenities on the Float 30. There are no ice axe loops or crampon pouches, and the pack only provides for a diagonal ski carry system, with no A frame straps or snowboard carry. Considering BCA had to wrestle with the logistics of accommodating a 150 liter bag and a compressed air canister while keeping weight down, you can understand why they chose to forgo some of these other accouterments. Such can be added if necessary by attaching straps to existing anchor points.
Triggering the Air Bag
The most important piece of the Float 30, the trigger handle, is located in the right shoulder strap. When traveling in avalanche terrain, the handle is removed from the zippered pocket and left accessible.
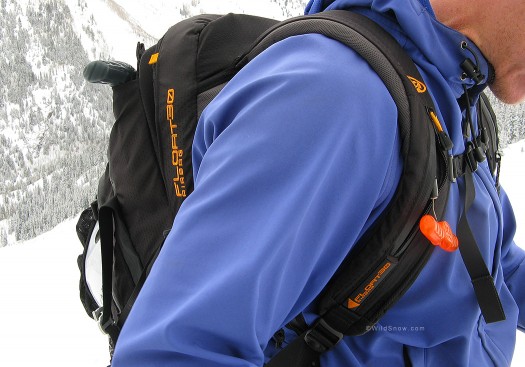
Float 30 trigger looks fine, but could perhaps be better designed to grab with gloves on in a panic situation.
Recently, we put the Float 30 through its paces and deployed the airbag while backcountry skiing during an official Wildsnow.com field trip(albeit in a controlled environment, not an avalanche). The process left me with a couple of thoughts:
* Even when skiing down a gently slope at moderate speeds, I was unable to grab the trigger handle cleanly on my first and second attempt. While touring, the handle seems nicely sized and easy to manage, so I was a bit surprised at how much difficulty I had grabbing and engaging it with a gloved hand while skiing. Perhaps it should be slightly larger yet less bulky, so it’s even more ergonomic?
* While many skiers already eschew pole straps in the backcountry, I would think such would be a necessity when skiing with an airbag pack. The last thing you would want is your pole being caught in the spin cycle and pulling your hand away from the trigger.
Despite compelling evidence, backcountry skiers are still split on the usefulness of airbag packs. Some view these packs as mandatory backcountry gear; no different than a beacon, shovel and probe. Others, however, disregard the airbag pack as an unnecessary insurance policy for experience and good judgment, and question whether these packs will be as effective in the U.S. — where heavily treed, rocky terrain is commonplace, often resulting in death by trauma rather than asphyxiation — as they have been in Europe. There’s no correct opinion, and where you fall within this spectrum will largely be a result of your personal risk tolerance.
As the father of a two-year old boy, however, I find it necessary to look for any advantage I can get in the event of the unthinkable. If an airbag pack, despite its cost and weight, can shift the odds ever so slightly in my favor when traveling in avalanche terrain, then it is a product I simply can’t ignore.
For more information, please see our avalanche airbags overview, as well as our airbag backpack category listing.
Shop for the BCA Float 30 here.
(Guest blogger Tony Nitti is in the financial trade. He skis with his body reinforced by a titanium plate, but likes wearing a helmet anyway. Tony is married, with a 2-year-old boy who’s already enjoying the climbing holds bolted on to the side of their backyard deck.)
Beyond our regular guest bloggers who have their own profiles, some of our one-timers end up being categorized under this generic profile. Once they do a few posts, we build a category. In any case, we sure appreciate ALL the WildSnow guest bloggers!

