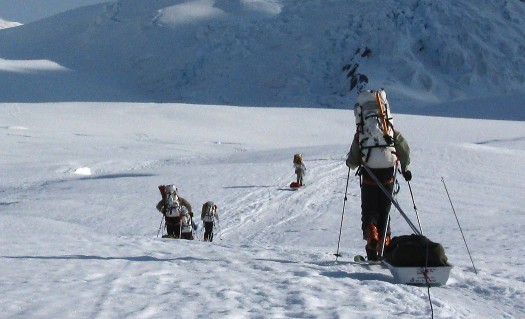
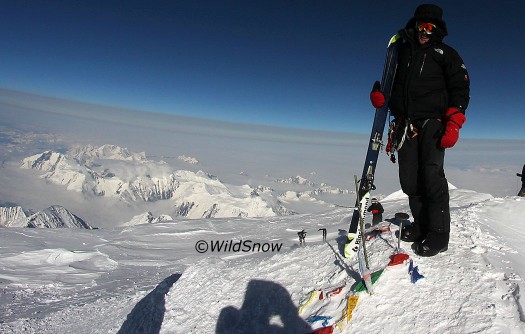
Sleds – Even with rigid trace rods our sleds skied downhill poorly, especially on sidehill areas such as Squirrel Point above Motorcycle Hill. After being up there, some in our group think a better sled strategy might be to stop sledge hauling at the 11,200 foot camp where the climb steepens, and do a backpack double carry above there to get everything to 14,200.
With modern lightweight gear, double carries with ten days or so of rations (around 25 lbs of food and fuel per person, plus group and personal gear) are totally reasonable without sleds, and might even take less energy than having a sled hanging off your body on slopes such as Motorcycle Hill. That being said, I watched our sleds carefully and was impressed by how well our Wilderness Engineering sleds did sidehill, at least on the ascent.
Our typical sled rig.
We also observed hundreds of people using the “kiddie” sled system. While the lightweight and easy gliding kiddy sled provided by the air services does have its advantages, I didn’t see it as anything special compared to what we were using. Jordan mentioned that for the downhill, perhaps it would be easier to just load a kiddie sled with a heavy duty duffel, use semi-rigid rods, and not worry about it tipping upside down (rig with a swivel connection if you do this, to prevent kinking of your haul line).
Still, after being up there and doing the mountain, I’d say a better plan would again be to simply go without sleds above 11,200. If two carries don’t do it for you to get to 14,200, you can always do two and a half by dropping your first load partway. Most people need to acclimate in this section of the mountain anyway, and doing a few carries instead of sitting in a tent at 14,200 feet feeling crumby after a heavy haul is a good option.
Caveat for this is the return trip — be sure you’ve planned your gear and food so you can get it all down from 14,200 to 11,200 in one load, as you don’t want to be double carrying _down_ the mountain!
As for how our sleds were rigged, main note is that our flexible hose connections for the rods all broke (we were anticipating this, so repair was easy.) Conclusion is that the flexible hose connections are not worth the hassle of breakage, and the way they perform on the downhill is not that great anyway.
Another issue with gear sleds is that of crossing your rigid trace rods or not. Some of us liked doing this, others did not. It’s easy to change methods so no big deal. Of more importance was how the sleds attached to our packs. The connection needs to be tight and strong, and ours was lacking in both. A stronger dedicated sled attachment tab on the pack is necessary, as is a beefy and lockable way of cinching the sled rod to the pack. Note that your pack’s sled attachment has to be very close to the level of the hip belt, and close to the body as well (rather than towards the rear of the pack), reason being that other attachment locations result in leverage that works the pack against your body rather than with it. Development is ongoing and we hope to work with Cilo Gear on this issue.
Backpacks – While it is hard or perhaps impossible to build the perfect backpack for a big long Alaskan mountaineering route, we were very happy with our CiloGear packs. While I used a 60 liter Dyneema model, the rest of the boys used models with 75 liter capacity and the bigger packs were much easier to pack and use than my 60. These packs save several pounds of weight over most other big sacks, and are thus even more appropriate for doing double or triple carries instead of sledge hauling, and they cinch down nicely to a smaller size for summit day. Truly worth the money and highly recommended.
Pack tips: Rig your ski carry system at home and test it, knot or stitch any ski carry loops that depend on a friction slider as you’ll have too much on your mind to be checking such things while you’re climbing. And again, if you plan on attaching your sled to your backpack, stay tuned for developments in that area.
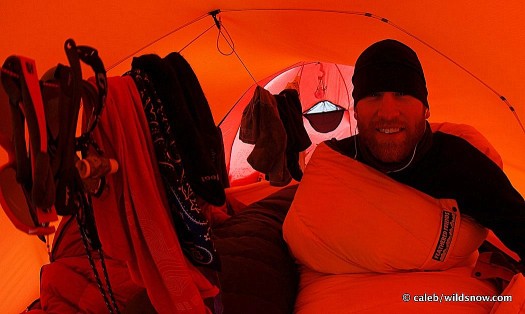
Tent floor from Forty Below – A winner, warm and dry, no weight penalty if care is taken with your sleeping pad and bag system, with a nod to how much warmer your tent will be with a floor. For example, Caleb and Jordan used nothing more than a Thermarest Prolite pad combined with a half-length Ridgerest, on top of their foam tent-floor. Louie and I used the Exped Downmat Pump and found that to be plenty. (I should mention that with my old beat up bod, using the comfy 7 centimeter thick Exped was key to my success on this trip.)
Sleeping bag – If you sleep warm and don’t plan on suffering the 17,200 foot camp, you probably don’t need a neg 40 bag. Save a few pounds with a lighter sack. Conversely, don’t try to save weight by skimping too much on your sleeping bag warmth. Once at 14,200 feet or above, your metabolism slows down and you’ll need more warmth than you might think.
Vapor barrier sleeping bag liner – Not necessary, but could come in handy if unusually cold or stormy weather forced you into a snowcave or igloo. Ditto for a headlamp and bivvy sack. Personally, I’d leave the VBL and bivvy sack behind, and bring a super small headlamp just in case I did end up in a snowcave.
Cook tent – Black Diamond Megamid is the most popular. For larger groups our Golite Shangri La 6 worked well, though the fabric could be considered a bit light and requires extra care when snow loaded (we took ours down every night after learning a lesson the hard way.) Whatever the case, bring a cook tent, it’s pitiful watching the people cooking outside in weather at 14,200 feet, and cooking in your tent just causes you to breath carbon monoxide, which accumulates in your bloodstream over time. (We did bring a CO alarm in case we ended up in a snowcave, but never used it.)
Stoveboards – Our carbon fiber versions worked super well and overall saved us about half the weight of my blog gear, though we’re still wondering if the thinner carbon boards could use a layer of foam underneath so they’d melt down slower through the snow. Louie’s stove leg mod, which involved placing small threaded studs in the XGK legs that in turn mate to holes in the stoveboard, was incredibly nice (no sliding stoves). We had several boards set up so we could gang two stoves under one cookpot, and this worked super well. Even an expedition as small as three people would still benefit from using a ganged set of stoves for nearly instant snowmelt and hydration.
Food – We needed one more breakfast choice added to our cycle of oatmeal and cream-of-wheat. Not sure what, perhaps a burrito of some sort? The pre-cooked bacon was a hit, though we probably brought a bit too much (10 slices a day per person). More variety in hot drinks would have been good, perhaps some hot apple cider mix, among other things. None of us are coffee or caffeine addicts, but some of us did find that a nice cup of joe was mighty tasty now and then, and I used a smidgen of caffeine on summit day to up my athletic performance from sluggish to semi-sluggish. As Andrew McLean suggested to me some time ago, for coffee I just brought a good quality instant, instead of messing around with ground bean.
Giving each person a personal food weight allowance worked well and is recommended. Caveat is to avoid starvation paranoia and use a final weight allowance for all food planning. Otherwise you’ll end up with too much food. Also be careful with your final purchases of perishables such as butter and cheese. It’s easy to forget this stuff during the final packing frenzy before the glacier flight. Keep your butter cool during early days on the hot glacier, otherwise it’ll melt and re-harden into clotted lumps of packaging paper and butter that are hard to separate. CLIF Bar sent us a nice sampling of bars, most of us used them effectively as part of our personal stash.
Basecamp cache – Buy and use a large plastic chest such as an Action Packer with a hinged lid. Test at home and make sure water can’t infiltrate. Even so, store sensitive materials and clothing in double ziplocks. Bring a basecamp cache marker made from a long chunk of PVC white pipe.
Shovels – You’ll need some sort of hacker/chipper shovel. In our case, a G3 Spadetech worked well, but we also used a steel spade that was floating around the 14,200 foot camp. The BCA Chugach Pros were perfect, and the couple of BCA Arsenal models we brought were also super useful. We wondered if an expedition really needs one shovel per person. Conclusion: So long as your shovel selection varies and you bring a few smaller ones, one shovel per person works well if you do need to dig out after a storm, but you could probably get away with something like two shovels for every three people.
Avy probes – Leave the short lightweight ones behind and just bring a few heavy duty guide/rescue models you can use for crevasse probes and cache markers.
Ice axe – One per person, but bring lightweight models (steel, not aluminum). The BD Raven Ultras we had were perfect for this non-technical route. Bear in mind that sometimes most of the West Buttress will be a snow climb and all you need may be Whippet ski poles, but parts of the route can also be extensive sections of low angled but nonetheless dangerous hard blue ice, and in that case you’ll need an axe and possibly even running belays to be safe.
Crampons – Steel, not aluminum, but for West Buttress you can use a lightweight model. Again, BD came through with our Sabertooth ‘poons — perfect.
Gloves etc. – Very personal depending on your hand and finger circulation. I never used my mittens, other guys needed the warmest mitts available. We’ll do a few individual blog posts about this and foot warmth, as drawing general conclusions would be too vague.
Personal entertainment – Ipod Nano with audio books saves a ton of weight over bringing paper books. Instead of a Nano, Louie brought his Nook e-reader, which worked well even at cold temperatures. Having some solar charging capability is good if you’re using this sort of stuff, but you can also rig recharging systems based on lithium AA batteries and doing so might be a lighter weight option than carrying solar panels. We brought an Eton Scorpion crank charged music player and found it to be quite useful, though it didn’t charge well from its smallish solar panel, and sorely needs a USB or 12 volt charging connection.
Self care – Wet wipes essential for bathroom duty and more, foot powder useful. I prefer non-alcohol wipes, specifically the individually packaged “Fresh and Flush” you can find at big box stores. These are more prone to freezing than the alcohol based wipes, so if you don’t mind the latter use those instead. I used prescription anti-perspirant on my feet and was happy with the results, though I still had to dry out my socks and VBL liners every night in my sleeping bag. For flossing your teeth bring floss sticks rather than floss on a roll, so you don’t have to use those dirty fingers for your floss. I liked having tooth powder rather than tooth paste, but either work.
Sunglasses – Julbo rules for glacier glasses. We don’t know what kind of anti-fog coating Julbo uses, but it works amazingly well. I actually had more trouble with my double lens goggles fogging than I did with my glacier glasses. I brought spare sunglasses with a selection of yellow and dark lenses, but found that my glacier glasses were all I needed, with my goggles as backup. Don’t forget your nose guard.
GPS, time keeping, radios – Astute and expert use of a GPS may be taking over the use of marker wands on the Kahiltna (though the first section of the route was well marked with wands). In one case, Louie and I would not have continued down the lightly marked glacier at the 10,000 foot level in a whiteout if we’d not had our GPS ready to go. Keep that in mind and make sure at least one person in your party tracks your routes and is good enough with their GPS to trackback with a minimum of fuss.
FRS radio is essential, as Park Service monitors channel one and broadcasts weather once a day. Bring the best FRS radio you can afford, one per person in smaller groups, or just one per person no matter what size group (which I still think is the best number of radios). Power your radios with AA lithium batteries, so buy units that work with AA batteries (see Motorola models). Each person should have a good watch, and some sort of wakeup alarm system to prevent sleep schedules from getting messed up by the long hours of daylight. Iridium satphone is the standard, but expensive. If you don’t carry a satphone and are social, once you’ve befriended other expeditions you can usually borrow their satphone for a quick call. Be polite and careful, as charges can be around two dollars a minute for that phone you are borrowing.
Water containers – Mixed feelings in our group about thermoses. Some of us swear by the 1-liter kept filled with hot drink, others say a 1/2 liter model would work fine and they could even do without a thermos. Everyone agreed that a good amount of water capacity is essential if you plan on doing big vertical such as the summit from 14,200 feet. Around three liters of capacity seems to be consensus. This can be done by using a 1.5 liter Nalgene combined with a 1 liter thermos and a 1 liter Fairshare GSI mug. If you don’t bring a therjmos, at least bring an insulating jacket for your Nalgene.
Kitchen – Use a spare mug as a dipper, but bring one that won’t break if it gets dropped or kicked around. Larger groups should have a stirring/serving spoon. Our larger capacity cooking pots were probably one of the reasons for our success. We had two 5 liter pots and two 4 liter pots. We melted snow in the 5 liter pots, and cooked in the 4 liter ones. We made custom windscreens for the larger pots.
Camp boots – While our Neos overshoes were useful at times, we found them to be redundant since using a synthetic bootie inside a Forty Below overboot achieved nearly the same effect and might have even been warmer. That said, the more boot-like Neos might be nice if you had to spend several days at Kahiltna base camp, so keep them in mind — you do see a lot of Alaskans using them. In either case, place thick foam insoles in your camp boots.
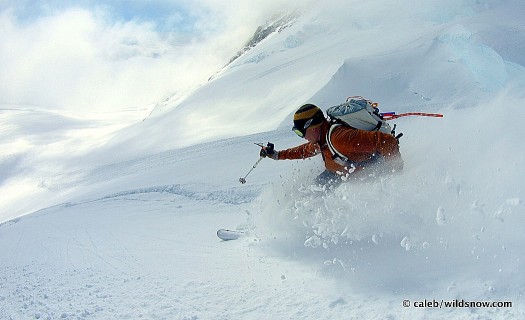
Skis, bindings, climbing skins – If you have any ski skills, use skis to the 11,200 foot camp. Ski travel on the low angled and crevassed sections of the Kahiltna is so much more safe and efficient than walking. On the other hand, in our opinion only expert skiers should use skis above 11,200, as the terrain becomes much rougher and steeper, with places where a fall could have deadly consequences.
All skis should have safety straps as well as brakes. Dynafit bindings are all over the mountain and definitely the binding of choice. If you go with Dynafit, stay in the habit of being super careful with how your boot inserts into the binding if you’ve been in crampons, as even a small amount of icing can cause a dangerous pre-release once you start downhill skiing. Use safety straps on all skis, even if you have ski brakes. Mohair skins work well for the mostly low-angled ski sections of the West Buttress.
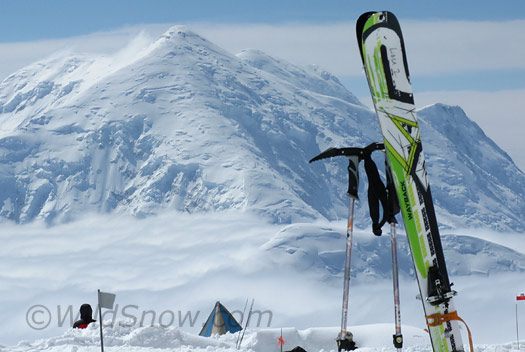
K2 Waybacks on Denali, Foraker in background.
Our K2 and Black Diamond skis worked well. I found the rockered K2 Waybacks to be especially versitile and appropriate, as they held fine on the icy sections but were forgiving in variable soft conditions. I’m not the power skier the younger guys are, so a ski like that was key for me.
Camera gear – Most Denali climbers will do fine with a good quality point-and-shoot that has a decent zoom range. Below a certain temperature you’ll need to keep your camera warm, so have a plan for that. Mine died at around 10 below zero, but worked fine above that temperature without warming.
Pros and semi-pros will of course want their SLR systems. In the latter case, be sure you have a wide angle as well as a decently tight telephoto. Caleb and Jordan both used fisheye lenses quite a bit on our trip and got some terrific images as a result, but such lenses are more fun then essential and have the potential of being over-used.
Most of the latest model cameras seem to have incredibly good battery life, but plan your batteries with care. Ditto for memory cards. Bring several memory cards of different brands, as some cards will fail at lower temperatures when the camera is stressed. We found the Sandisk SD cards to be reliable, but we brought several 16 gig cards of another brand, and they failed.
Hats – They’re small and light, so bring a few options so you can mix and match. During summit day, I found my full-on face mask to be super appreciated.
Pants – For the hot lower regions of the route, use thin softshell pants, preferably with side vent zips. Higher on the mountain switch to bibs (Arctyrx is standard of the industry for bibs), with down pants either over or under depending on what works for you and how much warmth you need. Practice at home using your split-crotch bibs for bathroom events.
Black Diamond Couloir harness and Scarpa boots, good Denali combo.
Harness – Must have removable leg loops for bathroom duty and ease of getting on and off while using skis or crampons. We liked our Black Diamond Couloir harnesses, and saw a ton of people using those on the mountain. Nonetheless, I found the Couloir buckle quite difficult to operate with gloved hands, and would try to come up with something easier to use if I went up there again — perhaps I’d have a climbing gear maker mod the harness with a different buckle, as I really like the Couloir.
The mountain economy – Expect to receive and give both food and fuel at 14,200 feet. Generous souls on their way down might help by swapping for broken gear, but bring some cash in case it’s needed to smooth such transactions. Don’t worry about running out of fuel at Kahlitna base, you can always buy a bit more or score some surplus.
Wands – If you’re sticking with the West Buttress, a dozen wands is plenty and you may not use them at all (other than taping a few together to use as cache markers).
Black Diamond Whippet ski poles: Simply awesome, thanks Andrew!
Clothing layers – Lots of feathers is the standard. Instead of a thick fleece, bring a lighter/warmer down sweater you can use when your expedition parka is too bulky and warm. Wool next to the skin has less odor and a wide temperature performance range, but test at home so you don’t get surprised by an allergy. Plan your gloves and socks so you don’t have a lot of extra that never gets used. A super lightweight hardshell is useful if you get wet weather lower on the glacier, or as part of a layering system for warmer high altitude temps when your expedition parka is too much. Again, I recommend the OR Helium as the lightweight hardshell all others are measured against.
Louie used a Marmot softshell built with Polartec Powershield, and I have to testify that that was a very useful piece for Denali. It worked well as a cooler breathable layer down low on the mountain, but still had some wind resistance for use at higher altitudes. In comparison, I had a Cloudveil softshell that was useful down low, but I found to be somewhat useless higher up because of it’s lack of wind resistance. In other words, if you bring a soft shell, bias your choice for use in cold and wind.
I also used a thin Patagonia made with Polartec fleece and found this to be a go-to layer that ended up as nearly permanent on my upper body once we were at 14,200 feet and above. I’m glad I brought this, as my Feathered Friends Hooded Heliosd own parka was a bit warm at times, and without the thin fleece I would have had no lighter weight layering system. If my down sweater layer had been thinner, I might have been able to do without the fleece, thus saving some weight. Tough call. I sure liked having the Helios for when my North Face Himalayan was just too much.
A word about parkas: Having a heavy duty high altitude jacket such as our North Face Himalayan was comfortable, and super useful on summit day. But such jackets are quite heavy. So if you’re configuring a lighter weight kit consider layering with a lighter weight down parka. In that case, to keep things simple use an outer parka that still has some sort of windproof outer shell, rather than plain nylon. One of the advantages of parkas such as the Himalayan is they work both as wind shell and insulating layer, thus simplifying your layering and keeping your down from getting damp from things like morning tent condensation.
Ski boots – After the trip, there was some discussion in our group about the possibility of using regular fitting ski boots with overboots, rather than the oversized boots I’d convinced all six of my compadres to use up there. To me, the risk of frostbite and resulting lifelong problems with circulation is not worth a tight fitting boot. But then, with a good overboot system perhaps a person with excellent circulation in their feet could get away with it.
Fact is, all the guys skied just fine with their oversized boots, so this just doesn’t seem like a big issue to me. Indeed, I’m looking forward to using my custom fitted Scarpas and Dynafits for colder winter days that involve foot chilling time on my snowmobile or doing cabin work here in Colorado. For those of you wondering about my final choice in boots, I did go with the Scarpa Spirit 3s as I couldn’t get enough volume in the toe area of my Dynafit Green Machines, as well as having some durability concerns about the ‘Machines.
Tents – We’re super happy with how our Hillbergs performed, and have covered that in other posts. I’ll say here that the wind performance of these tents is incredible, and their weight totally within reason.
Weather – It will define your trip, as it did ours. We had high hopes to do a number of ski descents, but storms and avalanche danger limited our window for a safe summit descent to ONE day once we were in position and acclimated.
A few other groups managed to squeak in a summit during short windows a few days previous to that, but this was usually done by taking more altitude and exposure risk than our instincts indicated as prudent, or else the group was a few days ahead of us in acclimation.
As a result there was some angst in our group at one point, as we sat down at 14,200 feet and heard about the occasional successful summit bid. Key was getting good weather reports. The NOAA weather the Park Service repeats every day over FRS radio was useful, but a custom weather report from Colorado Powder Forecast was the key to our safe success at skiing from the summit. If you head up there with more than the usual foot slog to the summit in you plans, and need astute weather forecasting, contact Colorado Powder Forecast and arrange for some custom forecasting to be texted to your satphone or emailed to you if you’re set up for that.
I should mention that if all our group members had had previous experience with altitude and arctic mountaineering, I would have been more comfortable with some of us pushing for a summit day with less acclimation and worse weather. But we had to keep our wits about us and realize that most of our group, while strong, had little to no experience with arctic mountaineering at 20,000 feet. Thus, I’m proud of the restraint and judgment the WildSnow boys practiced up there, as all seven of us did get to ski from the summit, and we came back healthy without even a severe sunburn. In my view that is exceptional for an unguided and relatively inexperienced crew who got some average to worse than average weather.
Social – Be sure to meet the rangers at 14,200 foot camp, they have a wealth of knowledge. Socialize as much as time allows, you’ll meet lots of interesting people on this popular route!
WildSnow.com publisher emeritus and founder Lou (Louis Dawson) has a 50+ years career in climbing, backcountry skiing and ski mountaineering. He was the first person in history to ski down all 54 Colorado 14,000-foot peaks, has authored numerous books about about backcountry skiing, and has skied from the summit of Denali in Alaska, North America’s highest mountain.

