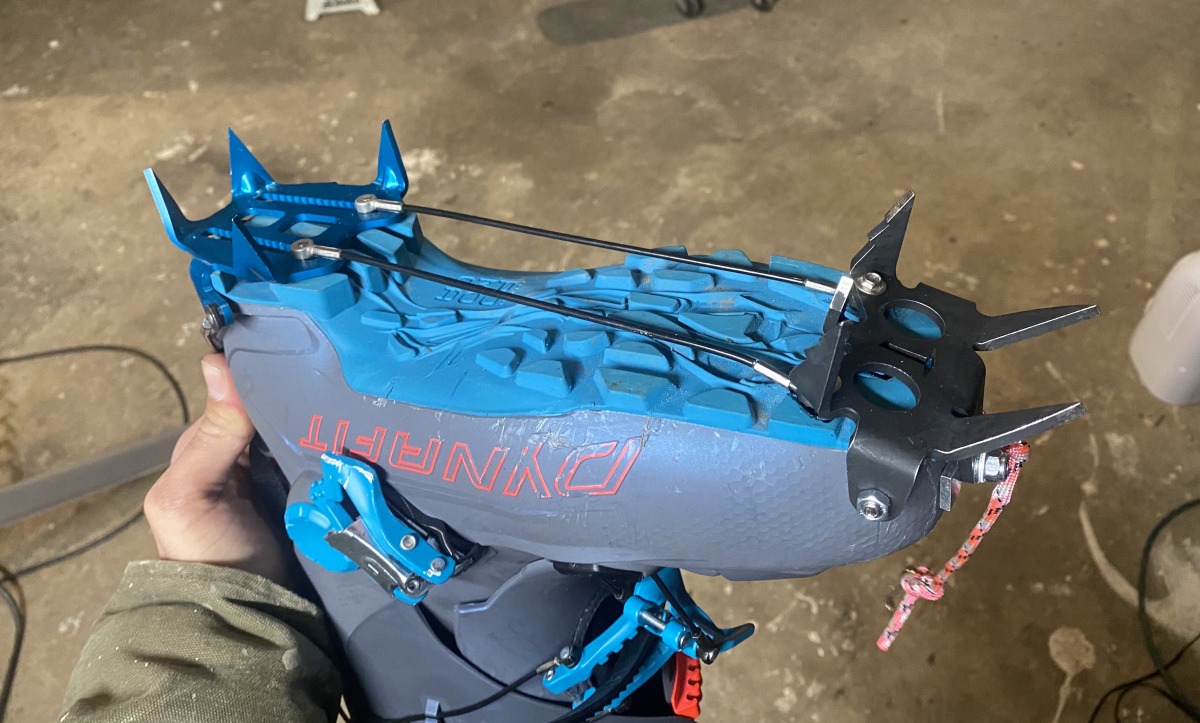
The Frankenpon, ready to be let out of the house.
Got some free time? Make crampons out of crampons
I’ve got a long list of “mods” floating around in my head. Under normal circumstances they mostly stay in my head, with other, more important things (skiing) taking up my time. I may be a gear nerd, but I still like skiing more than messing with my skis on the workbench.
Now, with Washington state under a “stay at home, stay healthy” order, I don’t have much else to do other than fiddle with things, so I’ve been clearing out the ol’ modification backlog. Today’s theme was “pointy feet things”…no, not stilettos (things haven’t gotten that weird yet) — crampons!
Earlier this year Yulia got a pair of Hoji Pro Tour W boots, along with some Dynafit “Cramp-in” crampons. The boots have gotten lots of use, but not the crampons. However, at this rate the next time we get out into the mountains, it might be spring…or maybe summer, so crampons will be useful. Initially we looked at installing the Cramp-in mount on the ski boot, and using them in the way that Dynafit intended. This requires removing some rubber and drilling two sizable holes through the boot sole, to attach the crampon adapter. After a look at these instructions, I realized following the rules wouldn’t be any fun. Time to make things a bit more interesting.
Mod #1: Cramp-in + Techpon = Frankenpon
Besides being interesting and fun, there’s a few more practical reasons we decided to create something different. The Cramp-in setup leaves a bit to be desired, specifically:
— The Cramp-in is lightweight aluminum. Aluminum works for some things, but there’s just something about cold, hard steel when it comes to sticking pointy things into rock and ice. Steel crampons are more durable, reliable and simply work better if you find yourself gettin’ gnarly.
— The installation requires drilling two sizable holes in the boot sole, and lugging around a HEAVY 30 gram chunk of metal on the bottom of the boot.
— The Cramp-in isn’t compatible with any other ski boot.
So we began the search for a better way. First we considered using Tech Crampon 250’s (Techpons) instead (a personal favorite, reviewed here). However the lack of a heel is a bit of a disadvantage for a general-use crampon. That’s when the lightbulb struck: combine the Techpon with the Cramp-in, creating the ultimate Frankenpon!
The actual process was surprisingly easy. Yulia’s boots are size 25 (BSL 281), which just so happened to fit the Cramp-in/Techpon combo (Cramp-tech?) perfectly. A BSL even a few millimeters larger wouldn’t work without further modifications. We drilled holes in the Techpon to fit the cable from the Cramp-in and screwed it all together. We did have to carve a bit of rubber off the sole to accommodate the screw-heads; the most time consuming part of the project. The resulting Cramp-tech is pretty rad and offers a few advantages over the Cramp-in:
— Heavy duty steel front-points (the steel of the Techpon is pretty thick compared to many lighter weight steel crampons, more comparable to a heavier duty ice-climbing crampon).
— The toe will stay attached even if the heel bail comes off.
— For even lighter, faster (is that even possible?) missions, the heel can be left at home; the Techpon still works on its own.
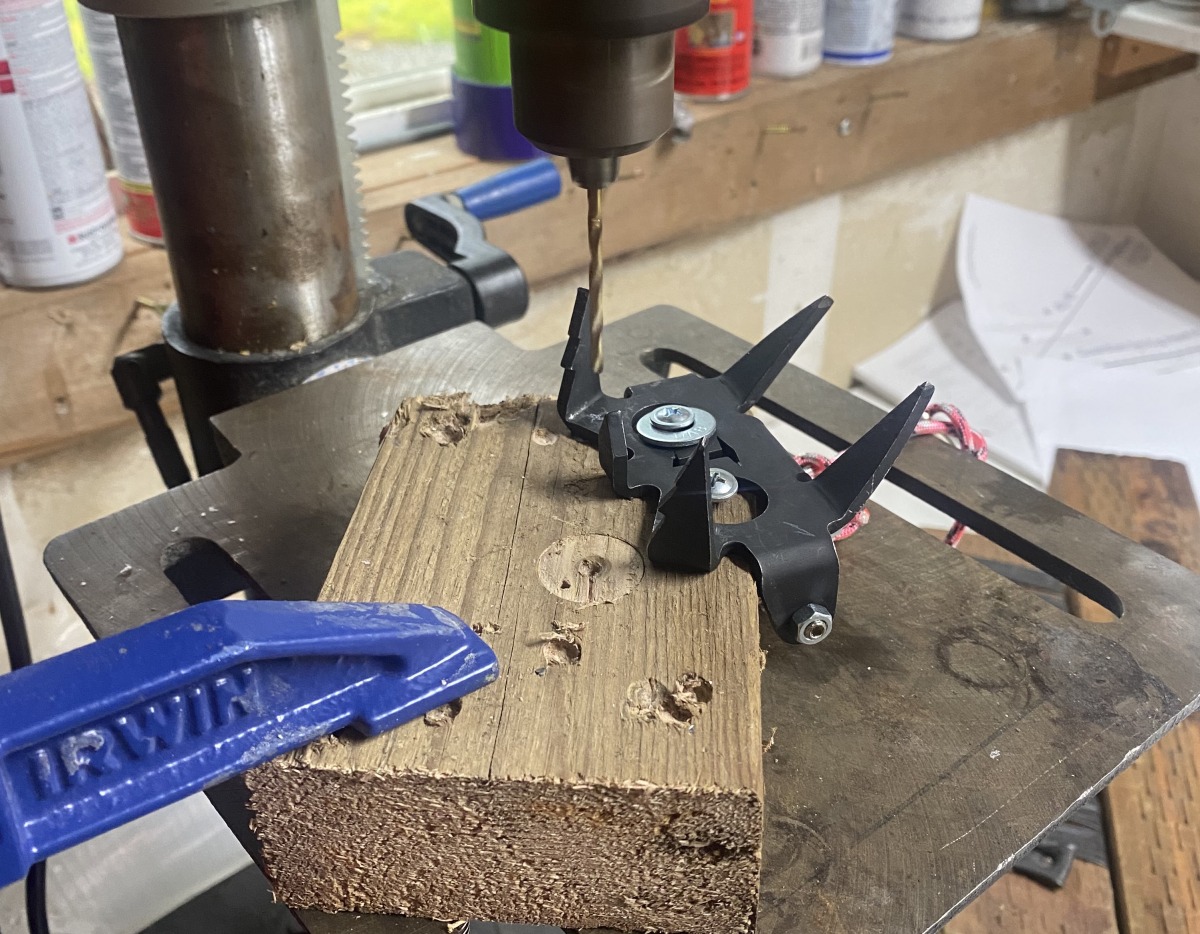
The only irreversible change to the crampons was drilling two 9/64’’ holes to fit the Cramp-in screws. These holes are small enough I don’t think they’ll affect the strength of the crampons.
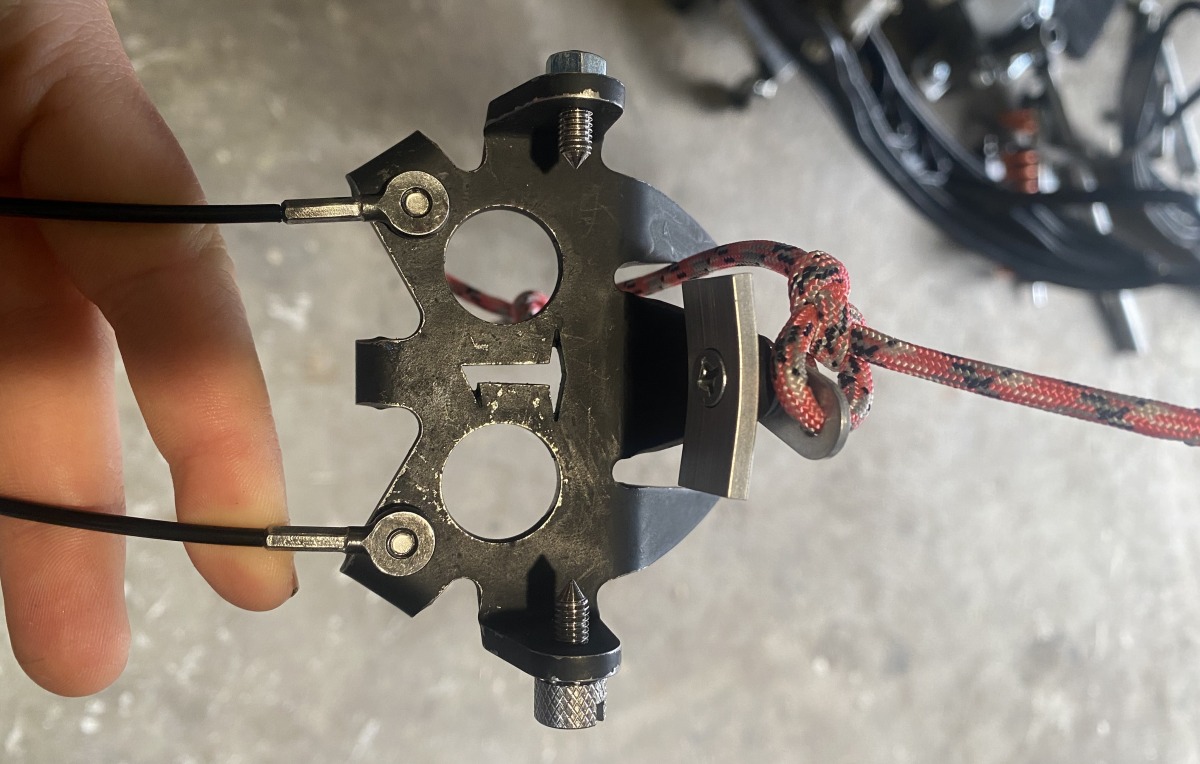
Cramp-in cables attached to the Techpon.
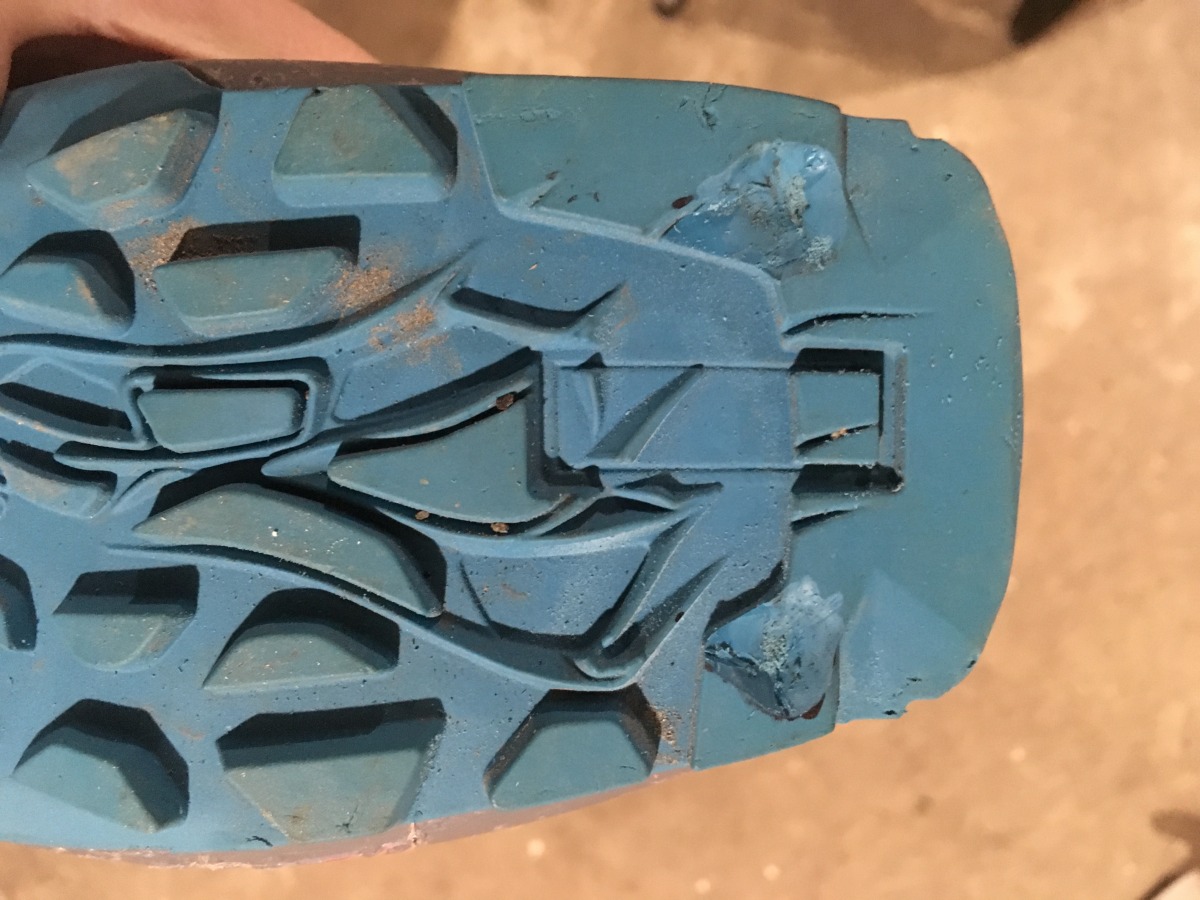
We had to remove a bit of rubber from the boot sole to accommodate the cable attachment points. Before doing this the cables stuck out quite a bit, and they looked like they would be easily damaged. After making these two ~3mm deep divots, they fit much better.
It’s surprisingly light at 220 grams. That’s lighter than Petzl’s Irvis Hybrid which also has a steel toe and aluminum heel, at 270 grams, but heavier than Camp’s skimo nanotech (only has steel reinforced front points, rather than a full steel toe), at 187.5 grams. I suspect that it will climb better than either of those options as well, owing to the heavy-duty steel toe.
But, there are a few disadvantages too:
— It’s heavier (ugh) than the Cramp-in. The steel toe adds 58 grams to the 162 gram Cramp-in.
— It doesn’t have any sort of anti-balling plate; we’ll have to see if this warrants further modifying.
— Putting them on is a bit fiddly compared to the Cramp-in.
— If you don’t have the two “parents” already, it’s not a cheap setup ($199 for the Cramp-in, and $119 for the Techpon).
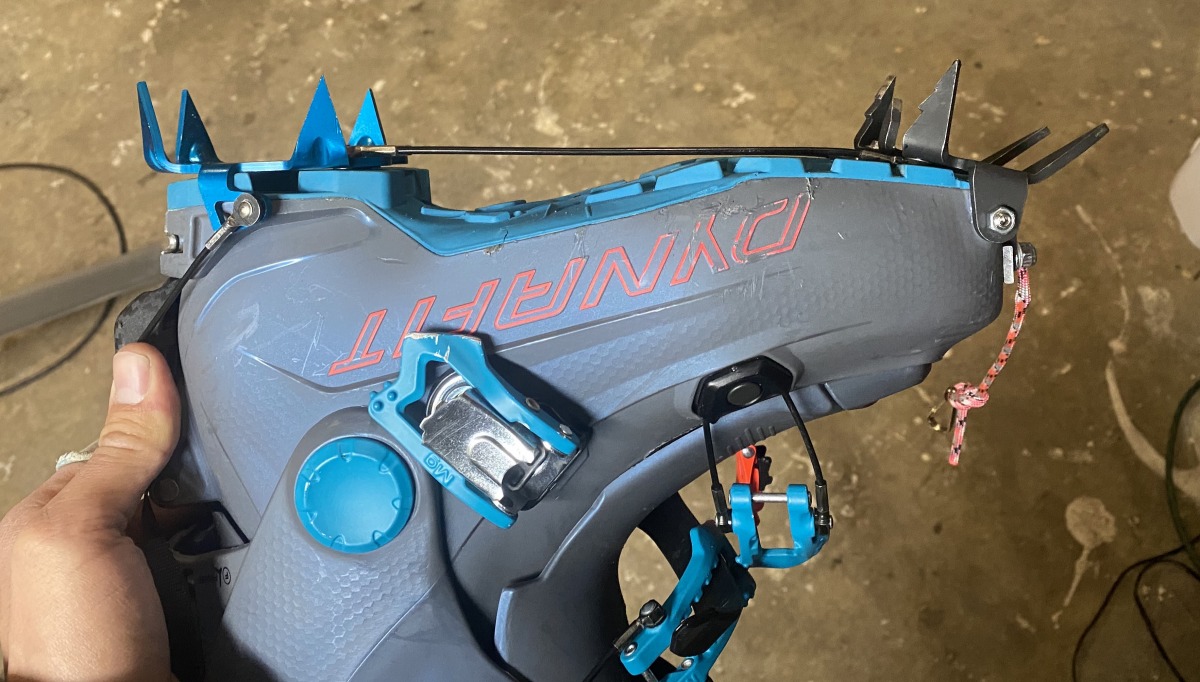
This photo shows how the cables lay fairly flat against the boot sole, this is after creating the divots in the boot rubber.
After patting myself on the back, I noticed the Cramp-in toes looking a bit forlorn and abandoned on the workbench. Maybe they need a job, I thought. So I set about finding one.
Mod #2: Cramp-in toes + strap = alpine “almost crampon”
Over the years I’ve occasionally found myself on steep snow with running shoes; a misguided pairing if there ever was one. This is usually the result of skimping too much on my pack weight on a summer alpine climb. I’ve occasionally carried Yaktrax, which don’t work so well when a pitch gets sufficiently steep, and also traditional crampons, which are just a bit heavy and bulky. A job for the little Cramp-in toes? Perhaps.
I rigged up a simple strap system with some webbing, which seems to hold them securely on a running shoe or mountaineering boot. I’ll have to get myself into some silly situations this summer to try them out. They are super light, only 76 grams. I think they’ll be perfect as an “almost crampon” — slightly more secure than Yaktrax, but much lighter and more compact than a traditional crampon.
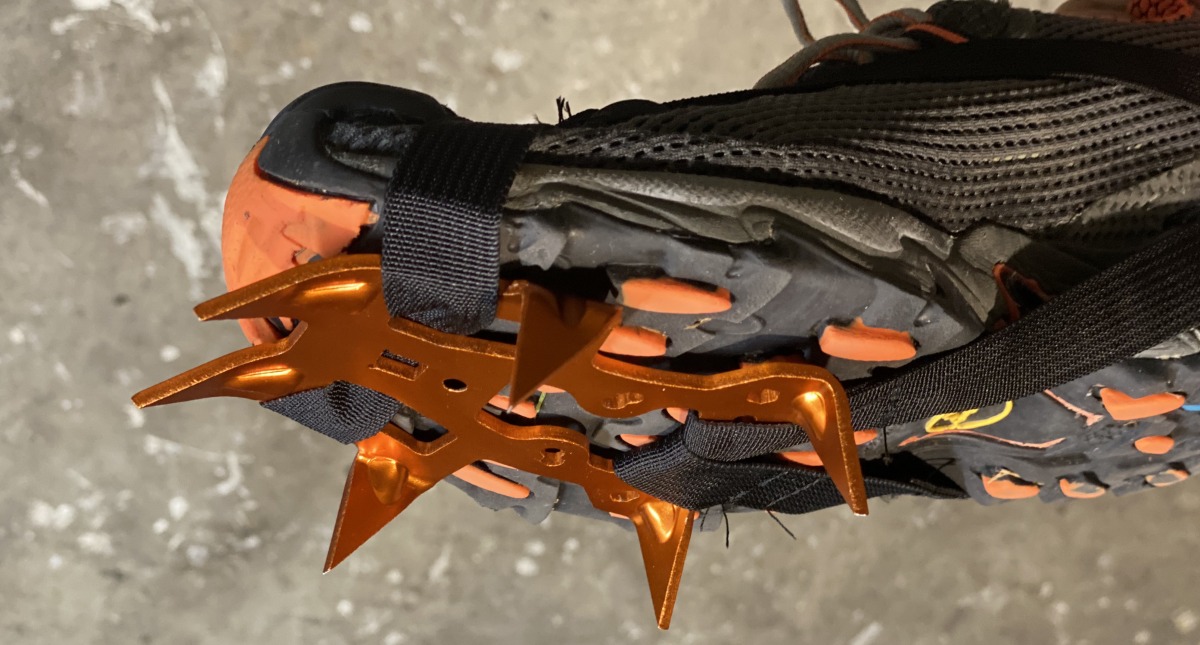
The Cramp-in toe gets used too! This little toe crampon might be perfect for fast and light summer alpine climbs.
After a few hours in the garage, I had finally succeeded in turning two sets of crampons into…two sets of crampons! The day wasn’t over yet, and I still didn’t have anything better to do. The only answer? Modify more crampons.
Mod #3: Make old crampons new(ish), and lighter
I have a pair of ancient aluminum/steel hybrid crampons that I cobbled together when I was a teenager. In fact, I believe they were my first pair. They helped me stay attached to the snow on many fun summits during my early years, but I haven’t used them much recently. They aren’t really much lighter, and are actually more bulky, than my full steel ‘pons (Petzl Irvis, an excellent light steel option, review here). If I could make them a bit lighter, then they might fill a nice niche in my pointy quiver.
A recent trend in ultralight crampons is replacing the steel linking bars with lightweight cord or webbing (usually Dyneema). When this idea first came out a few years ago, I was skeptical of the cord’s durability. Although I haven’t used any myself, I haven’t heard of issues. They’re also are still being sold, so they must hold up ok.
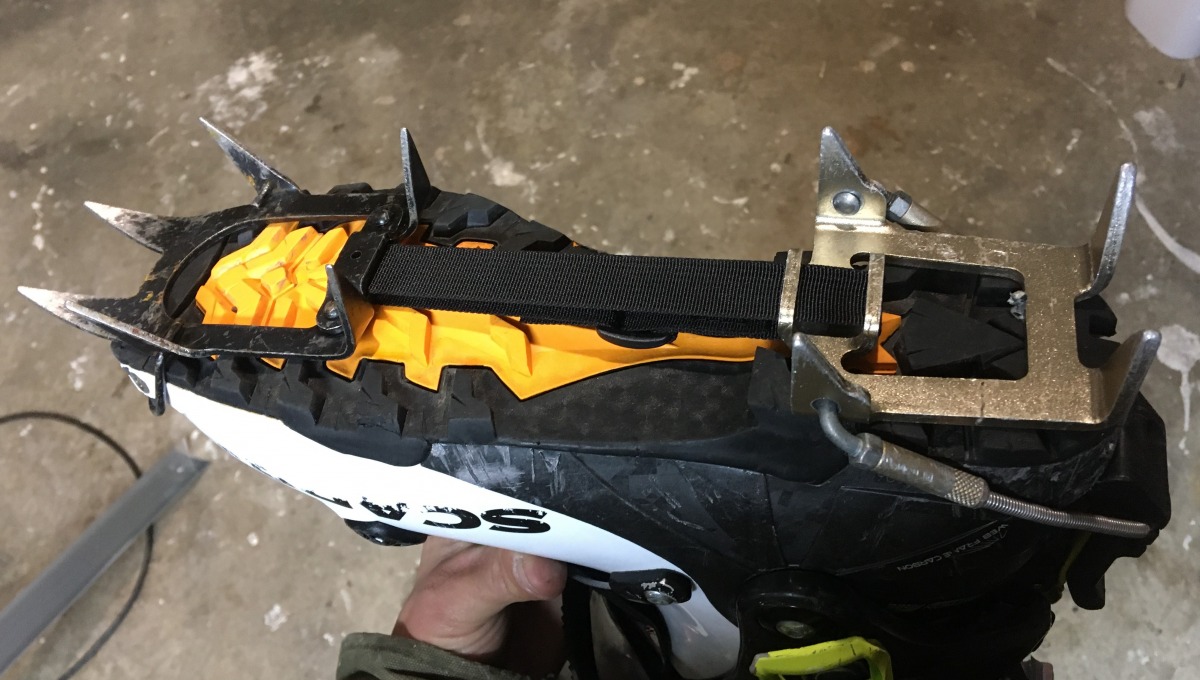
Modified ultralight crampon with nylon webbing replacing the old aluminum linking bar.
Inspired by the above, I removed the aluminum linking bar from my old crampons, and replaced it with nylon webbing. I unfortunately don’t have any dyneema webbing, but I suspect the “ordinary” nylon webbing will work. Dynema adds tensile strength, and is great for marketing but doesn’t do much for wear resistance. I’ll keep an eye on the nylon and if it starts to show some wear, I’ll try something else.
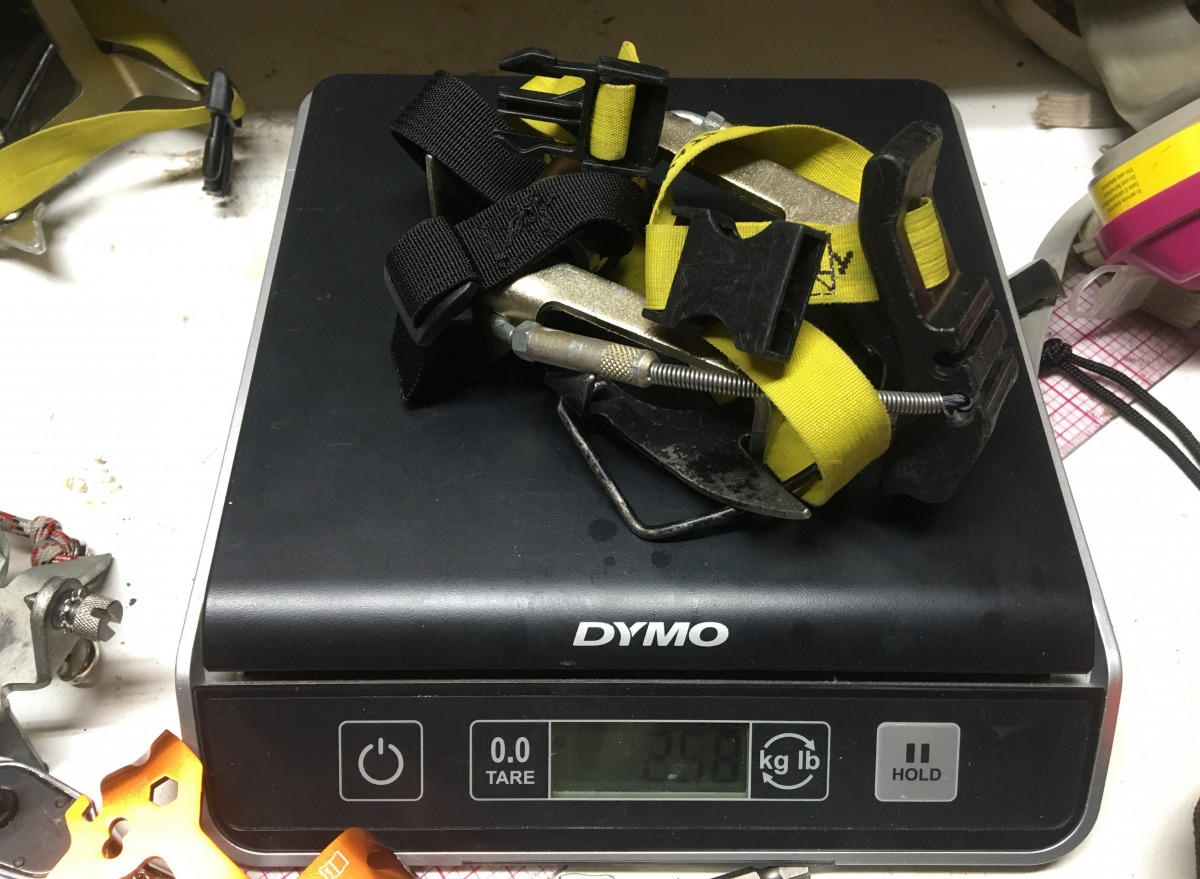
They pack up nice and small, and only weigh 258 grams. In the future I might shave a few more grams by replacing the safety strap with something lighter, and maybe the heel bail as well.
This simple mod reduced the weight from 300to 258 grams, and made the crampons much more packable. I think they’ll make a perfect lightweight option for days when the frontpoint-only Techpon isn’t enough, but I still want to save some weight and don’t expect to encounter too much intense climbing. I think one of the less technical Rainier routes would be the perfect use-case. Maybe we’ll be allowed up there before it’s too late to ski this summer? Only time will tell.
Well, that wraps up that project. Managed to fill almost an entire day! I wonder how I’ll fill the rest? I’ve been thinking of drilling tip and tail holes in all of the 17 pairs of skis in our house. That should eat up a few hours, right?
Louie Dawson earned his Bachelor Degree in Industrial Design from Western Washington University in 2014. When he’s not skiing Mount Baker or somewhere equally as snowy, he’s thinking about new products to make ski mountaineering more fun and safe.
