In the boot fitting trade, it’s sometimes necessary to remove a ski boot cuff rivet fastener. For example, while working on canting issues or replacing rivets with better friction-free alternatives. Sometimes a boot maker is enlightened to the 7 paths of how to build a perfect ski boot, and the cuff fasteners are threaded. But most have not achieved the 7th level and still smush a permanent aluminum rivet as they’ve been doing for half a century. I’ve always hacked out the old-style cuff rives by using various tool abuse. This has not been pretty and I’ve ruined a few shells. But I mended my ways, and over past years I’ve learned various methods that work. (For DIY rivet replacement methods, see linkage at bottom of this post.)
When we’ve taken boot fitter certification classes from Masterfit, the method shown was to simply grind the fastener out from the inside using a large diameter burr on a flexible shaft. Tooling for that is not particularly challenging, the process is time consuming and friction heat is a problem — though it is indeed the simplest solution. I’ve thus been inspired to improve my approach to this. Lots of options, check it all out.
Method 1, large orb grinder and brute force:
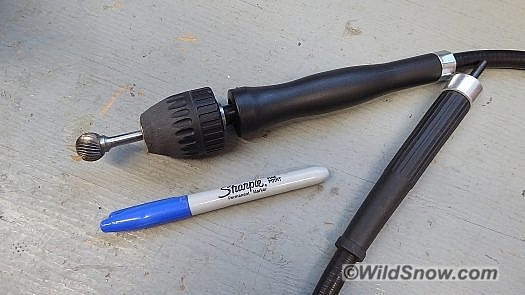
Flex shaft with burr, standard method of removing cuff rivets. A larger burr and streamlined shaft handle and chuck make reaching inside the boot easier, I use this larger more klugy combo because it’s lower cost — though I did grind plastic off the chuck for better clearance. I rig up a smaller air-powered die grinder if I need to reach farther into the boot. Boot fitters who work on alpine boots, especially race “plug” boots, do quite a bit of shell plastic grinding, sometimes in the hard to reach toe area of the boot. Grinding ski touring boot plastic is generally avoided, making a compact grinder less important. Shopping links at bottom of post.
Method 2, drill from inside:
I’ve recently refined my process to create less heat and be more precise, here is my latest, works well. Despite the number of steps, once you get this wired it takes mere minutes.
First steps are center drilling the rivet from the outside, and securing from rotation.
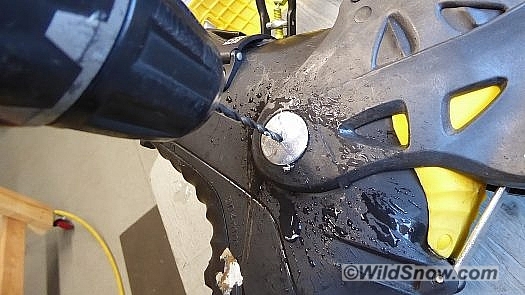
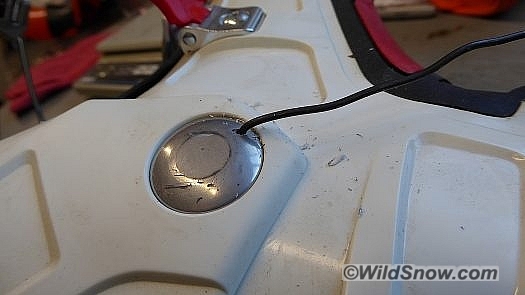
First step, drill through rivet with small diameter (sharp) bit, determine exact center and center-punch before drilling.
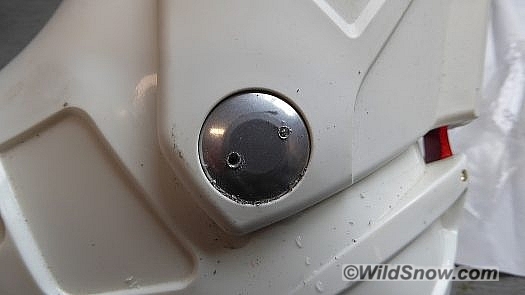
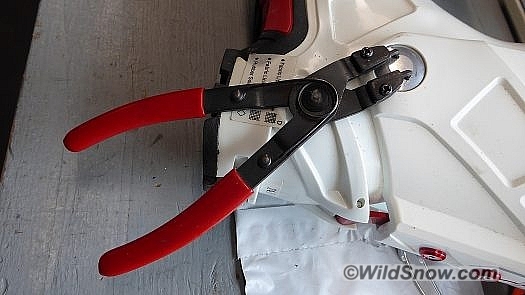
Also drill a couple of small holes off center, to anchor your circlip pliers. This is one of many methods to prevent rotation while drilling from the inside. Sometimes a tight rivet and duct tape on the outside are enough.
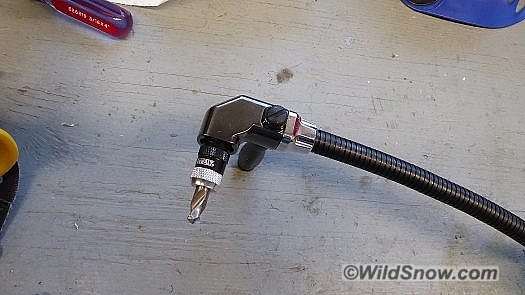
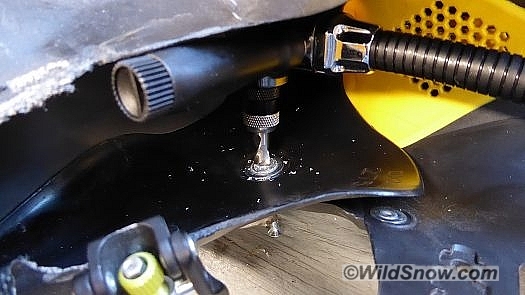
Next, from the inside of the boot I drill out the rivet with a right angle drill on flexible shaft, using a sharp 5/16 inch stubby bit. I’m using a DeWalt # DWARAFS-Z right angle flex shaft with stubby bits from Milescraft, #2320. The DeWalt shaft only takes hex type bits so it’s a bit limited, but very small and compact compared to a drill chuck type shaft. This step is fast, as you only need to drill down a quarter inch or so.
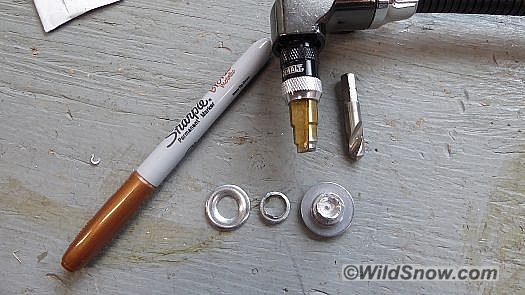
My best kept secret it out. This step bit (see shopping links below) is cut off to just below 10mm diameter cutter. You pop this into your flex shaft and finish off that stubborn rivet in about thirty seconds.
Method 3, do all drilling from outside (probably best DIY method for standard home shop tools).
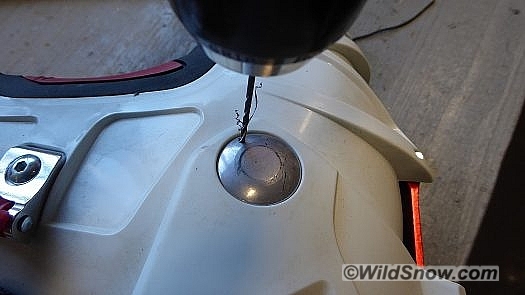
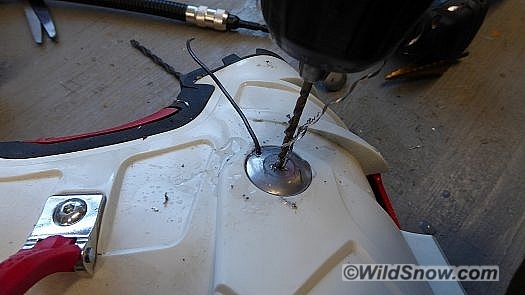
First step with the exterior drilling method, bore 1/16″ hole near edge of rivet head, through rivet into boot plastic. Hole location shown in photo is probably not ideal, better on the side of rivet closer to top of boot, so you’re not making a hole down where plastic around rivet is thinnest. Don’t obsess on making this additional hole, think about it, ski boots are already full of holes and they survive. Boot plastic is strong. But if desired you can use one of the less invasive anti-rotation methods detailed below. This drill and wire method is easy and fast. Cool this and steps below with periodic water spray.
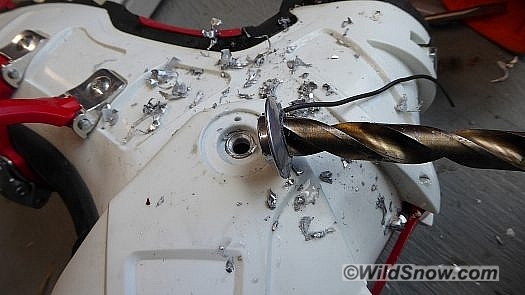
If this is your first rivet removal with a particular brand-model, you don’t know the size of the rivet and corrispondng hole in boot shoe (scaffo), some holes-rivets are small, some go to 10 or 11 mm. Thus, start your bore with a 24/64 inch (9 mm) bit , go slow with frequent inspections to be sure you’re not getting into the boot plastic, once you’re deep, pry sideways occasionally, eventually the rivet head will easily pop off (as shown)– if your bit is big enough. If you go all the way through and the rivet doesn’t destruct, bump up to 27/64 inch (~10.5 mm) bit and resume bore, the larger bit will cut in fast so be careful in case it hits plastic.
Notes: For the basic method of grinding down the rivet, you can buy large carbide orb burrs but they’re pricey. The Kutzall seems to work well (see links below) though too much steel contact will diminish life as it’s designed for wood working. With new condition boots, take care not to make tool marks while prying cuff from shell if you need to pop a stubborn rivet. As always this is an evolving system here at WildSnow Labs. Amazon links follow.
Milescraft 2320 Metal Stubby Drill Bit Set
DEWALT Right Angle Flex Shaft, USES HEX SHAFT BITS
For the simpler alternative, just hook up the following carbide burr to a rotary grinder or flex shaft, use plenty of cooling water, and have it it.
uxcell 5/8-inch Head 6mm Shank Tungsten Carbide Ball Shaped Rotary File Grinding Bit Tool
Enkay 115-C Flex Shaft with 1/4-Inch Chuck, Carded
The following $25 die grinder probably won’t support a full time metal worker, but for occasional DIY work it’s hard to pass on. It fits nicely inside ski boot for grinding the cuff rivets, but is too large for any other internal boot work. I use my die grinders quite a bit for more than ski boot work, so I got one of these for light duty use when I don’t want to fire up the air compressor.
Omni High Speed 25,000 RPM 1/4 Inch Electric Die Grinder w Carbon Brushes – Red
Optional anti rotation method: After you drill a pilot hole all the way through rivet, drill about 3/16″ deep with 5/32 bit. Once threaded to 10/24, this 5/32 hole allows an inserted bolt to bottom out and lock from rotation.
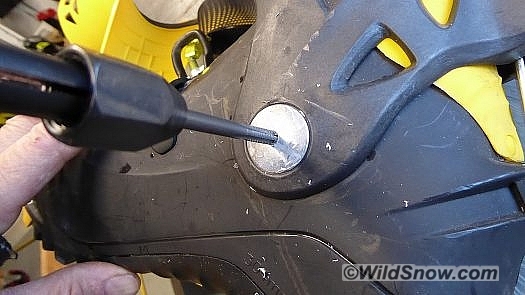
Tap resulting hole for 10/24 machine screw or bolt. Again, this is a fairly shallow hole that causes the fastener to bottom out.
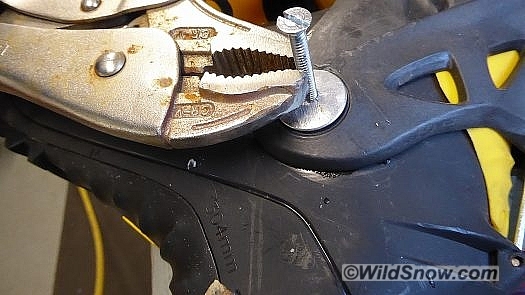
Thread in a 10/24 fastener and grab it with locking pliers. Place in bench vise or have assistant hold the pliers while you work drilling from the inside.
Overall Tips
— Go slow, use copious water from spray bottle. Overheating the rivet and damaging boot is easily done.
— All cutting tools must be sharp, otherwise inordinate friction makes excessive heat. For cutting aluminum, cheap, newly sharp bits from big-box store work well.
— If you do this with minimal DIY tooling such as simply drilling the rivet from exterior, key is preventing rotation of the rivet and is challenging. Use any of the methods above.
— A vacuum cleaner works well for clearing aluminum chips from inside boot.
— If you’re tooled up for doing so, re-pressing a loose rivet before you begin can make everything easier. Pressing rivets is more difficult than one would assume.
Need to replace a ski boot fastener as do-it-yourself DIY? We’ve got lots of posts about doing cuff rivets with more coming.
WildSnow.com publisher emeritus and founder Lou (Louis Dawson) has a 50+ years career in climbing, backcountry skiing and ski mountaineering. He was the first person in history to ski down all 54 Colorado 14,000-foot peaks, has authored numerous books about about backcountry skiing, and has skied from the summit of Denali in Alaska, North America’s highest mountain.

