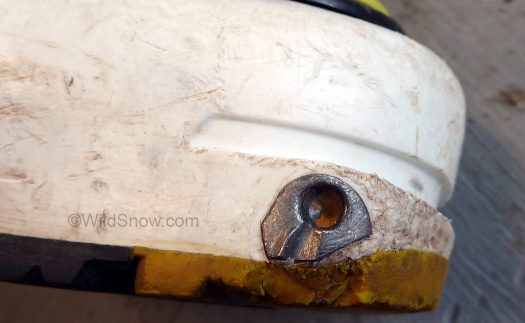
What is an “insert?”
In the case of tech ski touring bindings, what we call “inserts” are a set of two steel parts built into the boot, one in the toe and another at the heel. Even as these are built into the boot, it is crucial to understand that the inserts are part of the binding. The quality of the insert is as crucial to the binding as any other part of the system, and has an enormous effect on binding retention and release.
Note from WildSnow.com: The original copy and images for this sponsored post were provided by Dynafit, written by Matthieu Fritsch. Lou Dawson did a heavy re-write that involved researching lost wax casting and clarifying the process in English. WildSnow.com maintains 100% editorial control of these posts. We enjoyed working on this and hope we can do more technical manufacturing posts related to specific ski touring gear. Interesting stuff.
While “tech” bindings caught on slowly at first (they appeared tiny and fragile) the slow march to world domination was as inevitable as the rising sun. At a glance, a boot held in a ski binding by pins and inserts appears trivial. A set of holes in the front insert for the toe clamping system, a set of cut-outs in the heel of the boot to accept the heel pins — that’s it. But no.
 Here is the crux: Unlike an alpine binding system, where you get large boot/binding contact points on the sole, heel, and toe, tech inserts create the only contact surfaces between the boot and the binding. In other words, these are undergoing and transmitting all or most of the forces/stress from the skier’s boot to the binding and also transmitting the ski and binding’s response to the skier, whether you are skinning up or skiing down. The contact surfaces are incredibly small, just a few square millimeters at the toe, not much more at the heel. They’re tiny, but the inserts are subject to surprisingly large forces (up to 200kg on a regular basis, with peak loads around 380 kg, 840 lbs). These forces must be held simultaneously statically, dynamically and over a sometimes lengthy time span due to consumers owning and using boots for multiple seasons.
Thus, not only do the inserts need to be a strong steel alloy, firmly mounted in the boot, but they need excellent fatigue and corrosion resistance as well. Moreover, consideration has to be given to how much the insert wears during the pivoting action of ski touring, as opposed to placing the wear on the binding pins. Ideally, this involves the company making the binding to be the same as that making the fittings.
What are the inserts made out of?
The exact insert manufacturing details are a Dynafit secret recipe — the result of over 30 years working on the system. What can be said is both toe and heel inserts are made out of a complex steel alloy, and are then heat treated to reach the desired level of mechanical resistance and hardness before receiving a zinc based coating for better friction behaviour and also corrosion resistance. Top secret details aside, plenty can be shared about the overall process of lost wax casting used to make the fittings. Below, the casting process in detail.
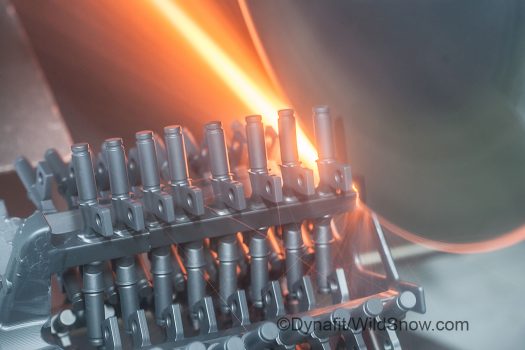
(Note from Lou: It appears only one of these photos shows actual binding parts, others are representative of the process and are “stock” photos from the manufacturing company. They’re good images that do a decent job showing the various steps of lost wax casting, so we’re happy to use them — though I wish I’d been there in the factory with my camera, dodging molten steel and living to blog about it.)
As with much manufacturing these days, the insert building process begins with a computer aided design. Once the insert’s digital 3D model is validated, a physical mold is made, which in turn is used to produce wax models of the inserts (in a process similar to plastic injection molding). In other words, you end up with wax versions of the inserts. These wax models are almost one-to-one in size, the same as the final part. This is where casting technique know-how comes in, as any hot handled material will shrink while cooling down, so getting the wax model’s dimensions right is part art and part science.
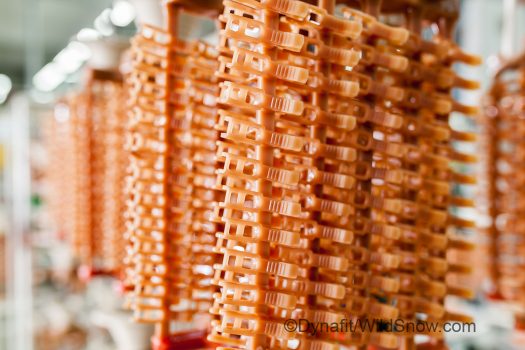
As the wax models are made they are attached to a “trunk” forming a “tree.” This allows many small parts to be cast in the same steps. Each model’s attachment to the tree will eventually form a channel for molten steel that’s poured into a funnel at the top of the tree. Pictured here, Dynafit binding “triggers.”
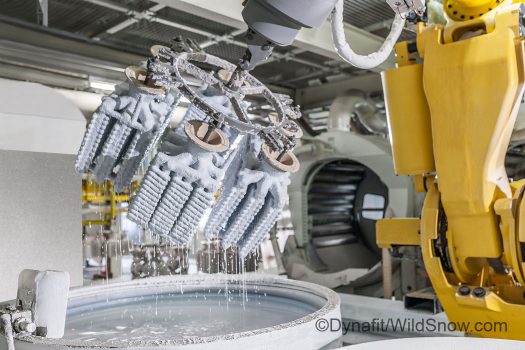
The “tree” is then coated in a liquid ceramic-type material that allows a special ceramic sand to stick to it. This is the step where the “real” casting mold is created. The process consists of repeating the same procedure of liquid/sand/liquid/sand. A rougher sand is used at each step. The finest sand is used first because this material defines the final surface roughness of the cast product.
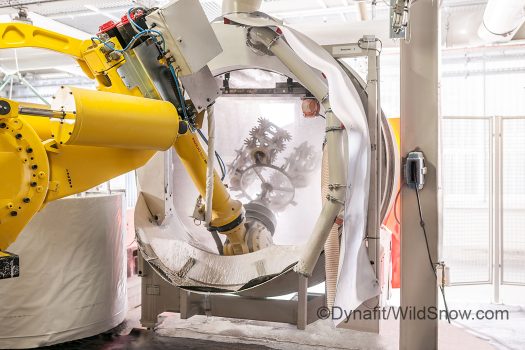
The sand coating part of the process, this is repeated several times, alternating with the liquid coating pictured above. Product molds shown here are apparently not Dynafit insert parts.
Once the ceramic sand coating is completed, a several hour drying period ensures that the mold reaches a sufficient mechanical resistance to handle the next steps. Continue reading, it gets dangerous now.
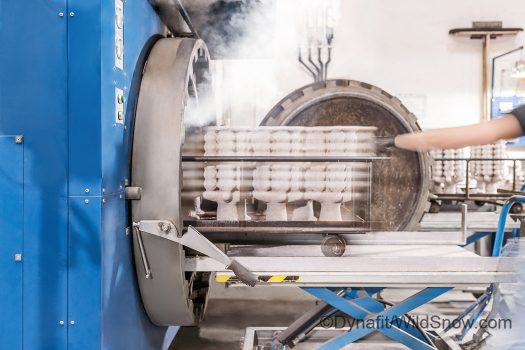
Once dry, the parts tree is placed into an autoclave oven. This completes drying the ceramic sand coating and melts the wax out. This is the birth of the casting mold: a hollow ceramic shell is the cast.
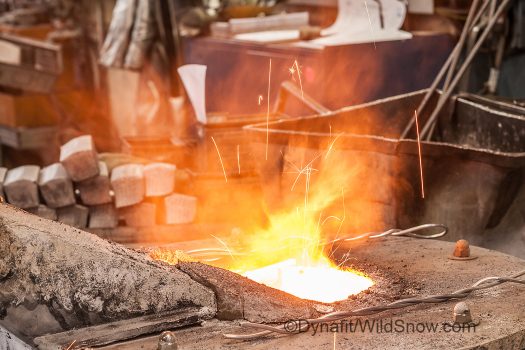
Now we are at the spectacular and most dangerous phase of the manufacturing: the casting. In the case of making Dynafit inserts or for that matter any other quality product, a special metal formulation is required. To create that, the specified amount of each base material is placed in the furnace to create liquid steel. The special sauce is then heated up to a specific temperature, ending up liquefied and pourable. This part of the process can involve other tweaks, for example sometimes a high temperature “resting” period is required to make sure the metallic mixture “base material” will form specific compounds. Overall, highly technical metallurgy, nothing less.
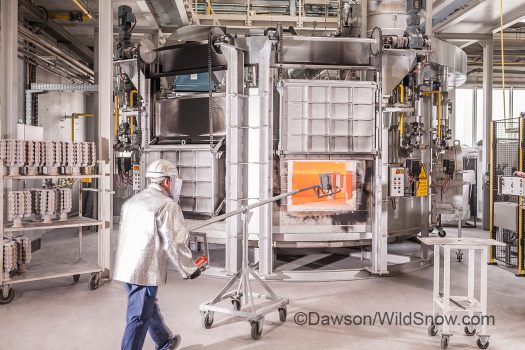
While the base metal is concocted and liquefied, the ceramic molds are placed in another furnace and heated to a similar temperature (900 to 1000°c) as the liquefied base metal. This is done to avoid thermal shock, as the liquid metal will be poured into the ceramic causing it to shatter if the temperatures are not equalized. This is another phase where an experienced manufacturing team is crucial. More, depending on the type of material behaviour desired, the temperature of the mold has a significant effect on how the liquid metal will start to cool down and harden. This will influence the cooling speed, thus the material structure. As you can imagine, in the case of ski boot tech inserts, this part of the process can make or break the necessary metallic performance in terms of wear and friction.
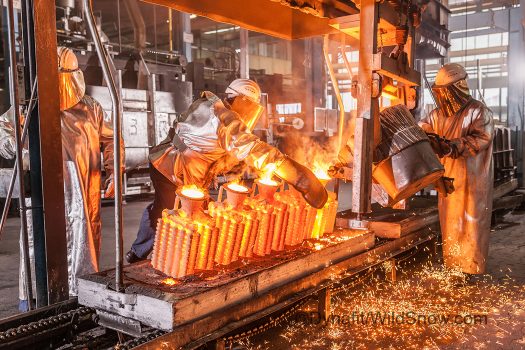
After the wax is lost and the molds are properly heated, they’re removed from the furnace in order to fill them with liquid metal. This “pouring” phase is done by hand and extremely dangerous. The liquid metal is at a temperature above 1100°C 2000°F. Don’t wear your trail running shoes.
After the pour, a cooling period is observed either in open atmosphere or under controlled conditions, depending on what is expected of the steel alloy.
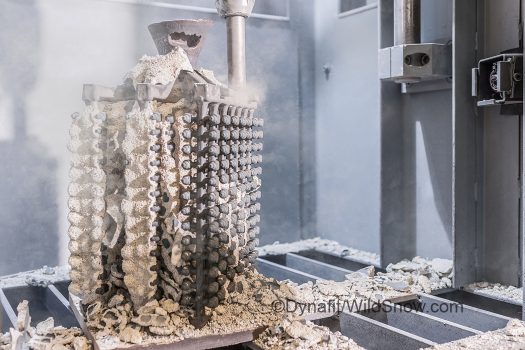
Once everything is cooled, the molds are vibrated in order to break the ceramic shells off the actual steel parts.
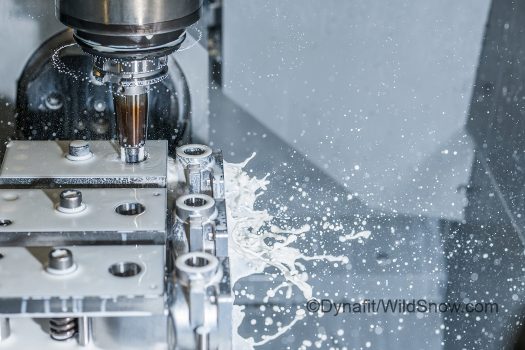
When required some surfaces can be either polished or milled in order to achieve a better surface finish (clearly not a boot insert shown here!)
After the finish work, quality control is done to ensure that the inserts are fulfilling the dimensional and chemical specifications. Furthermore, x-ray analysis is performed (on a statistical basis, not on every piece) to ensure that no microcracking occurred within the part structure during the cooling process. After this the inserts are sent out for heat treatment — an essential step that immensely increases their strength and resistance to friction wear. Final step, the inserts are zinc coated to provide good friction performance and protect from corrosion.
After zinc coating, a final automated 100% dimensional check is performed, and the inserts are sent out to the boot manufacturers. Most boot makers will also do their own quality control checks on the fittings, though generally not as extensive as the original manufacturer.
The challenges don’t end. Mounting the toe insert in the boot’s injection mold is difficult. The various boot makers are secretive about how they do this, the challenge is that in any plastic injection molding process, there are minimum size restraints on the areas you’re attempting to inject. Start adding things inside the injection mold, you can end up with trouble getting the plastic to fill the mold. Moreover, as noted above you’re trying to mold a small steel part into a small volume of plastic — and expect it to withstand large forces. Takeaway: Be appreciative of what you have on your feet when your tech fittings, bindings, and body are pumping along as one integrated unit, climbing mountains, and carving turns on the down.
Shop for backcountry ski touring boots and bindings.
While most of the WildSnow backcountry skiing blog posts are best attributed to a single author, some work well as done by the group.

