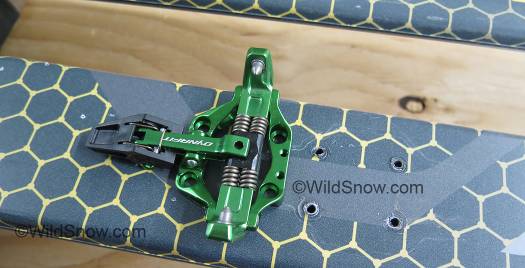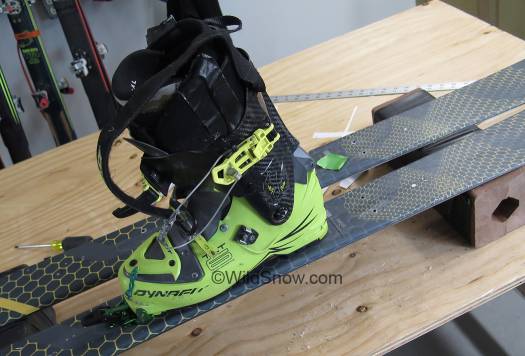
Ready, set, slow down. Superlite 2 ski touring binding has no fore/aft adjustment for boot sole length so mounting is a challenge for the DIY.
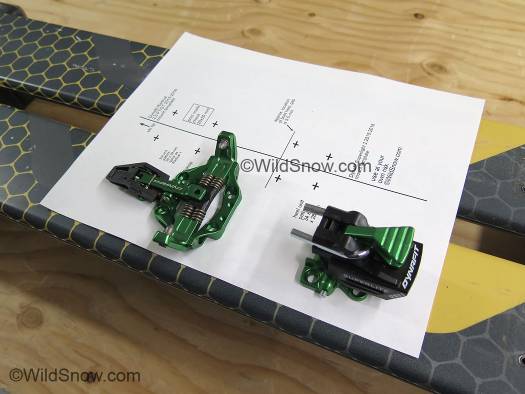
Keepin’ it real here, no template or jig easily available so we whipped one up. Superlite 2 paper template available here. (NOTE: During template improvements it may not be available for download.)
Trick with the Dynafit Superlite 2 is it has NO forward/back adjustment at the heel for boot length. Mounting needs to be done with more care than is normal for most of us. Steps are similar to our other binding mount instructions. Get the toe unit installed first, with boot nicely aligned and the screws glued/torqued. In this case our La Sportiva Svelte planks were already drilled for Dynafit Radical, so the toe unit holes matched up perfectly. After cleaning up the hole “volcanoes” and old glue I installed the Superlite toes — after drawing a fore-aft center line on each ski. (Note: it’s common when mounting bindings using mechanical jig to do the heel unit first, then use it for reference while centering the boot. We do the opposite here because we need the toe installed to figure out where the heel unit is located.)
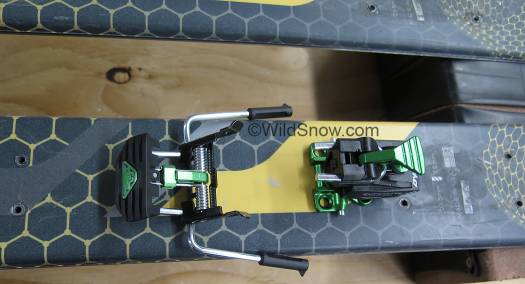
Superlite brake goes to a max of 80 mm so it won’t work on these 96 mm waisted skis. I’ve devised a way to widen the brakes; we’ll see if that gets done…
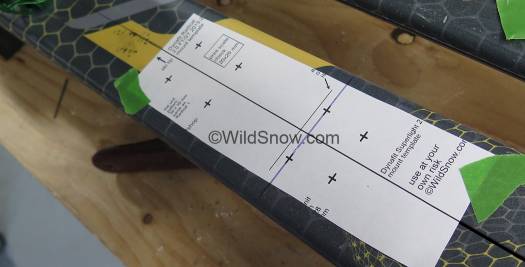
Template on ski, with hole positions matched up. It’s impossible to get this perfect, and the gap changes anyway when the ski flexes. In my opinion, so long as you’re within a millimeter you’re ok. I’m working on drawing thinner lines and taking my time, to help eliminate compound error.
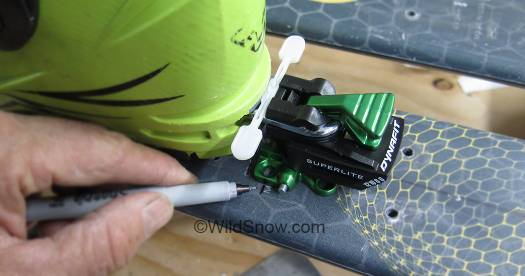
Marking fore-aft position of heel unit screws, this is tricky. If you use the supplied white plastic gauge know that the specification is 5.5 mm for the gap, but the gauge compresses! Instead, using 3 moderately worn American nickels gives you a nice 5.5 mm gap and is much more solid while you’re making marks. Just be sure you squeeze the binding up tight against the nickel stack.
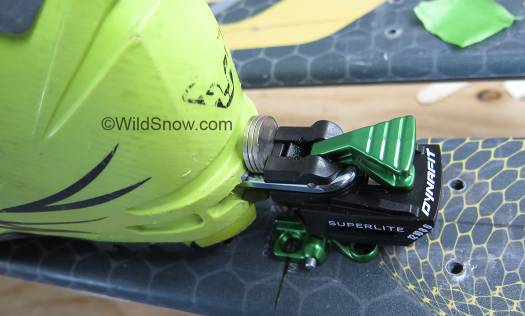
Using a nickel stack to set the gap during marking. Be sure everything is squeezed tightly together and the binding is set down solid and tight on the ski.
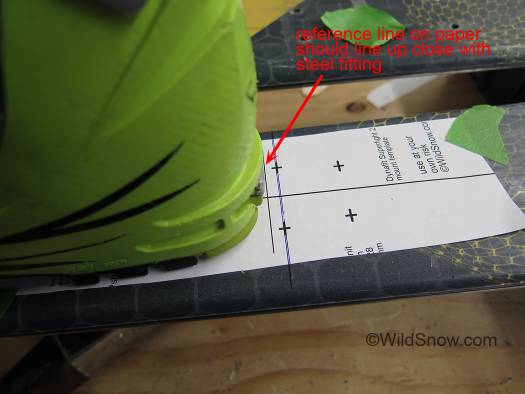
Position of paper is where your screw holes end up, so be careful. The template I made includes a line to reference the boot heel, but don’t depend on it entirely.
WildSnow.com publisher emeritus and founder Lou (Louis Dawson) has a 50+ years career in climbing, backcountry skiing and ski mountaineering. He was the first person in history to ski down all 54 Colorado 14,000-foot peaks, has authored numerous books about about backcountry skiing, and has skied from the summit of Denali in Alaska, North America’s highest mountain.

