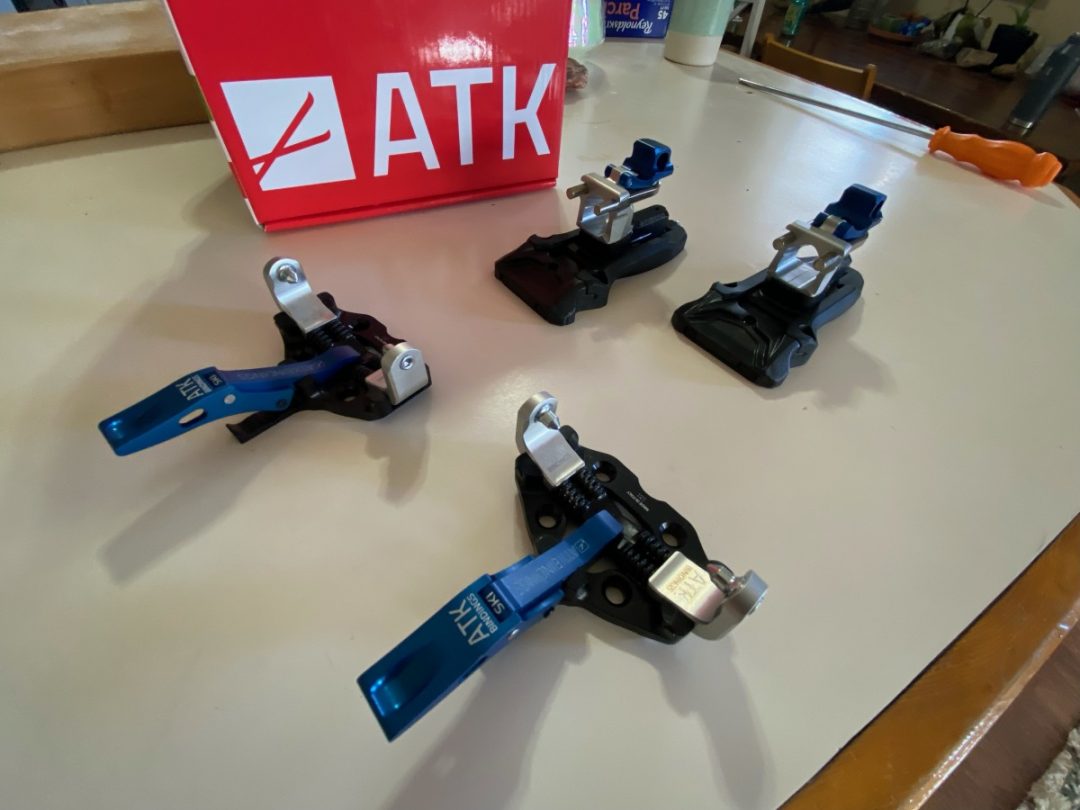
These ATK bindings sure are pretty. They would look better mounted up on a pair of skis: here’s a DIY how to.
The DIY ATK tech binding mount process can be done. Take a breath, read up, and practice several times on a 2″ X 4″. Here’s a many-steps process to help guide you along. Ok, easy peasy, mount those bindings. And thanks to Lou for all those DIY mounting tweaks over the years.
DIY tech binding mounts with a paper template is a time-honored leap of faith. We’re going to take a relatively simple yet slow approach to make this leap less of a cliff dive and more of a first-timer’s knee dive from the side of the pool. You don’t want to botch it, and we don’t want you to botch it. I hear you: you might be mounting carbon-infused $1400.00 powder boards.
When considering any mount, the most important properties of a screw hole are a “guide screw,” drilled perpendicular to the ski, and a screw drilled straight into the middle of the guide hole. Your local ski shop will have a jig with a drill guide to ensure straightness, but at home, it’s up to you to have a steady hand and the confidence to hold the drill bit perfectly perpendicular.
Take it slow, measure three times, and drill once. And read some of the resources linked in the how-to.
I’ve reduced my mounting procedure to two key steps. First, locate the factory-recommended boot mounting marks and draw a straight line connecting those two points. We’ll refer to this line as the boot mounting line. This line runs perpendicular to the length of the ski and will eventually be where you align the boot sole’s midpoint. The other critical macro step is marking the ski’s centerline. And as I’ve evolved in this process, I still use a paper template, but I use the binding heel and toe units as templates too.
A reduced DIY tech binding mounting recipe might go something like this:
1. Mark the boot center line on the ski.
2. Mark ski’s centerline.
3. Use the toe unit as a template.
4. Use the downloaded paper template to fine-tune the binding position.
5. Punch the hole center.
6. Mark holes, drill.
7. Add glue.
8. Screw the binding in place, making sure the toe and heel align.
Tools for the Job:
– Center punch or awl.
– Calipers or Slidewright centering tool.
– Metal edge ruler or yardstick.
– Appropriate drill bit and power drill.
– Appropriate epoxy. (Look for slower curing epoxy.)
– Paper template printed to scale.
Although this is oversimplified, sometimes it helps to pull back and see the big picture before we do, as Lou called it, “the moment of truth” and drill holes in your preciousness.
Let’s contemplate the anxiety here. It’s real. I recall my initial DIY mount using Lou’s process. I’m sure it took a total of six hours per ski. That’s on me, as I measured and marked each ski three times. Each time I readied to drill, I stopped and restarted the process. It ultimately worked.
There were no mess-ups until a few pairs ago; I mangled a DIY mount job on a pair of La Sportiva Vapor Sveltes. I recall that mount. While barely eyeballing and hastily marking the center line and hole pattern, I drilled away and ruined a fine winter morning and almost some spendy skis. A local shop did remedy the massacre. I then had a friend mount several pairs of skis, as I had a sensitive case of the tech-binding mounting yips. I’ve overcome the DIY yips, but I’ve learned my lesson; my approach is more tempered.
What Lou once wrote about this DIY project still applies, “The keys to success in home mounting bindings are careful measurement, moving slowly, and using the paper template and your boots as a substitute for the mechanical jig used by ski shops. Also, IMPORTANT: if you’re new to ski work, slow down and do a practice mount on a pair of dumpster skis or a 2×4.”
In fact, before committing this process to draft mode, I practiced numerous times on a 2″ x4″, taking notes each time as I progressed. I’m organizing this DIY mounting process using the major steps as headings, followed by a numerical list under each significant step, to clarify the procedure.
Helpful WildSnow links for DIY Binding Mounts:
7 Deadly Sins of Tech Binding Mounting.
Binding Mount Screw Length.
DIY: Mount Your Dynafit TLT, Comfort, Radical, Speed and Rotation bindings.
Backcountry Skiing Binding Mounting DIY How-To.
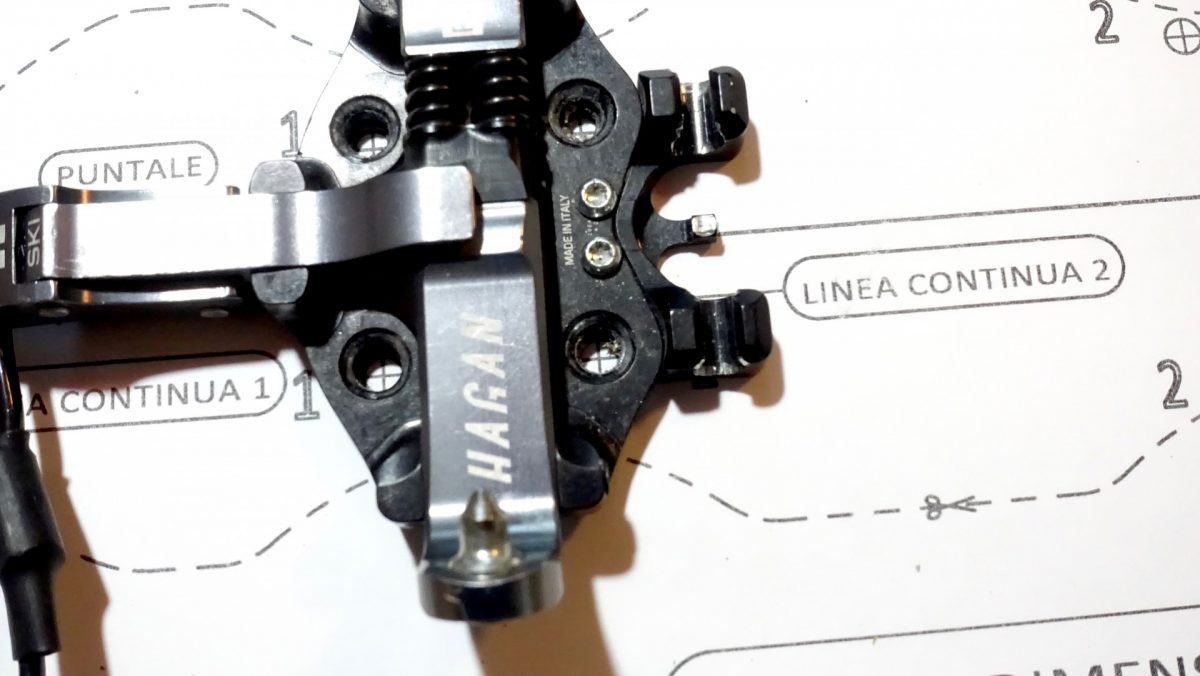
Make the sure the template is printed at the proper scale. And ensure the holes for the toe and binding units line up properly on the paper template.
The DIY Tech Binding Mount Process
Step One: Print Template.
1. Print out 2X paper templates for your specific binding. (As reminded in the comments below, using overhead projector plastic to print the template may be beneficial.)
2. This part is a must; confirm the template is to scale (1:1). Most templates print with a scale bar. By measuring the scale bar against a ruler, you can verify the scale is accurate.
3. Make sure the screw holes for the binding toe and heel unit align perfectly with the hole pattern on the paper template. The hole patterns must match up precisely.
4. Cut out the template and divide it into heel and toe pieces.

With tape placed down the center of the ski, the boot center line is marked with a straight edge.
Step Two: Mark Boot Mounting Line.
This step is a basic one that, if done properly, will set you up for success.
1. Most boots come with marks either on the boot sole or the side of the boot (on the shell), indicating the boot sole’s midpoint. I highlight the midpoints on the inner and outer sides of the boot with a fine sharpie. This boot sole midpoint mark aids my alignment process later on.
2. Next, locate the factory-recommended boot mounting marks on the ski. Draw a line using a straightedge and fine sharpie connecting those two points. (This line runs perpendicular to the ski’s length.)
3. Always reference the ski manufacture mounting website for the exact boot center line. It is pretty common these days for boot centerlines to be confusing or not marked on the ski at all. It is also increasingly common for this line to be off by a cm. or more on a single pair of skis. Use the manufacturer’s specs or average the two topsheet marks. Many skis can also now have up to seven different recommended marks. Aim for the one in the middle or, in our readers’ case, usually the one labeled touring or backcountry.
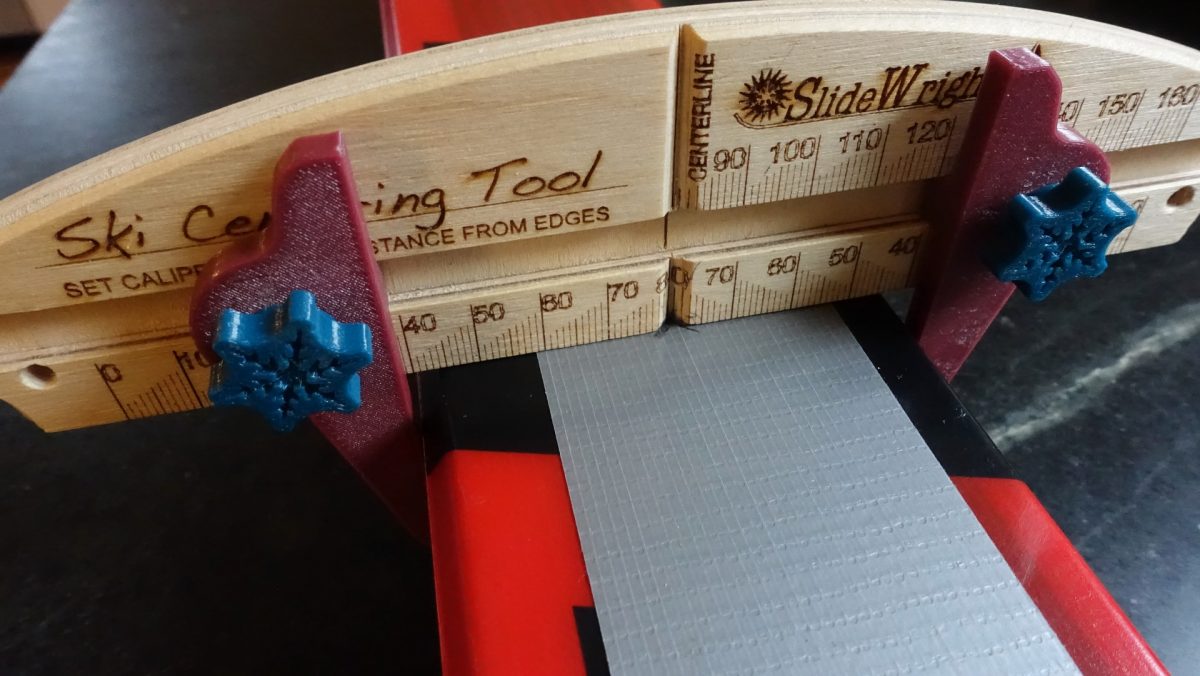
Using the SlideWright centering tool, the job of finding the counterpoints, and thus the centerline, is made easier.
Step Three: Mark the Ski’s Centerline.
With the right tools, in this case, a centering tool, ensuring the centerline is both straight and centered is a relatively simple task. If you are mounting your first set of tech bindings, this is a step to 100% practice on a 2″ x 4″. And if you need to make more frequent marks (see step 3 below) to lay down the centerline, that’s not such a bad idea.
1. For starters, I use a $35 Slidewright centering tool and caliper. This tool is a wooden/plastic caliper that assists in identifying a ski’s centerline.
2. Run a piece of masking or painter’s tape down the center of the ski in the binding mount zone. Eyeball the middle here and lay the tape down.
3. Using the centering tool/caliper, mark the center point of the ski in four spots. Have roughly eight inches between each mark. Then, using a straight edge — a yard or meter stick helps — mark the centerline by drawing a line through the four center marks. I like to extend the centerline roughly 2.5 feet in total. Extending the centerline line adds a visual guide beyond the toe and heel piece locations, respectively.
4. Take a breather here. Pull the masking/painter’s tape up and start over if you rushed this portion. It will be faster the second time. This step involves using the centering tool/calipers to measure edge to edge on the ski and marking the ski center.

Here we see the centerline and boot center marks located. Time to take a breath.
5. Here’s where I double-check my centerline. I cut a few strips of paper 1″ wide. Take the piece of paper, and wrap it tightly (without ripping it) over the ski edges. The metal edges will crease the paper. Then fold the paper in half, allowing the edge creases to meet. The fold marks the edge-crease to edge-crease middle point. Wrap the strip of paper over the ski, and the fold/middle mark on the strip should align perfectly with the centerline you’ve already drawn. Some DIYers do fine using paper strips alone to determine the ski’s centerline. It is doable.
6. Another basic tool to locate and mark the ski’s centerline is this template from Slidewright. It’s possible to use this template as is or glue it to the back of a ruler and use a modified centering tool minus the calipers.
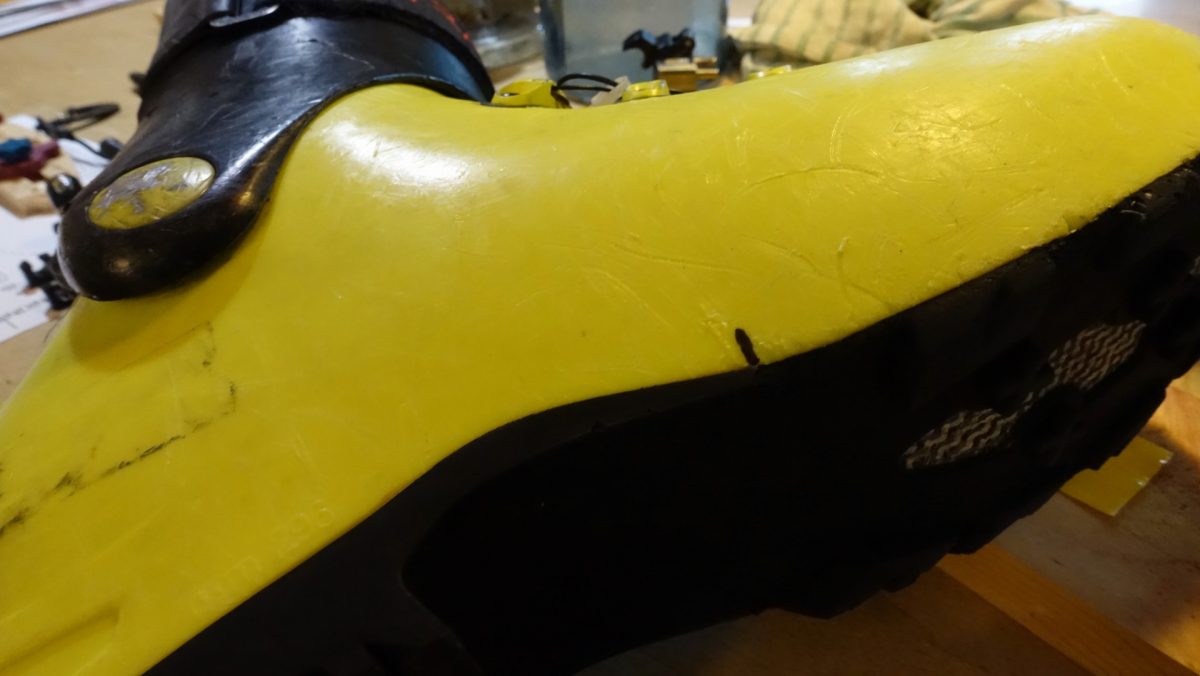
Mark the boot center on the boot shell early in the process.
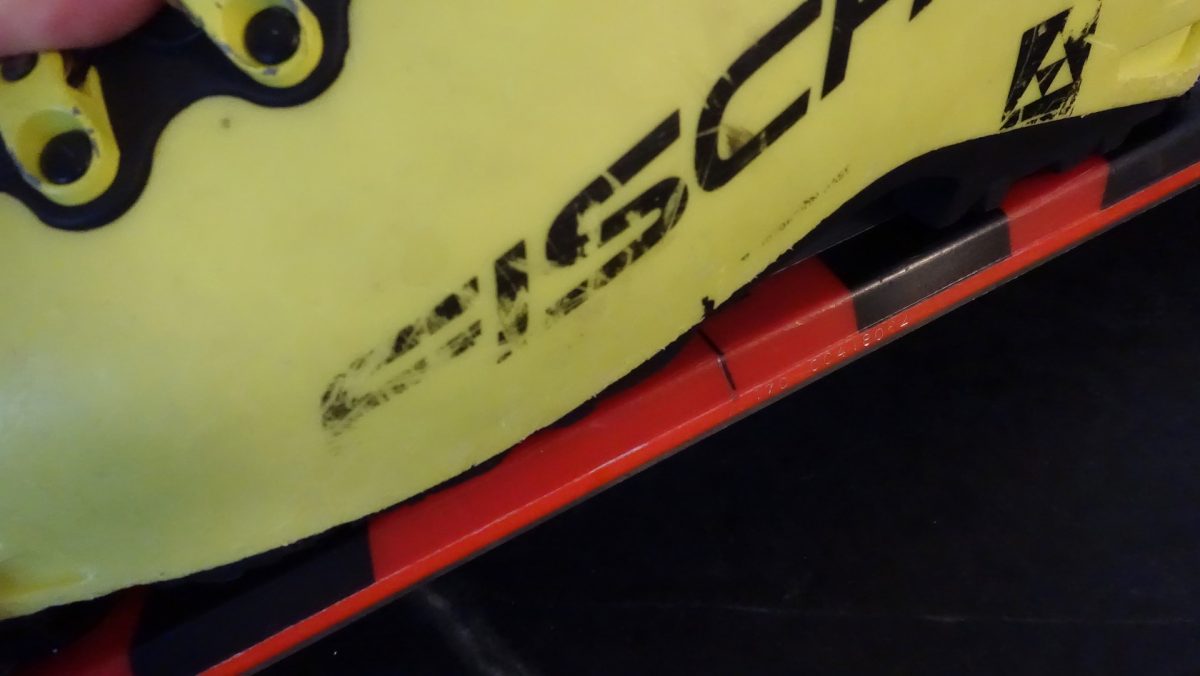
Here we are aligning the boot center mark (drawn on the boot) with the boot mounting mark on the ski.
Step Four: Grab a Boot and Binding Toe Piece.
This is the most important place to check for silly mistakes in the mounting process. If you used the wrong line or got a measurement off, you will see the boot and toe piece are in the wrong place on the ski or misaligned. Use common sense here and avoid embarrassing issues. Everyone makes mistakes; practice on the 2″ X 4″.
1. Snap the binding toe onto the boot.
2. Place the boot on the ski and align the boot center with the boot mounting mark on the ski.
3. Keep enough pressure on the toe piece that it lies flat on the topsheet.
4. I like to align the center of the toe lever with the ski’s centerline here.
5. At this point, the boot is centered, and the toe unit should be straight.
6. Using the binding toe unit as the template, it’s still flat on the ski and centered, mark the center point of the front screw holes.
7. Draw a straight line on the topsheet, edge to edge, using the two marks as your guide. This line allows you to align the toe’s paper template on the topsheet. (For accounting, note the distance from the ski tip to this line, as it will allow you to ensure the binding toe unit on the remaining ski matches the mount point on the first ski.)
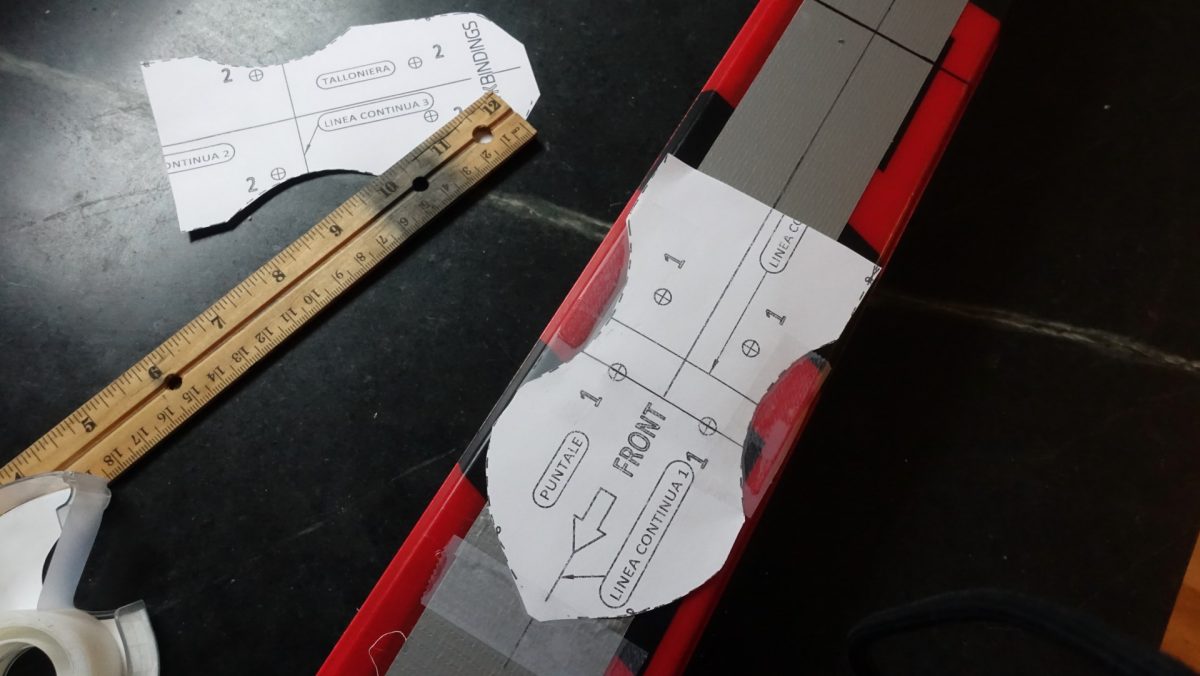
Here the paper template is aligned with the ski centerline, and the line intersecting the crosshairs in the front two holes. (We drew that line on the ski in the previous step.)
Step Five: Align the Paper Template (toe) and Drill the First Hole.
All we are doing here is aligning the paper template with the marks made in the previous step. If you measure correctly, then this step is all about alignment and drilling a straight and perpendicular (to the ski) first screw hole.
1. The paper template should have crosshairs in the two front screw holes; if the template does not have a perpendicular line running through the two front screw hole crosshairs (which the ATK templates do not), I draw this line in with a straight edge.
Align the template’s crosshairs with the front screw hole horizontal line drawn on the ski. Lightly tape the template in place using scotch tape. It’s critical here to also match up the centerline of the ski on the paper template with the ski’s centerline.
2. With the horizontal and centerline axis aligned with the template, secure the template in place with scotch tape.
3. Using a center punch or awl, lightly tap a guide dimple at the left front hole’s center point.
4. Using the proper bit diameter for your specific bindings and a sharp bit, drill a hole for the first toe screw. In this case I’m using a Wintersteiger .1 x 9.5mm (0.16 x 0.37in.) bit specific for binding mounting.
5. Insert screw and lightly tighten.
6. Center the toe unit using the template, centerline, and toe lever to ensure alignment. It’s also possible, at this point, to remove the paper template and use only the front toe unit as your template.
7. Mark the center of the second front hole, center punch, and drill.
8. Repeat the process for two rear screw holes; ensure alignment, center punch, and drill.
9. I back out the first screw slightly and then insert and tighten all four screws. As I tighten, I eyeball the toe unit to ensure it aligns with the centerline. Do not over-tighten; I only tighten enough to secure the toe unit so I can easily snap the boot toe in place.
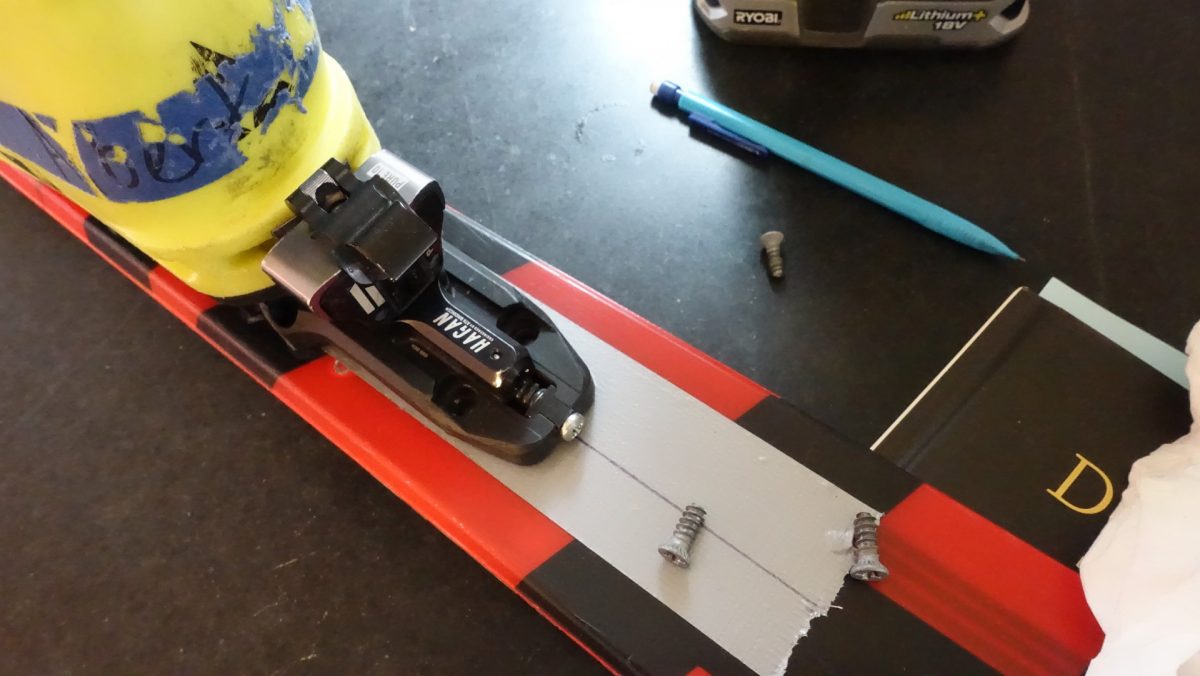
In this dry run, we are ensuring the heel piece is aligned and centered. The centers of the two rear screw holes will be marked, and a line connecting those two points is drawn across the ski.
Step Six: Mount the Heel Unit.
In this next step, we use the binding heel unit as the template, and then confirm alignment using the paper template. When all is confirmed, holes are drilled, beginning with one of the rearward screw holes. Again, assure the alignment, then drill the second hole.
1. Set the heel unit’s release tension to the lowest setting. (This allows less force to be applied when setting the boot into the heel unit’s pins.)
2. Snap the boot into the mounted toe unit.
3. Mark the heel center on the boot with a fine sharpie.
4. Lower the heel onto the topsheet. The heel center mark should align with the ski’s centerline.
5. Adjust the heel unit to its fore/aft midpoint. The midpoint setting allows some latitude when micro-adjusting the heel pins to ensure the specified heel gap.
6. Insert the heel pins into the boot heel. Lower the boot heel (with binding attached) down to the topsheet. Note if your binding requires a specific heel gap. Insert the 4mm wide gauge (comes with binding) and ensure the proper heel gap. We’re mounting rebranded ATK bindings sold as a Hagan Crest 10; they require a 4mm gap.
7. Mark the center points of the two rear screws. (I can only mark the center of the two rear holes with this specific ATK model.)
8. Draw a straight line on the topsheet, edge to edge, using the two marks as your guide. If the heel paper template does not have a perpendicular line running through the two front screw hole crosshairs (which the ATK templates do not), draw the line using a straight edge).
9. Lift the boot heel and align the paper template up on the ski, making sure to align crosshairs on the rear two holes on the paper template with the horizontal line you just marked and the ski’s centerline.
10. Tape the heel paper template in place.
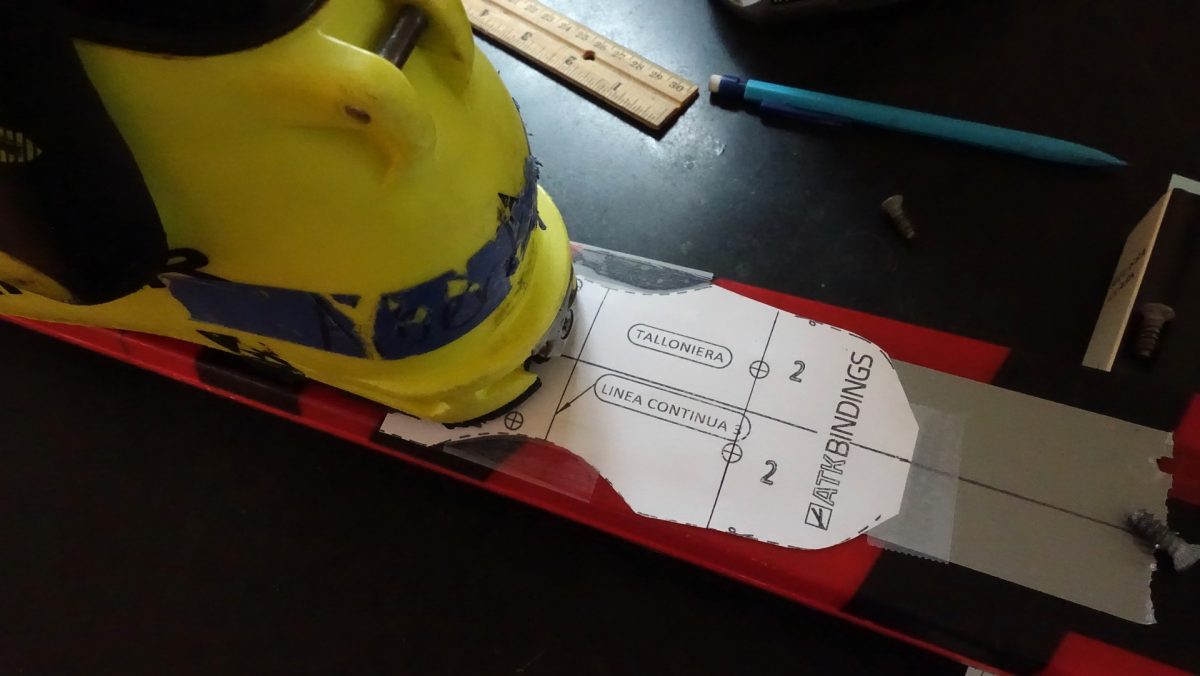
Lower the boot heel back down (with boot secured to binding toe piece) and ensure the boot heel is centered.
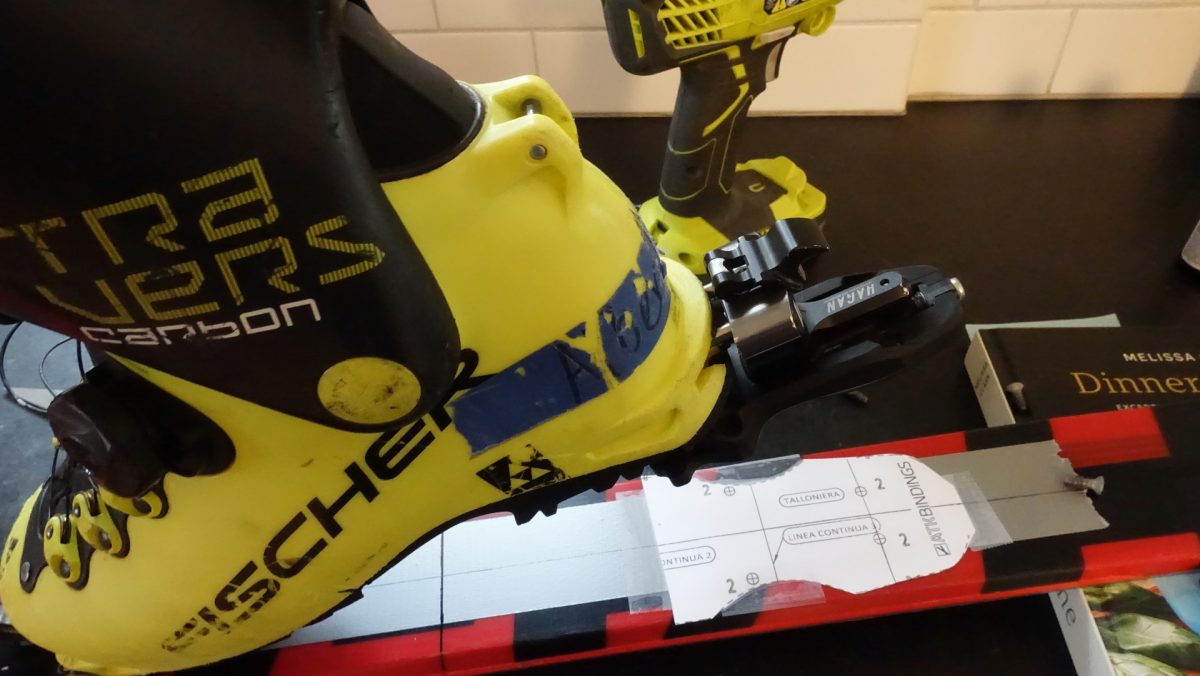
Now we are double checking by attaching the heel unit (with the proper gap) and ensuring the screw holes align and the unit remains centered.
11. Lift boot back up, and center punch the rear screw hole that is most accurate when referencing the ski centerline and the horizontal line intersection of the screw hole crosshairs.
12. Drill a hole and lightly tighten the screw.
NOTE: Before centering punching, drilling the second heel unit hole, and lightly tightening the screw, repeat the process of lowering the secured heel unit onto the ski/template to ensure the centering of that second rear hole.
13. Click the boot into the heel unit. Ensure the heel unit is centered with the pins slotting into the heel without hitting the rubber sole.
14. Ensure the heel unit is still centered (it should be) by referencing the location of the ski’s centerline and boot heel center. All good? The heel unit and paper template should still align. Remove the boot and center punch and drill the front two holes.
15. Add and lightly tighten the two front screws.
DIY Tech Binding Mount: Almost There; Heel First, Toe Second
This next step is when we introduce the epoxy/glue. Ideally, this whole DIY project is a calculated process; you’ve had time to procure the epoxy, which means you are thinking more long-term, as in epoxy/glue that is slow curing. The fast curing, five-minute epoxies do lock up fast, but those epoxies are more brittle. And quick curing epoxies give off more heat that, in some circumstances, which are unlikely in this DIY process, could affect the ski. Go long here, as in a long time to cure. Use an epoxy that cures overnight.
Step Seven: Adding Glue to Heel Holes.
1. At this point, the heel and toe unit should look solid. Clicking the boot into place should also be no issue, as everything lines up nicely. OK. Remove the screws from rear unit.
NOTE: Get ready to glue. The full-on aerospace epoxies are too strong; avoid those. Wood glue will do the trick, but basic epoxy works best. The key is to use a “softer” epoxy that allows for later screw removal.
2. Add epoxy/glue to the heel holes. Wipe/clean any excess glue away.
3. Use a paper clip or something pointy to make sure the glue goes all the way into the hole and fully coats the side wall of the hole.
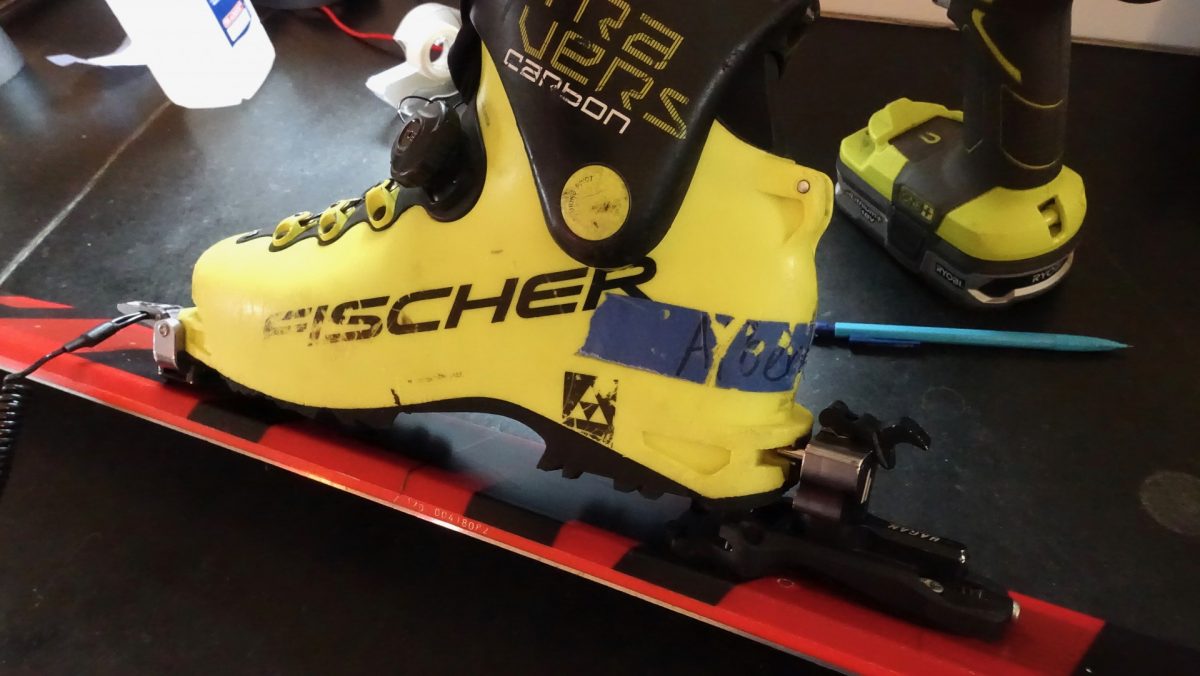
With the boot secured in the toe piece, we can then focus on gluing and then tightening the rear unit’s screws one at a time to ensure proper alignment.
Step Eight: Final Heel Unit Alignment.
Take your time, as you realize now, this is all about alignment. Tighten one screw at a time, ensuring the alignment looks spot on after each screw is tightened.
1. Firmly tighten only the rear left screw and then run the remaining three screws into place.
2. Snap the boot into the toe unit, which has remained drilled but not glued into the ski, and drop the heel. Hoping all is aligned, snap the boot into the heel pins.
4. If the boot snaps in cleanly and is aligned, begin the final tightening of the three remaining heel screws. Check alignment after tightening each screw.
Step Nine: Adding Glue to the Toe Holes.
1. Remove the screws from the toe unit.
2. Remove the binding toe unit from the ski.
3. Add epoxy to toe holes and clean any remaining/excess glue from the holes.
Step Ten: Final Toe Unit Alignment.
Same as above, align, align, align. Tighten one screw at a time, and check for proper alignment as you tighten each screw securing the toe unit.
1. Snap the boot into the toe unit and drop the heel. If the heel aligns perfectly, remove the boot, tighten the remaining screws without overtightening, and snap the boot in place, checking again to ensure precise alignment and symmetry.
2. Once the screws are in place, and all is aligned, remove the boot and firmly tighten the remaining screws.
Suppose you notice after tightening the first screw and lightly tightening the remaining three screws that the boot heel is off by, say, slightly more than a millimeter. In that case, you can gently push the boot heel into alignment (on this ATK Crest 10 binding, the right forward screw is exposed) and firmly tighten the remaining front screw with the boot still locked in place.
4. Again, drop the heel and check for alignment. If it looks good, pop the boot out and firmly tighten the two rear screws.
5. Pop the boot back in and check for alignment. It should look nice and tidy, and the boot heel middle mark should line up with the ski centerline. As Lou wrote in 2017, “the idea is to gradually tighten the toe unit screws while making sure the heel of the boot is aligned.”
Postscript: We’re mildly stressed just proofing this step-by-step process. If head spinning has ensued, hire the local shop to do the deed. If you have specific requests for the mount, like having the heel unit set in a spot to allow for maximum adjustability (you might want to use different BSL boots on the same set of skis), make sure they are clear about your needs.
Jason Albert comes to WildSnow from Bend, Oregon. After growing up on the East Coast, he migrated from Montana to Colorado and settled in Oregon. Simple pleasures are quiet and long days touring. His gray hair might stem from his first Grand Traverse in 2000 when rented leather boots and 210cm skis were not the speed weapons he had hoped for. Jason survived the transition from free-heel kool-aid drinker to faster and lighter (think AT), and safer, are better.
