We love skiing, and we love being in the mountains. How can we do this with longevity in mind? We need a process to manage uncertainty.
You’ve got one day this weekend to get out and ski tour. How are you approaching your plan to get into the backcountry? Are you showing up at the trailhead Saturday morning with your partners and going from there, or are you spending the time to thoroughly plan for your day ahead of time?
Planning and preparing for a day of ski touring mid-winter in the backcountry can be an overwhelming process filled with more questions than answers. That being said, with practice and a systematic approach you can reduce the amount of information overload, and maximize enjoyment and safety on a day of backcountry skiing.
Using systems to manage uncertainty
There has been a significant amount of research as to how humans most effectively plan for an activity that operates in environments full of uncertainty. The backcountry and avalanche hazard is the quintessential example of this type of environment. Stir in skiing, which creates a strong emotional response and desire to participate in the activity, and you’ve got a potent recipe for a challenging decision-making process.
Many current avalanche education programs teach a systematic approach to planning for a day in the backcountry. This includes understanding the individuals in your team, anticipating hazards (such as weather, terrain, and avalanches), creating a plan that helps to manage your team’s risk, and ultimately incorporating an emergency response plan. This may seem like a lot of steps, but with practice and time this can become a streamlined process.
So how could this look?
Systematic planning based on forecast
It’s Saturday morning, and you have plans to meet two friends up on “Get Rad Pass” at 9AM. Since you all are good friends with the goal of safety at the top of the list, you hop on the phone at 6:30AM and start planning…
First things first: what’s everyone’s goal for the day? Jim says “he’s just looking for some fitness laps and mellow skiing, but is pretty open to whatever the conditions dictate”. Ruby mentions that “she’s had a long week at work and is feeling a bit low energy, but can rally and knows that exercise is exactly what she needs!” Dale states that, “he’s got one day off this week and he’s looking to ski something steeper like the “Gnar Couloir”.
Right off the bat, there’s some dissonance in the group’s goals — this should be discussed before meeting at the trailhead and heading into the backcountry. Generally defaulting to the more conservative goal in your group increases a margin of safety in the decision-making process.
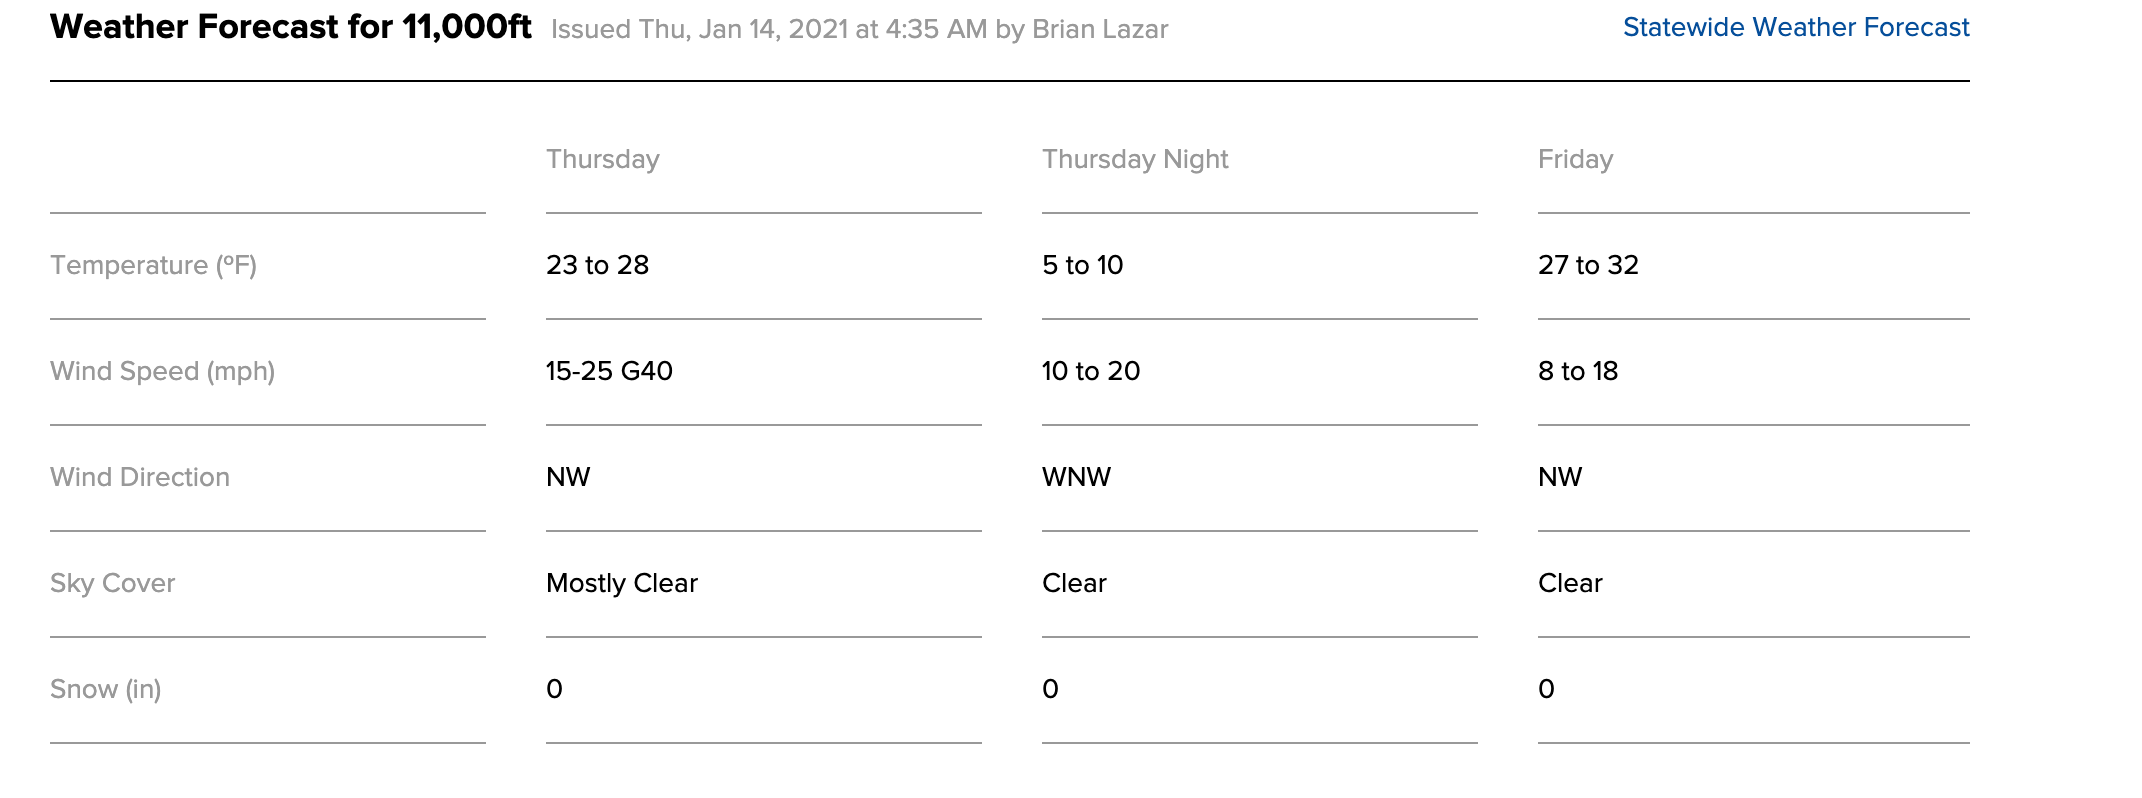
It’s important to make informed decisions when possible – so read the weather and avalanche forecast!
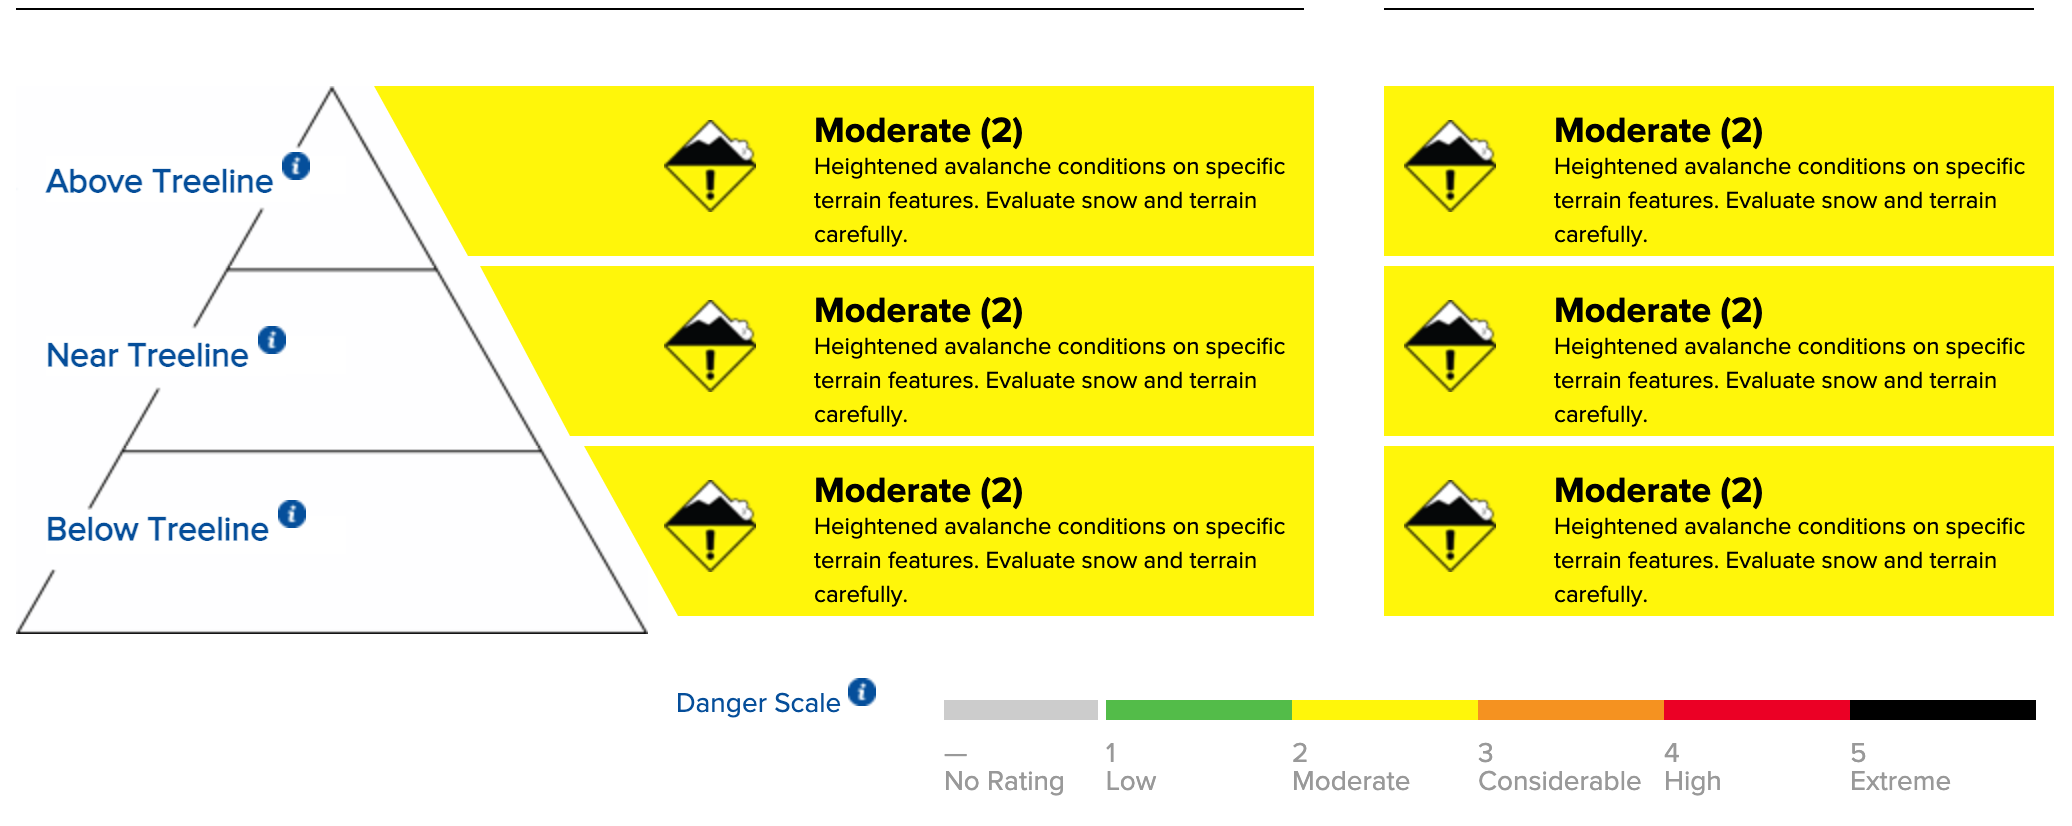
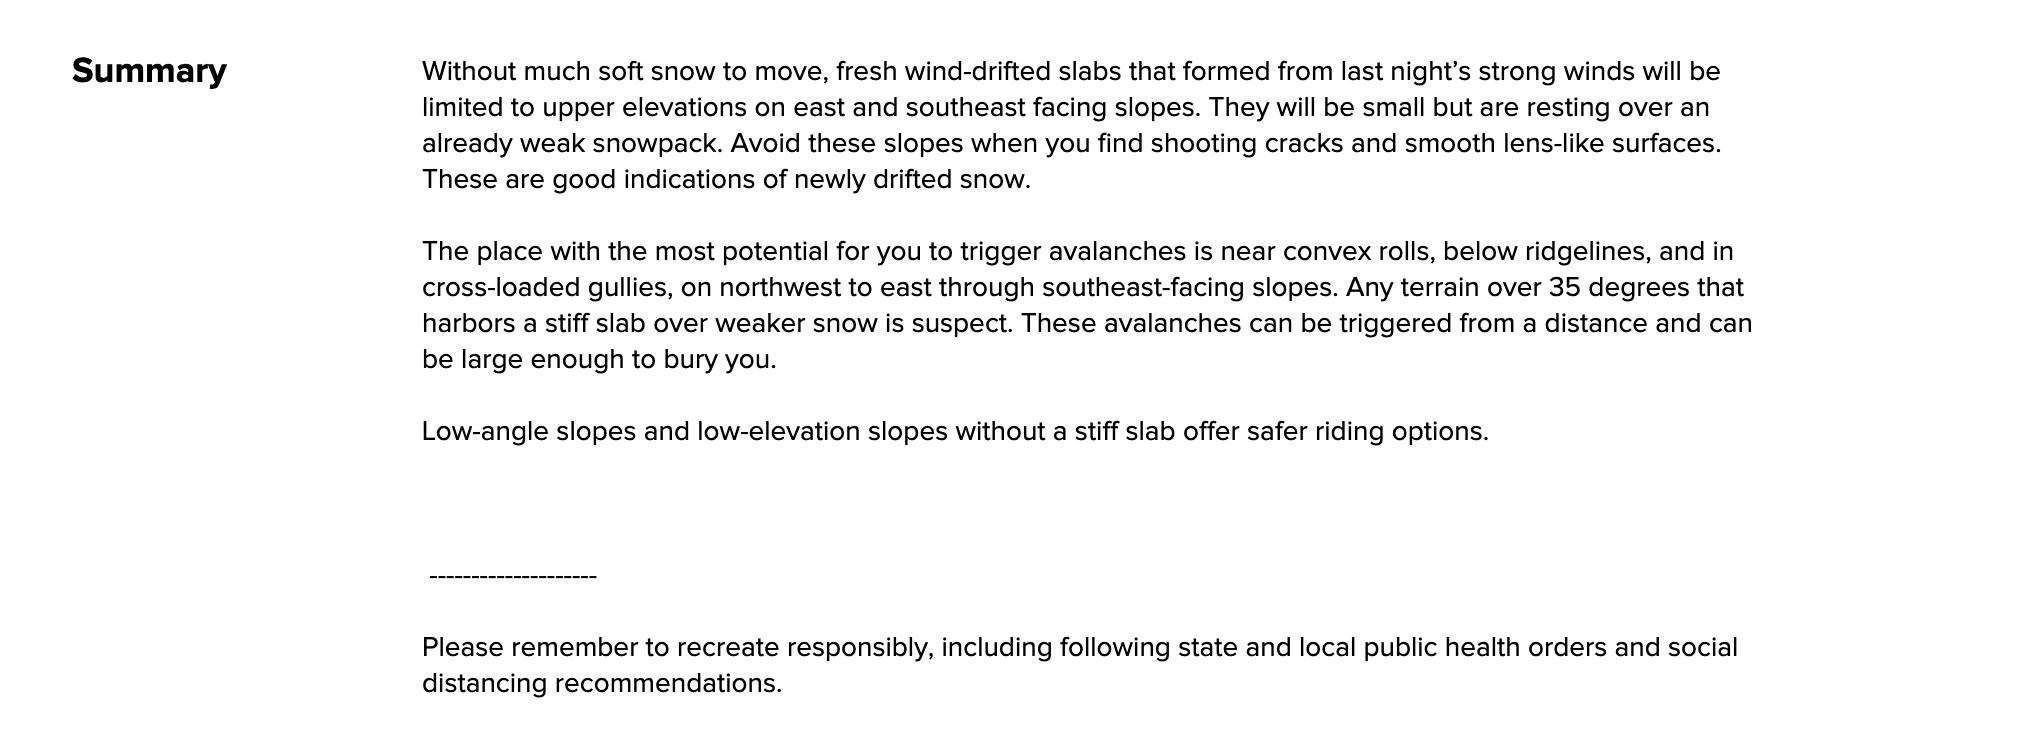
You all take a look at the avalanche forecast and see the above information. This can be somewhat nebulous, and it’s important to really understand the definition of the different danger ratings. It’s even more important to understand the nuances of the different avalanche problems and their specific characteristics.
As you all are digesting the information, there are some key phrases that jump out and are worth noting.
“fresh wind-drifted slabs that formed from last night’s strong winds will be limited to upper elevations on east and southeast facing slopes”
“Avoid these slopes when you find shooting cracks and smooth lens-like surfaces”
“The place with the most potential for you to trigger avalanches is near convex rolls, below ridgelines, and in cross-loaded gullies, on northwest to east through southeast-facing slopes. Any terrain over 35 degrees that harbors a stiff slab over weaker snow is suspect.”
The avalanche forecast summary can help you narrow your terrain choices and areas where you need to gather more information throughout your day.
The avalanche problem: Persistent slab
Definition: Release of a cohesive layer of soft to hard snow (a slab) in the middle to upper snowpack, when the bond to an underlying persistent weak layer breaks. Persistent layers include: surface hoar, depth hoar, near-surface facets, or faceted snow. Persistent weak layers can continue to produce avalanches for days, weeks or even months, making them especially dangerous and tricky. As additional snow and wind events build a thicker slab on top of the persistent weak layer, this avalanche problem may develop into a Deep Persistent Slab. The best ways to manage the risk from Persistent Slabs is to make conservative terrain choices. They can be triggered by light loads and weeks after the last storm. The slabs often propagate in surprising and unpredictable ways. This makes the Persistent Slab avalanche problem difficult to predict and manage and requires a wide safety buffer to handle the uncertainty.
So what do we do with this information?
As you start to look at maps a good strategy is to set “guardrails” in the terrain. These are terrain characteristics that are off limits for your group. This is important to do at home when you are warm and comfortable (ie: thinking clearly and rationally).
For example: With this forecast and danger rating, our group will not ski slopes steeper than 35 degrees on NW – N – E facing slopes where the forecast states the persistent slab problem exists. We will avoid terrain over 30 degrees if it is large enough to produce a D2 avalanche, or a slope ends in a terrain trap. If we find a stiff slab (firmer snow) overlying weaker (cohesion-less) snow, we will narrow those guardrails and avoid terrain over 30 degrees.
It’s important to acknowledge that these guardrails that are mentioned here are not the most conservative option. Avalanches can be triggered on terrain over 30 degrees. Avoiding travel on, underneath, or connected to avalanche terrain is always a great option to increase your margin of safety.
Once the group has established terrain boundaries, a great next step is to utilize an online (or analog) mapping tool. There are various resources out there such as onX Backcountry, Caltopo, Gaia, Fatmap, Google Earth, etc. Several of these resources have a slope angle shading overlay which can give you a broad overview of slope angles in the terrain. Planning your route based on the guardrails you have already set becomes more simple, once you are in the field you will be verifying the terrain in relation to the map and making changes based on observations.
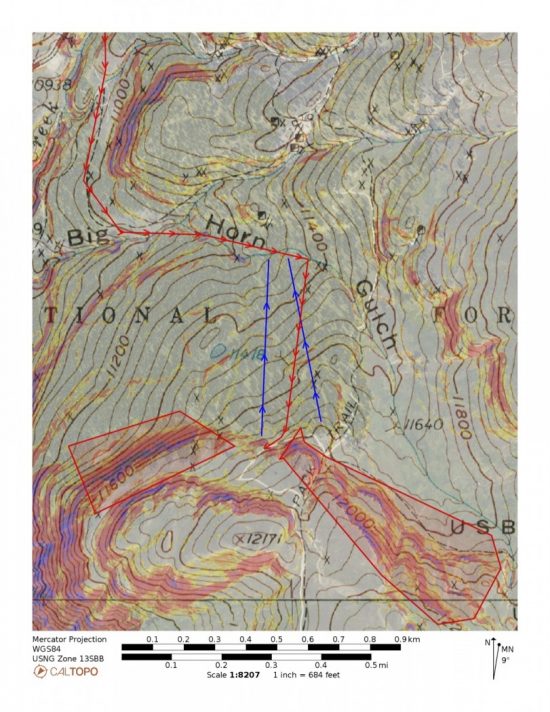
Here is an example of how to mark hazards, uptracks, downtracks, and other things like observation points on Caltopo.
Taking your plan to the skintrack
The plan and guardrails that Jim, Ruby, and Dale set out during the planning process made sense to everyone based on the information they had at the time. Since these three friends have skied together often, and ultimately agreed to the plan, it simplified the decision-making throughout the day. They all reminded themselves about the inherent uncertainty with persistent slab avalanche problems, and discussed where the best snow was going to be. Their experience led them to sheltered northerly slopes below treeline, which held soft snow that hadn’t been affected by the wind. Throughout the tour they found opportunities to observe the snowpack structure and increased their margin of safety by avoiding convex slopes over terrain traps, and chose more planar slopes with larger more open runouts.
Since you planned your day thoroughly on the front end, your observations in the field become more refined and targeted. We are the worst decision-makers when we are standing on top of an untouched slope, so simplicity and a structure is key. You know you are avoiding all terrain >35 degrees, and that you are specifically looking for the presence of a layer of firmer snow over weaker snow. Finding this structure on your tour will allow you to make more informed decisions and narrow your guardrails to avoiding terrain >30 degrees. There are numerous ways to observe this structure during the day. You can periodically be poking your ski pole in the snow to feel for firmer layers over weak layers as you change aspect, elevation, and terrain features. You can dig a snow pit to look for the presence of this structure. The important component here is to plan your route in a way that allows you to gather relevant information on slopes that do not have an avalanche hazard (ie: not on, connected to, or underneath avalanche terrain).
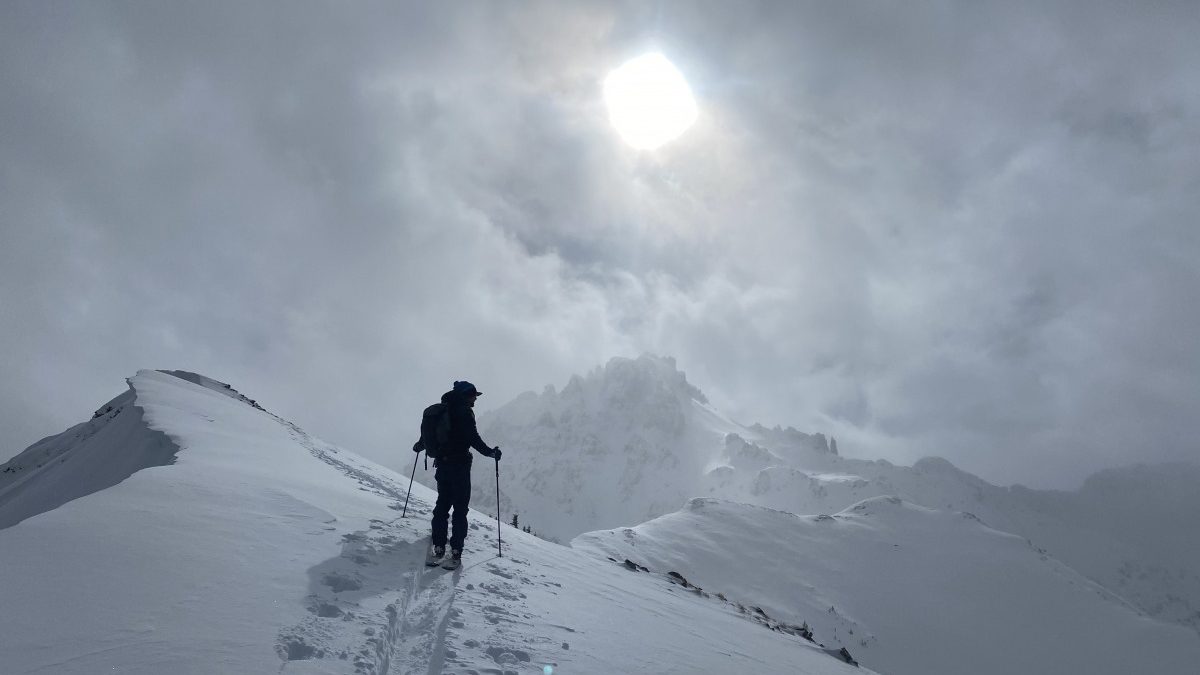
Enjoy the beautiful scenery, and don’t get lured in to places you don’t want to be because you didn’t have a plan.
Ultimately, during your tour if snowpack structure, group dynamics, or weather are ever in question; the answer is to always choose more conservative terrain.
Finally, after you return back to the trailhead from a day of skiing, take a moment to ask some intentional questions to your partners about your day. Where could things have gone wrong today? What questions do we still have? What could we have missed in our assessment? What would we do differently next time? Don’t just high five and cheers beverages, because the backcountry isn’t going to give you the feedback you need to continue to learn. You have to create that learning opportunity for yourself.
Have a safe winter of touring, and remember to make this activity one of longevity!
Jonathan Cooper (“Coop”) grew up in the Pacific Northwest and has been playing in the mountains since he was a teen. This was about the same time he made the fateful decision to strap a snowboard to his feet, which has led to a lifelong pursuit of powdery turns. Professionally speaking, he has been working as a ski guide, avalanche educator, and in emergency medicine for over a decade. During the winter months he can be found chasing snow, and passing on his passion for education and the backcountry through teaching avalanche courses for numerous providers in southwest Colorado, and the Pacific Northwest. Similarly, his passion for wilderness medicine has led him to teach for Desert Mountain Medicine all over the West. If you’re interested, you can find a course through Mountain Trip and Mountain West Rescue. In the end, all of this experience has merely been training for his contributions to the almighty WildSnow.com.

