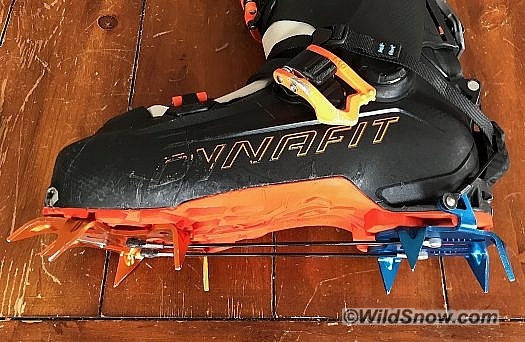
Many have lamented the “Speed Nose” toe Dynafit includes on a number of their boot models. Scroll through the Wildsnow archives and you will find comments such as, “The one drawback in the Hoji Boot’s design is the unfortunate inclusion of the Speed Nose.” That’s from me six months ago. Lou’s concerns are known as well. While it’s common for discussion of the Speed Nose limitations to lament incompatibility with bindings such as the Shift as well as incompatibility with “normal” crampons, my concerns are more about having a strong, effective “real” crampon. Dynafit’s minimalist aluminum Cramp-In solution is innovative, but how “real” is it? How much should I really be concerned — how rad do I really get climbing in my ski boots? How often am I kicking blue ice with serious fall potential?
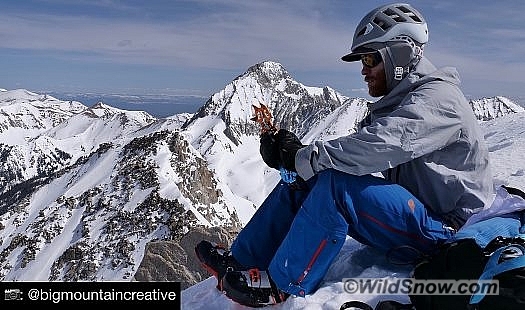
I have used Dynafit’s Cramp-In with my Hoji Pro Tour boots for about a month now. Dynafit’s party line is these are more upgrade than band-aid for non-technical ski boot crampons — that they’re “real.” My impressions, after 8,000 vertical feet or so of steep snow booting and rocky ridgeline traverses on the Cramp-In’s, are largely positive and align with Dynafit, with a few concerns.
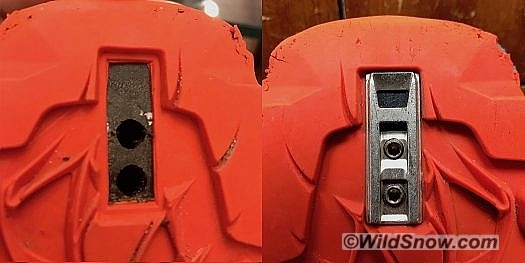
The Cramp-In requires a small custom installed fitting on the sole of the boot. With a razor knife, you cut out the 1×4 cm rectangle stamped in the sole under the toe of the boot. After removing your liner (or leave in if you want it ventilated), you drill out the two pre-dimpled holes that you have exposed, with 8mm bit, then clean holes with round file. Place the inner plate with two screws installed inside boot and hold with one hand. Then place the exterior plate in place with notch facing forward. Tighten the screws firm using a 3 mm hex key.
Length adjustment is a tool-free breeze. The crafty folks at Dynafit machined a hex hole in the toe portion of the Cramp-In. Use this “wrench” to ease the hex head on the peg at the rear of each connecting cable a quarter turn or so. Turn peg 90 degrees, slide it along the numbered notches in the heel track, and rotate back. Tighten the hex head and test on the boot for a solid lock.
Attaching the Cramp-In in the field is best described as “foreign yet simple.” The dashed line printed on the toe part is where the front edge of your boot should line up at first, then with your boot centered, slide the Cramp-In back (or boot forward with crampon stuck in snow) until the front edge of the boot aligns with the solid line. Clip the heel bail over the boot heel lug and attach the lightweight webbing around the ankle with adjustable buckle. If you miss you know it, you absolutely can not install your boot in the Cramp-In without it correctly attached to the boot fitting.
In theory, you can set the Cramp-In on the snow and step in. I haven’t pulled this off, though I would imagine it possible on firm flat snow. Install in steep terrain or unconsolidated snow requires hooking the toe by hand and holding tension while securing the rear lever. Take a quick seat balance on the opposite leg to do so. Note the symmetrical attachment points means symmetrical Cramp-Ins. They’re not left and right specific. This is particularly helpful in technical terrain where gear management can be a challenge. On multiple occasions I was spiked up and breaking out the boot pack while partners were still sorting their lefts and rights. Being first can be nice, unless it means you’re the one doing the work. So in that regard I’d go 50/50 with how “advantageous” the Cramp-Ins are in terms of how fast you can put them on. Sometimes speed isn’t everything.
Prior to using the Cramp-Ins, I was concerned about snow build-up on the boot sole notch complicating attachment to the boot. This has turned out to be less of an issue than I thought, but still can happen. The hook on the Cramp-In is sharp and the boot attachment point is hollow to the rear. This combo pushes snow or ice out of the back of the receptacle. I have yet to begin a bootpack without spikes, only to find I needed them at some point on the climb. I’m thinking this could pack snow more forcefully under the boot attachment bar. Also, wetter climates could also pose more of a challenge with snow build. I’ll keep testing.
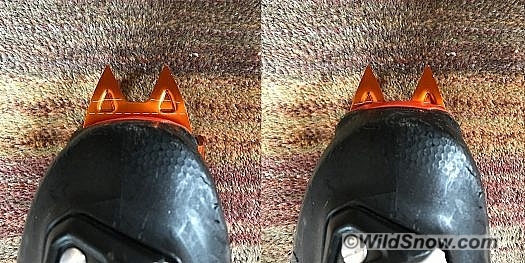
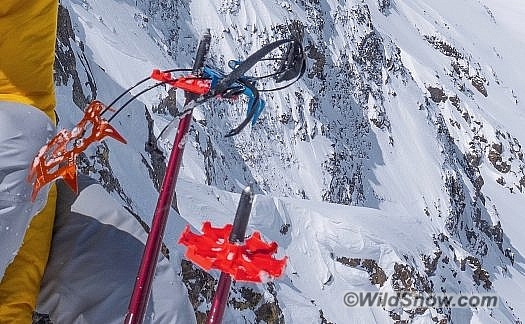
Low weight and packability are the key bonuses of the Cramp-In system. At about 160 grams each, the Cramp-Ins are among the lightest crampons out there – hardly perceptible on your boots. They also fold over on themselves and pack neatly. I’ve seen this packability in other ultralight models using a textile linking bar and tech heel attachment. The dual steel cable linkage and traditional heel bail on the Cramp-In are more secure.
More on the solid attachment: I am truly impressed. Brand specific design helps here. The heel unit aligns exactly with the rear edge of my Hojis while vertical wings are tight laterally. The simple heel bail snugs up the dual cables with a reassuring clunk. The toe unit has little play — similar to any well fit automatic crampon latching over a front toe lug.
The short aluminum front points have enough purchase for vertical boot packing, in any type of snow. On an endless 3,000 foot booter we subbed in sessions of French stepping to save our calves. Grip was good here here as well, though I did have some balling under both toe and heel that had to be cleared. Recently while climbing in warming powder snow, I balled up so much that every fourth step required a pole whack or tap to the opposite boot. Plastic anti-balling plates would have been worth their weight penalty in gold! After that climb, I agree with Lou’s stated policy that anti balling plates are a must on any crampon, I hope to see them on Cramp-In 2.0.
In my opinion, these are not technical mountaineering or vertical ice crampons and should not be relied on as such. But I did anyway, after all, is this not testing? I have front pointed and scrambled alpine granite in the Cramp-Ins without any slop or damage. Likewise, while you could probably make a go of it with the Cramp-Ins, long sessions on blue ice should always be kicked at with steel.
Other gripes? At $200, Cramp-Ins should come with a durable carrying case to protect the other contents of your pack from their 10 aluminum points. A punctured Red Bull can in my pack would have agreed. I have repurposed a Pomoca skin bag for carrying, though a specifically sewn bag of heavier material would contain their fangs and take advantage of the Cramp-In packability.
I have concerns about the boot modification weakening the boot sole shank, and I’m watching for rounding out the drilled holes or other issues. A lot of force is directed at the small hook. Time will tell.
I am also leary of the Cramp-In fitting making my boots colder due to the conductive metal under the most vulnerable part of my feet. The first few days with the system installed were unseasonably cold, and I felt the Cramp-In receptacle exaggerated that. This could be a paranoia, as I’m preparing for a trip to the Alaska Range, and a big part of that is anticipating extremes. I may remove the hardware and plug as I will be bringing semi-automatic steel crampons up the Great One.
Simple, solid, and light — I like the Cramp-In for non-technical, steep, or frozen snow travel. I will keep tabs on the boot modifications longevity and balling issues. Please comment below with your Cramp-In take. Being a new product, we want to get as much dialogue going as possible!
(WildSnow guest blogger Gary Smith is an avid backcountry skier and ski mountaineer residing in Eagle County, Colorado. You can find him at Cripple Creek Backcountry in Vail when he is not in search of the next descent. Please visit @g.allen.smith on Instagram for ski shots and snippets of mountain life.)
On March 22nd 2021, Gary Smith tragically died in an avalanche outside of Beaver Creek Resort in Colorado. Since 2018, Gary has been a frequent and insightful contributor to WildSnow. From Christmas Eve spent at the Wildsnow Field HQ cabin, to testing gear and sharing his love for steep skiing around the world, he was a pillar of the ski touring community and will be greatly missed.

