One of the mistakes I see in backcountry skiing is people aggressively lifting up their skis when skinning. They stomp uphill like a sumo wrestler ceremoniously warming up for a match, rather than smoothly sliding their skis on the snow.
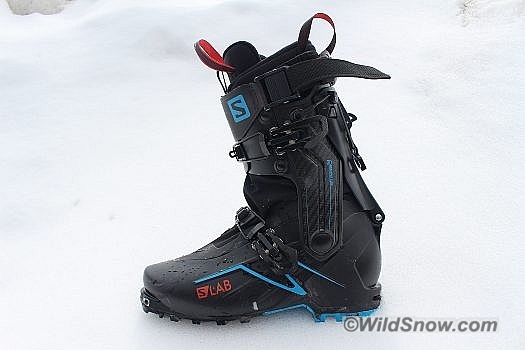
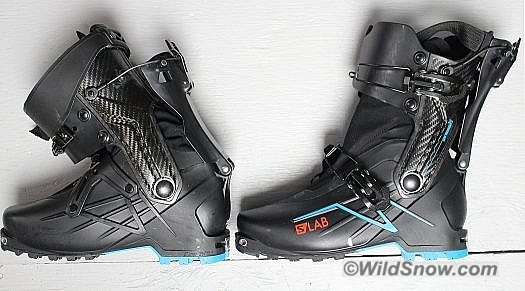
Glide friendly skins are part of the formula for an efficient stride. Another thing that helps is a boot with exceptional range of motion. Enter Salomon S Lab X-Alp ski touring boots (similar to Arcteryx Procline).
The fluid wide range of motion of the S Lab X-Alp makes a noticable difference for efficiently sliding your skis while touring. What more can I say? You have to try it to believe how well it works.
One complaint our testers shared is that it is difficult to insert the liner into the shell. There are two reasons for this: a textured boot board and the fabric gaiter of the shell.
The boot board has a rough texture. The advantage of a textured boot board is the liner won’t slip around in the shell, thus making the boot feel more solid: your foot stays anchored instead of sloshing. The downside: there is a lot more friction when inserting the liner.
The no-zip, mid-size gaiter opens quite small, and has a thin strip of gription which is grabby when you’re trying to insert the liner. There are a couple of work-arounds. At worst, you can cut the gaiter, which of course compromises its waterproofness.
Better solution: use a shoe horn. I swear by The Boot Horn which I bought years ago at a MasterFit bootfitting seminar. I can slide my liners into any boot with ease without modifying the boot board, thus retaining a solid anchor for my liner. The Boot Horn weighs practically nothing and is also handy for slipping into tight ski boots. I use it all the time and even take it along on hut trips.
I got a good laugh once when Louie was flipping through a ski magazine and said, “Hey Mom, here’s an ad for the boot horn you always use.” The byline read: “The perfect gift for elderly skiers.” But I digress.
Another remedy for difficult liner insertion is to shave texture off the boot board. The S Lab X-Alp’s boot board is attached inside the shell with adhesive but can be peeled out, especially if you have small hands (or the right tool, that being a gasket hook or screwdriver with tip bent at 90 degree angle). Sandpaper or a disk grinder is then applied, with care. Lastly, a bit of foot powder rubbed on the bottom of the liner reduces friction as well.
Be careful with over-modifying the boot board: reducing friction could allow the liner to move around in the shell, which might compromise downhill performance.
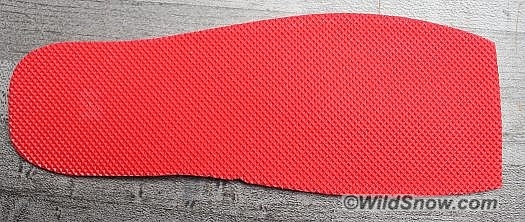
The S Lab X-Alp’s textured boot board which is glued inside the shell. With small hands and a bit of effort (or the right tooling), it can be peeled out.
A note about the 3/4 shape of the S Lab X-Alp’s boot board: I developed an unusual pain under the ball of one of my feet; this sort of thing can quickly become Morton’s Neuroma, which can end your ski season quicker than you can say “Salomon.” When I took out the liner and discovered the boot board was 3/4 instead of full length, I suspected that the tiny ridge where the boot board ends might have caused the irritation. It’s odd that such a small ridge could cause such discomfort, but after we tapered the ridge and shortened the front of the board about 1/8 inch, the pain went away. I was really surprised especially since I wear a custom foot bed and had molded the liner, but like the princess and the pea, my feet proved to be hyper sensitive.
The Salomon S Lab X-Alp is a low volume shoe with a thin liner, I was therefore concerned about getting cold feet. One of our testers skied thigh deep cold smoke pow in Canada on a frigid day and reported that her feet stayed dry and warm, which amazed us both. Mine have been fine so far. As always, proper bootfitting is key for warm feet, beyond whether you have 4 millimeters of insulation, or 5.
Changing uphill-downhill modes with minimal motions is a ski touring holy grail. It took me a while to tune this in on the S Lab X-Alp. In my other boots, I tour with the buckles loosened or entirely disengaged. But with the wide range of motion in the S Lab X-Alp, I found this unnecessary and even inefficient, since the boots ended up too loose.
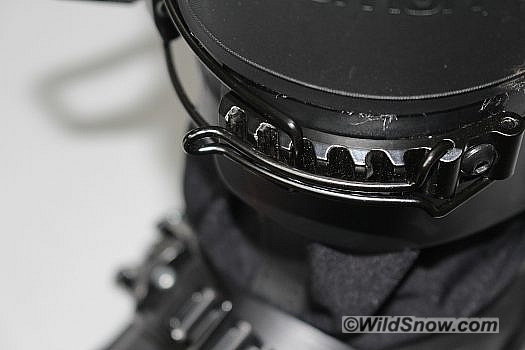
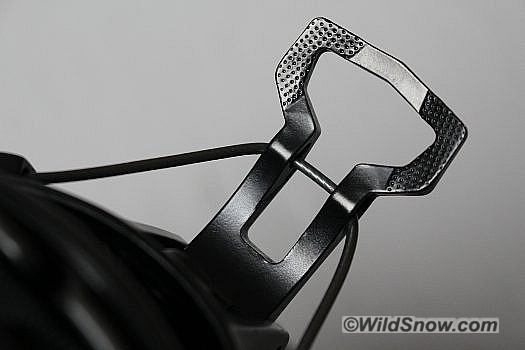
Because I did not need overly loose buckles for range of motion, I experimented with tightening the buckles as I would for downhilling and keeping them that way for uphilling, only with the lean lock disengaged. This was a bit uncomfortable but did not compromise range of motion, and I could still skin with a sliding stride without having my foot move around the boot. I compromised by buckling the boots on the notch I use for downhill, then kept the buckle lever open for uphilling. This snugged my feet into the boot nicely and at the end of the climb all I had to do was snap down the buckles and launch. I did have to reposition the buckles on the boot in order to dial this (several positions are available). Tuning buckles for easy use when changing modes is an under-appreciated part of setting up a ski touring boot. Blog post?
The Salomon S Lab X-Alp is pricey, MSRP $900, but it delivers Lamborghini level engineering and performance:
A note about sizing: this boot is narrow. The Grilamid shell plastic punches out easily but you might also consider going up a size if your foot shape cooperates.
When you’re looking for a boot that’s almost as light as a race boot, but performs like a much beefier boot, consider the S Lab X-Alp. I think you will be wowed. I sure am.
Shop for Salomon ski boots here.
WildSnow Girl, Lisa Dawson, is the luckiest girl in the world. Also known as Mrs. WildSnow.com, she tests whatever gear she wants. She gives the WildSnow family of websites the feminine voice.

