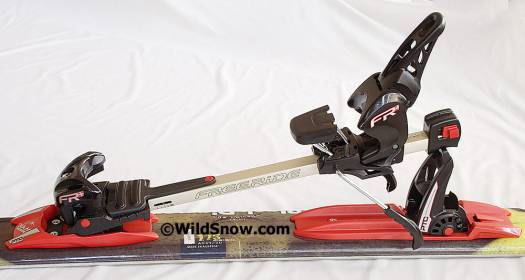
We’re always wondering what’s inside these mechanical marvels. Why not find out?
Before we start, if you landed here because you’re looking to shop for Fritschi bindings, please check here.
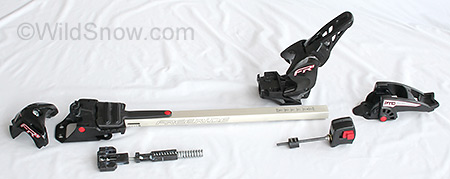
We disassembled a Fritschi Freeride Plus as far as we could go without removing non-replaceable fasteners and fittings. Project done for educational purposes and to evaluate binding, do not try this at home. (Exception perhaps being an older binding that’s seen quite a bit of use in wet conditions. In that case this process would be used to re-lube the binding.)
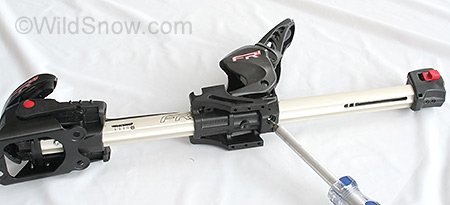
Above screw is already removed and heel unit slid forward. Screw driver indicates location of screw that was removed.
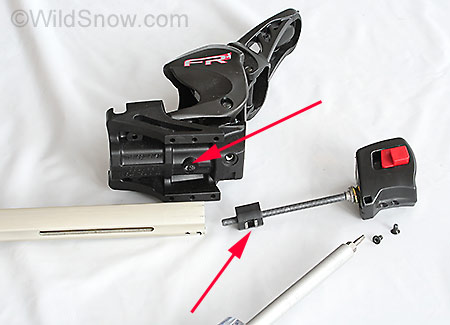
Next, we remove two small screws from the cap at the end of the rail, then easily slide the cap and length adjustment rod out of the hollow rail. Arrow indicates location of screw that mates heel unit with length adjustment rod.
After removal of end cap it’s easy to slide the heel unit off the rail. Taking the heel unit apart involves removing press pins and dealing with a spring under tension, so we left it alone.
Part of the reason for this exercise is to ascertain if the binding could be shortened. Conclusion: Doing so would be relatively easy, but would require shortening a substantial amount so that the binding rail could be cut ahead of the existing rear slot, and a new slot routed into the rail. Otherwise you’d have to cut the rail through the existing slot, which would then compromise the strength of the rail as the slot would run out all the way to the end of the rail. The front of the rail would be difficult to shorten as well, though again, it could be done.
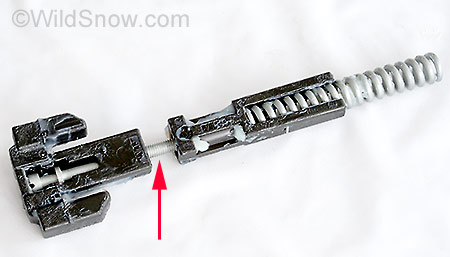
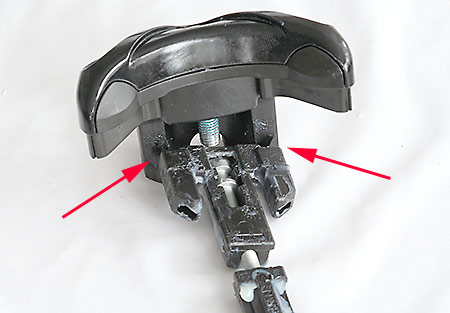
Now for the toe. We first dialed the lateral release setting as low as possible, removed the one obvious screw on the underside, then removed the toe jaws. With that done, the unit shown above pops out of the hollow rail. This is the lateral release mechanism. Changes in lateral release setting are accomplished when the threaded rod indicated by arrow is rotated using an exposed screw head at the front of the binding, thus changing the amount of compression on the spring, which is pushed back against a stop inside the rail.
When the toe jaw is rotated, it pushes against the shoulders of the mechanism at the points indicated by arrows in photo above, which in turn push against the spring, thus encountering resistance and creating release tension. Quite ingenious to fit all this in such as small lightweight package. Check this video showing how it works.
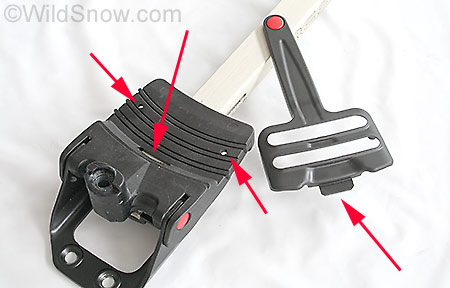
On older model Fritschi bindings the anti friction device used to move freely from left to right. On the Freeride it is fixed in position by a tab and two screws, as indicated by arrows in photo above. We suspect this is because the moving type AFD was prone to damage, and rather than change the design, Fritschi realized the moving AFD had little benefit and could be eliminated by simply attaching it to the toe unit.
We hope you enjoyed a brief glance at the guts of the excellent Fritschi Freeride Plus. Now you know what’s going on when you change the binding length or release settings.
As a bonus, a short video of parts in action.
While most of the WildSnow backcountry skiing blog posts are best attributed to a single author, some work well as done by the group.

