– The Backcountry Ski Site
  • Avalanches
  • Gear Reviews
    • Ski Reviews
    • Boot Reviews
    • Binding Reviews
    • Snowboard Splitboard
    • Book Reviews
    • Avalanche Beacon Reviews
    • Airbag Backpacks
    • Backcountry Electronics
    • Misc Gear Reviews
  • Podcast
  • Tips & Tricks
    • Ski Touring Basics
    • Boot Fitting
    • Fitness & Health
    • Gear Mods
  • Trip Reports
    • Fourteeners
    • Huts – Cabins – Lodges
    • Denali McKinley
    • 8,000 Meter Skiing
  • Stories
    • History
    • Humor
    • Land Use Issues
    • Evergreen Ski Touring
    • Poetry
  • Resources
    • All Posts Listed
    • 100 Recent Comments
    • Backcountry Skiing & Ski Touring Webcams
    • Ski Weights Comparison
    • Archives of WildSnow.com
    • Authors Page
    • Ski Touring Bindings
      • Trab TR2 Index and FAQ
      • Salomon Guardian & Tracker
      • Naxo Backcountry Skiing Bindings – Info Index
      • Silvretta Pure Backcountry Skiing Bindings – Info Index
      • Marker F10-12 Duke Baron
      • G3 Onyx Ski Binding FAQ
      • G3 ION Ski Touring Binding
      • Fritschi Backcountry Skiing Bindings – Info Index
      • Fritschi Diamir Frame Bindings Mount DIY
      • Fritschi Diamir Bindings FAQ
      • Fritschi Tecton FAQ
      • Atomic Salomon Backland MTN
      • Dynafit Tri-Step Binding 2001-2003
      • Naxo randonnee alpine touring AT ski binding FAQ
      • Dynafit Skiing Bindings – Info Index
      • Dynafit Binding Frequently Asked Questions FAQ
      • Dynafit Beast 16 FAQ Review 1
      • Dynafit Beast 16 FAQ Page Two
    • History
      • Ski Touring Binding Museum
      • Trooper Traverse Intro & Index
      • Randonnee Ski Touring “AT” ski gear — What is Hip?
      • Chronology
    • Backcountry Skiing Core Glossary
    • Gear Review Policy & Disclosures

– The Backcountry Ski Site

  • Avalanches
  • Gear Reviews
    • Ski Reviews
    • Boot Reviews
    • Binding Reviews
    • Snowboard Splitboard
    • Book Reviews
    • Avalanche Beacon Reviews
    • Airbag Backpacks
    • Backcountry Electronics
    • Misc Gear Reviews
  • Podcast
  • Tips & Tricks
    • Ski Touring Basics
    • Boot Fitting
    • Fitness & Health
    • Gear Mods
  • Trip Reports
    • Fourteeners
    • Huts – Cabins – Lodges
    • Denali McKinley
    • 8,000 Meter Skiing
  • Stories
    • History
    • Humor
    • Land Use Issues
    • Evergreen Ski Touring
    • Poetry
  • Resources
    • All Posts Listed
    • 100 Recent Comments
    • Backcountry Skiing & Ski Touring Webcams
    • Ski Weights Comparison
    • Archives of WildSnow.com
    • Authors Page
    • Ski Touring Bindings
      • Trab TR2 Index and FAQ
      • Salomon Guardian & Tracker
      • Naxo Backcountry Skiing Bindings – Info Index
      • Silvretta Pure Backcountry Skiing Bindings – Info Index
      • Marker F10-12 Duke Baron
      • G3 Onyx Ski Binding FAQ
      • G3 ION Ski Touring Binding
      • Fritschi Backcountry Skiing Bindings – Info Index
      • Fritschi Diamir Frame Bindings Mount DIY
      • Fritschi Diamir Bindings FAQ
      • Fritschi Tecton FAQ
      • Atomic Salomon Backland MTN
      • Dynafit Tri-Step Binding 2001-2003
      • Naxo randonnee alpine touring AT ski binding FAQ
      • Dynafit Skiing Bindings – Info Index
      • Dynafit Binding Frequently Asked Questions FAQ
      • Dynafit Beast 16 FAQ Review 1
      • Dynafit Beast 16 FAQ Page Two
    • History
      • Ski Touring Binding Museum
      • Trooper Traverse Intro & Index
      • Randonnee Ski Touring “AT” ski gear — What is Hip?
      • Chronology
    • Backcountry Skiing Core Glossary
    • Gear Review Policy & Disclosures

Dynafit Boot Tech Pintech Fittings – Everything You Ever Wanted to Know

by Lou Dawson March 22, 2006
written by Lou Dawson

I got curious. How exactly is a Dynafit toe fitting held in a boot, how easy is it to remove, and how much does it weigh? On the alter of blog I sacrifice a worn out pair of Scarpa Laser backcountry skiing boots:

Removing Dynafit fitting from backcountry skiing boot.
The Dynafit toe fittings are easy to remove. Just grind the sole off, grind away a bit of plastic around the edges, and the fitting pops out when you pry it up.

Dynafit boot fittings.
Dynafit fittings removed from boot. Weight 1.1 ounces (32 g) total, per boot. (Coin for scale).

People have had mixed success with installing Dynafit fittings themselves. In mine and many other people’s opinion, there are so many great Dynafit compatible boots out there, why spend the time to make them yourself? But then, who am I to judge other backcountry skiing modders? If you’re curious, here is the article written by one guy who did it.

Lou Dawson

WildSnow.com publisher emeritus and founder Lou (Louis Dawson) has a 50+ years career in climbing, backcountry skiing and ski mountaineering. He was the first person in history to ski down all 54 Colorado 14,000-foot peaks, has authored numerous books about about backcountry skiing, and has skied from the summit of Denali in Alaska, North America’s highest mountain.

www.loudawson.com
March 22, 2006 8 comments
0 Email

Dynafit Freeride Aero — Another View

by Lou Dawson February 24, 2006
written by Lou Dawson
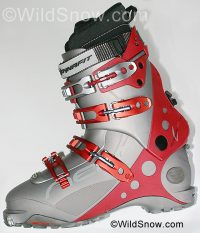
Dynafit Aero ski touring boot.

Dynafit Aero ski touring boot.

I recently lent Michael Kennedy my Dynafit Freeride Aero boots for a few days of testing. Known as a long-time climber and former owner/publisher of Climbing Magazine, Michael is also a fine skier and spends quite a few days out every winter. I told him these were the beefiest Dynafit compatible boots out there, and he was excited to give them a go. For previous reviews of this boot please check the “Boot Reviews” category in the menu to right. Michael’s take:

“Lou,

Here’s a brief report on the Dynafit Aero. Since I’ve been skiing the Garmont Megaride the past 2.5 seasons, that’s my reference point.

I managed four days total in these boots — a few good days in the backcountry, and a couple of days at the ski resorts.

Conditions were variable: perfect powder, mellow windcrust, groomed, wind-densified powder over old ski tracks, crud over bumps, etc. Pretty good variety of winter snow types although I avoided the worst of the icy bumps.

The buckles and all the normal functional parts of the Aero were good. I found the boot a little harder to get my foot into than the Megaride, but this is is a minor concern. The Aero should have a cant adjustment for the cuff (I know you retrofitted one on this pair). The walk/ski mode dial was fine, although I prefer the lever on the Megaride.

I used the Aero with Dynafit and Fritschi bindings. The new toe lugs were intriguing but for the experienced Dynafit user the benefits were nearly unnoticeable. Those less adept at dealing with the Dynafit
boot/binding interface may find the new toe lugs slightly easier but my sense is that this feature could use a bit more work.

The Aero is noticeably stiffer than the Megaride. I really liked the Aero’s performance on lift-serviced terrain: very powerful getting onto the edge and close to a full-on alpine boot overall. The forward flex was less progressive than the Megaride (you drive forward and at a certain point the boot stops, as opposed to the smoother transition I’m used to), but once I adjusted to the Aero I was very happy with its downhill performance, especially in steep crud and bumps. For powder and variable conditions, though, I still prefer a boot with a more progressive forward flex.

The Aero was reasonably comfortable for touring and/or walking (i.e. up the ridge to Highlands Bowl); it felt stiffer and a bit more “clunky” than the Megaride but nothing that would be a deal breaker. I did
notice the weight, however: my old legs were complaining.

Bottom line: If downhill performance with a Dynafit compatible boot is your priority, especially in lift-serviced terrain, the Dynafit Aero would be a great choice. For touring, I’d be more inclined to go with a lighter boot. I’m aware that next year’s model will be a few ounces lighter, and that might make the Aero the a do-it-all boot for me, but we’ll have to see.

See ya soon, MK ”

Lou Dawson

WildSnow.com publisher emeritus and founder Lou (Louis Dawson) has a 50+ years career in climbing, backcountry skiing and ski mountaineering. He was the first person in history to ski down all 54 Colorado 14,000-foot peaks, has authored numerous books about about backcountry skiing, and has skied from the summit of Denali in Alaska, North America’s highest mountain.

www.loudawson.com
February 24, 2006 0 comment
0 Email

Big Things in the Backcountry Skiing Boot World — NTN and Black Diamond

by Lou Dawson January 13, 2006
written by Lou Dawson

Interesting things are happening in the backcountry skiing boot and binding world. Black Diamond announced today they’ll be designing and producing their own backcountry skiing boot line (see below)! Over on the telemark side, Rottefella recently made the production model debut of their New Telemark Norm (NTN) binding.

Designed to work with a specially shaped boot sole, NTN eliminates the archaic and problem prone cables common to most telemark bindings, instead using an ingenious (some would say Rube Goldberg) system of catches to hold the boot sole in the binding.

What’s interesting to me about NTN is that the boot sole has a standard randonnee (DIN) shaped toe, and may work in randonnee bindings (again, telemark gear gets ever closer to being randonnee gear). More, the specially shaped sole is the first attempt in years by any backcountry binding maker to establish a boot/binding interface, the last being the quickly (and thankfully) abandoned Silvretta SL system that attempted to compete with Dynafit.

It is remotely possible that the catch built into the NTN boot sole could also be made to work with some form of randonnee binding, thus becoming the boot that does it all. On the other hand, NTN is a heavy binding without safety release, and thus continues a sad legacy of telemark gear: that of the binding being the least developed part of the system. NTN does get rid of the duckbill sole I’ve always contended was ridiculous for alpinism, and it eliminates having a left and right binding (another laughable legacy of ancient nordic bindings).

Perhaps having a step-in telemark binding such as NTN will continue the growth of telemark as a lift served sport, as step in convenience is obviously a desirable trait. If NTN helps, fine. But remember our subject here at WildSnow.com is backcountry skiing, not mechanized resort skiing. We’re concerned with gear and technique that makes climbing up and skiing down natural snow easier, more fun and safer.

New Telemark Norm
Rottefella NTN telemark skiing binding, lift served and backcountry skiing. Amusing to note the groomed snow in the photo — subtle hint of some sort?

While NTN does make a nod to backcountry skiing by having a free pivot for touring, the binding is heavy, complex, and has no safety release. Telemarkers will make all sorts of gear sacrifices to be able to shuffle their feet between turns, but will they continue to sacrifice safety? The knee protection offered by tele release bindings is an open question. But think beyond that. If you’re locked into a binding as solid as NTN appears to be, and you stick a ski under a log, what exactly is going to happen to your body? Or what if you’re in an avalanche, even a small one? Results of medieval torture come to mind.

I happen to know a guy who stuck his tele skis under a log. His monster cable bindings held him in quite well, as would NTN. His hamstring muscles provided the release mechanism. Repair took more than a year.

Another thing I find interesting about NTN, and tele bindings in general, is the effort that goes in to making the bindings active. Consider alpine bindings. By virtue of its powerful ergonomics the alpine turn asks very little of the binding. If you forget safety release, you could epoxy your boot to your ski and turn just as well without a binding as with. Contrast that with telemark bindings.

In the active tele binding, beefy systems of springs and cables are configured in various ways to give you resistance to heel lift, all adding weight and complexity. Meanwhile, release systems are an afterthought and just this year we’re seeing a selection of bindings that have a free pivot for touring. And now we have New Telemark Norm, with a heavy and complex mechanism that makes it active and allows step-in, but has no safety release. Is this progress? Indeed yes, but so is the movement of a glacier.

Some of you may think I’m bashing telemark. I’m not. Again, our mission here is to cover backcountry skiing, and write opinion about what gear and technique makes backcountry skiing safer and more fun. Telemarking has proved to be part of that equation, and provides many people with substantial grins but telemark bindings are still the weak link, and NTN does not appear to be the answer. I’d love to be proved wrong.

In other boot news:

Black Diamond announced today that they’ll be developing a new line of alpine touring and telemark ski boots. This is a huge step for the company, as designing and marketing a ski boot line from scratch is one of the more complex juggling acts in the outdoor sports industry. Presumably the tele boots they develop will be NTN compatible, but word on the street is that they may be developing their own boot/binding interface. Should be interesting.

Lou Dawson

WildSnow.com publisher emeritus and founder Lou (Louis Dawson) has a 50+ years career in climbing, backcountry skiing and ski mountaineering. He was the first person in history to ski down all 54 Colorado 14,000-foot peaks, has authored numerous books about about backcountry skiing, and has skied from the summit of Denali in Alaska, North America’s highest mountain.

www.loudawson.com
January 13, 2006 3 comments
0 Email

Black Diamond Equipment to Design and Market Ski Boot Line — PR

by The Editors Of Wildsnow January 13, 2006
written by The Editors Of Wildsnow

Editor’s note 2014: This was a historic event as the entry of Black Diamond into the ski touring backcountry boot market indicated a “main streaming” of the human powered ski industry. More, their process of having the boots made in China instead of Italy was a sea change in the worldwide schema of the ski boot business. Where and when this will all shake out is unknown at this time. Most backcountry ski boots are still designed and made in Italy, and Black Diamond’s boot line, while excellent, has never achieved much in the way of market share. In our opinion, the biggest feather in BD’s ski cap is their development of a cutting edge “beef boot” that showed the market welcomed a walk and hike capable boot that skied like an alpine boot. As of this writing, their beefy Factor ski boot model is still in distribution.

January 13, 2006, (Salt Lake City, Utah)
Black Diamond Equipment Ltd., a global leader in skiing and climbing gear, announced the development of a new line of alpine touring and telemark ski boots. This is a logical step for Black Diamond (BD), which has been both SCARPA’s North American distributor as well as its primary driver in terms of telemark ski boot designs and concepts for eighteen years. SCARPA and Black Diamond terminated their partnership as of January 1, 2006, with Black Diamond assuming responsibility of the SCARPA boot line until the end of the current ski season.

Peter Metcalf, CEO/co-founder of Black Diamond explains, “BD designs and builds products that make a difference in the day to day existence of skiers and climbers.” Metcalf continues, “In the case of ski boots, we will draw on our vast experience as intimate users, innovative designers, and as a reliable, ethical and committed partner to our dealers in order to design a new standard of AT and Telemark boots to meet the needs of the modern day telemark & off-piste skier.”

Black Diamond has already assembled a specialized design team that has been actively working on the boot project for over six months. BD plans to show boots at (Outdoor Retailer) Winter Market 2007, for release the following Fall season (Winter 2007/2008). Led by Thomas Laakso, Ski Group Category Manager and Dave Narajowski, lead designer of many of BD’s successful products, the BD Boot Team is comprised of Andi Lachinger, Jake Hall, Jeremy Saxton, Paul Terry and Alex Holzberger. This group brings a “Chop Shop” tenacity, resourcefulness and diverse work experience ranging from the biomechanics of skis and ski boots, to alias surface modeling, high performance footwear and auto design. Specifically, Lachinger worked with Atomic as their ski boot product manager, and BootDoc which develops high-end custom ski boot footbeds and liner solutions in Europe. Hall brings previous experience from Rome Snowboards, Saxton worked at Nike, Terry hails from Porsche Designs and Holzberger developed Roces speed skates.

Metcalf explains, “This is a huge investment for BD, but one that we are excited to make because we see opportunity to raise the bar in terms of product and the performance it delivers. (Wildsnow editor’s note: “huge” is an understatement.”) BD is the only player in the tele/AT boot market with designers who are an integral and organic part of the backcountry ski community, dawn patrolling each day before work. (Wildsnow editor’s note: We’re not sure where Metcalf got the idea that other boot companies don’t have designers who ski tour, as that’s simply not true. Companies such as Scarpa and Dynafit have many individuals working on their boots who are long-time committed ski mountaineers.) Such levels of intimacy and passion are terrific sources of creativity and inspiration. You can feel the energy level of this project radiating through all parts of BD”

The Editors Of Wildsnow

While most of the WildSnow backcountry skiing blog posts are best attributed to a single author, some work well as done by the group.

wildsnow.com
January 13, 2006 0 comment
0 Email

Bootfitting for Backcountry Ski Touring

by Lou Dawson December 26, 2005
written by Lou Dawson

Spent more quality time backcountry skiing and lift skiing with my latest test boots. The stock liner is a robust inner boot that works for most people, but in my case, no joy. I’ve got narrow feet, and want room for my toes in a backcountry skiing and ski alpinism boot, so I went with a shell size larger than I’d have picked for alpine skiing. Even after careful molding of the G-Fit, with no sock and a thick custom footbed, I ended up with a hair too much room. Solution: grab a pair of thermal molded liners I had kicking around from another boot, and bingo, perfect fit.

Baking backcountry skiing boot liners
My Thermoflex liners being baked at Sportfeet in Aspen.

As it nearly always does, a boot fitting problem yields to innovation and experimentation. Here are a few tips I’ve learned from this and dozens of other such incidents:

Pick the correct shell size for backcountry skiing by placing bare foot in shell, touching end with toes, then seeing how many stacked fingers you can fit behind your heel. Any more than a 2 finger stack and the backcountry skiing boot shell is too big. Less than one-and-one-half fingers and it’s probably too small. In some cases (as in mine) you’ll be between shell sizes. If that happens try fitting the smaller shell first, but remember it’ll probably be colder and you may have problems with getting enough length for your toes. The larger shell will be warmer and easier to get comfortable for touring, but you may have problems getting the fit tight enough for downhill skiing.

Be willing to experiment. Try different liners and play around with custom footbeds. Different brands have VERY different fits, so don’t get stuck on one brand/model.

When molding thermo liners for backcountry skiing (or alpine skiing) use a nylon stocking instead of a sock. When doing so, mold with the usual toe cap (under the stocking), but add a small wad of duct tap to any toe areas that tend to need more room (cover with tape so the spacer doesn’t stick to the inside of the toe cap). Liners molded this way may feel slightly tight for a few days, but after a few days use they’ll usually pack out to perfection. If not, re-mold with a thin sock.

You can mold thermo liners at home, but doing so can be a real freak show the first time you try it. Best is to do it at a shop with expert help, then mold at home after you’ve seen how the pros do it.

Here are thermo boot liner baking instructions gleaned from my own experience and various sources on web:

Put the liners in a convection oven at 210 – 250º F (depending on brand) for 12-13 minutes, or use regular oven with plank of wood on aluminum foil to keep radiant heat from scorching the liners. If you use a regular oven, pre-heat then turn off soon after placing the liner in the oven, to prevent scorching. With nearly all ovens, use an accurate oven thermometer to check temperature.

Most liners use similar temperatures, yet care is required. Sometimes you can find the correct temperature in the pamphlet sold with the boot. Other times, the information will be arcane and difficult to acquire. Examples:

Scarpa’s heat blower system is set at 246°F, this is an Intuition liner so their excellent home molding process applies. If using an oven I’d tend to go a little cooler, try 240°F.

Atomic Memory Fit oven operates at 117°C – 242.6°F. This would probably work for using an oven at home, provided your thermometer was accurate.

When the liners are “baked” in an oven they will look big and puffy. It’s better to heat them in the boot as you won’t have to struggle with placing the wormy puffed liner into the boot before you put your foot in.

If you have any sensitive areas on your foot that could result in rubbing/pressure problems, duct tape foam spacers on such areas to create extra room in the liner. Ditto for ends of toes that may not have enough room. If you use thick spacers, bevel the edges.

Put your footbeds on the bottom of your feet, and a toe cap over your toes. If you don’t have a toe cap, use tips from 2-pair of socks. Place a women’s stocking foot over everything to hold the parts together. Don’t wear any sort of sock, as the liners will pack out and compress quite a bit as you use them, and fitting them without a sock will make them tight enought fit perfectly with a sock after just a few days of use.

The toe cap should cover your toes and come down to the ball of your foot.

Prepare backcountry skiing boot shells by making sure buckles are easily worked and power strap is out of the way. Switch boots to walk mode. Sprinkle some talc powder in shells to ease entry of puffy baked liner — or better, heat liner while it’s in the shell (see Intuition method linked above). Make sure there is nothing inside the boot that will catch the liner and tear it, or keep it from going in smoothly. If such things exist, cover with some duct tape or something so the liner can go in easily. Many ski touring boots have a vertical tongue of plastic in inside the shell in the rear, take care this doesn’t get folded down while you’re molding.

Following must be done quickly:

(Assuming you’re using the oven method), take the liner out of the oven and wrap it around your foot, making sure the overlap or tongue is configured correctly. Have an assistant shift the liner around so that the seam on the bottom of the liner sole goes exactly down the center of your foot. Having help from an assistant is important.

Stand in the liner and pull up on the cuff to make sure your foot is all the way in. Then put your foot (with the liner) into the shell. This method prevents wrinkles from forming in the liner due to compression, and it also prevents the footbed from getting warped. When placing foot in shell, have your assistant hold the shell open and help the liner slide in.

To further make sure that your foot is all the way in the liner, have your assistant hold down the shell of the liner, and lift your heel and the liner up about 2 inches. Then while pulling up on the liner, push the liner back down into the shell with your foot. Do this procedure twice, but don’t over-stretch the liner by pulling it up too much towards your knee. Too much stretching and pulling will result in the liner being too thin and high. The foam inside the liner, when heated, is easily damaged.

Tighten the boot buckles half-tight, so that the liner just molds to your foot. Do not tighten the buckles any further while the liner cools.

Hit your heel on the floor several times, and flex a few times, to get your foot into the heel pocket of the boot. Do the process with the other foot. Then wait 10 minutes while standing with your toes up on a book or some kind of spacer that’s an inch or two high, so your heels are low. Try to maintain a static stance that’s similar to your downhill skiing stance. If you require cuff alignment (canting) be aware of which way to bias the mold. For example, if you are knock kneed use a slightly bowlegged stance while you wait for the liner to cool. Stay in the boots until the liner cools completely.

To fine tune, you can reheat parts of the liner with a heat gun to puff it out a bit, or compress on a boot press if it’s too tight in spot areas. Most liners also “ski in” a bit, so slight imperfections in the molding process can be remedied by just going out and using.

You can re-bake liners a number of times, but each time they will puff slightly less.

Lou Dawson

WildSnow.com publisher emeritus and founder Lou (Louis Dawson) has a 50+ years career in climbing, backcountry skiing and ski mountaineering. He was the first person in history to ski down all 54 Colorado 14,000-foot peaks, has authored numerous books about about backcountry skiing, and has skied from the summit of Denali in Alaska, North America’s highest mountain.

www.loudawson.com
December 26, 2005 14 comments
0 Email

Boot Comparo – Backcountry Skiing

by Lou Dawson December 20, 2005
written by Lou Dawson

Did more “frontcountry” skiing and boot/binding/ski testing up at Aspen Highlands yesterday. The steeps had a few too many bumps for my taste, and Highland Bowl was closed, so back to extreme blogging (and hopefully back to the backcountry tomorrow).

To that end, a number of people have asked me how the Dynafit Aero, Garmont Megaride and Scarpa Laser with Flexon tongue compare as to stiffness. I spent some time this morning working on that — here is my take. First, know that both Garmont and Scarpa makes stiffer boots now (Garmont Adrenaline, etc.), so I’m not picking favorites here or make recommendations. The boots in question happen to be three of the more beefy Dynafit compatible boots out there, and are what I’ve chosen to work with this year, so I’m offering what information I can. For other reviews of the Aero check our “Boot Reviews category via menu to right.

Backcountry skiing boots
From left: Scarpa Laser with Flexon tongue, Dynafit Aero, Garmont Megaride

All the boots are similar in height front and back.

Dynafit cuff is higher on the sides.

Laser/Flexon has smoothest progressive forward flex (gets stiffer as you flex forward), smidge softer than Megaride.

Dynafit has forward flex that is similar to Megaride for first inch or so, then it gets extremely resistant because there are stops built into the cuff that limit forward flex (see detail photo below). These could be ground out for a more progressive flex, but since this is still a thin plastic touring boot they’re probably a good idea.

Megaride flexes much more like a touring boot than the Dynafit Aero, meaning when you drive your shin forward you can see more bulging in the shell, and the tongue moves back and forth because of play in the tongue hinge. As you can see in the photo, the Megaride has a tongue similar to a Flexon, this results in a nice smooth progressive flex.

Dynafit easily has the stiffest feel overall and would be best for performance skiers who spend time touring as well as riding helicopters or lifts, Megaride in my opinion has the best mix of stiff /flex/weight for longer backcountry tours, Laser/Flexon has a very nice “Flexon” flex and is still a fine boot as well.

Thanks goes out to Garmont, Scarpa and Dynafit for supporting this ongoing evaluation.

Backcountry skiing boots
Highlighted area shows Dynafit Aero cuff flex limiter. The raised nub engages the shell when flexed and moved to right in photo.
Lou Dawson

WildSnow.com publisher emeritus and founder Lou (Louis Dawson) has a 50+ years career in climbing, backcountry skiing and ski mountaineering. He was the first person in history to ski down all 54 Colorado 14,000-foot peaks, has authored numerous books about about backcountry skiing, and has skied from the summit of Denali in Alaska, North America’s highest mountain.

www.loudawson.com
December 20, 2005 0 comment
0 Email
Newer Posts
Older Posts

Gear Reviews

  • Boot Reviews
  • Ski Reviews
  • Binding Reviews
  • Avalanche Beacon Reviews
  • Book Reviews
  • Misc Gear Reviews

Popular Posts

  • 1

    Feeding the Backcountry Soul on Crete

    August 25, 2022
  • 2

    Wolverine Split Sticks: A Terrific Telescopic Pole For The Hard-Charging Splitboarder

    January 2, 2025
  • 3

    See You Tomorrow — The Disappearance of Snowboarder Marco Siffredi on Everest: A Book Review

    November 1, 2022
  • 4

    A Small Hut for Big Skiing in the San Juans: Aladdin’s Lamp

    April 23, 2024
  • 5

    Backcountry Ski Bibs: Why I Love Them, And My Favorite Pairs

    November 19, 2024

Recent Posts

  • A Small Hut for Big Skiing in the San Juans: Aladdin’s Lamp

    April 23, 2024
  • Revisiting a 2011 Trip Report: Adventure in the Pickets — Thread of Ice Ski Descent

    December 9, 2022
  • Feeding the Backcountry Soul on Crete

    August 25, 2022
  • WildSnowNZ — French Ridge Hut

    July 25, 2022
  • Friends and Resupplies on a Ski Traverse of The Colorado Trail

    July 13, 2022


  • Facebook
  • Twitter
  • Instagram
  • About Lou Dawson
  • Terms of Service
  • Authors Page
  • About
  • Contact
  • Advertise
  • Copyright & Legal
  • Website Security

@2025 - All Rights Reserved. Designed and Developed by WildSnow


Back To Top