Tech Tuesday is recurring segment sponsored by Dynafit to get you in the right touring gear and make sure you know how to use it.
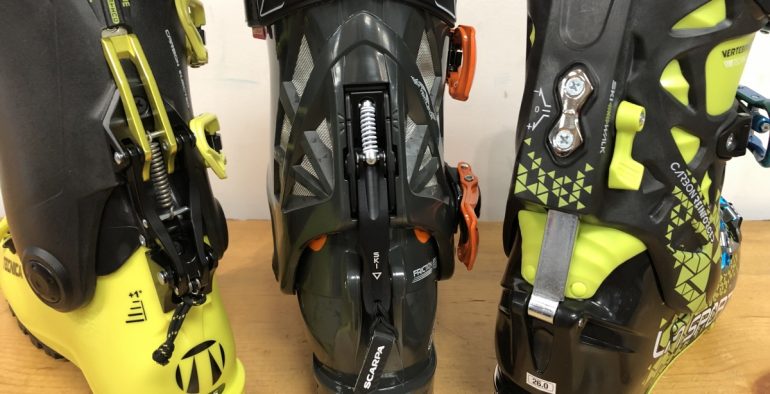
The external lever walk mode of the two left boots has become the standard, while the La Sportiva Spectre internalizes the process.
Tips on materials, features and buying used
Ski touring boots remain the most complicated link in the chain of gear available to get you into the mountains efficiently. In Part I of our boot buying guide, we developed an understanding of the types of touring boots and basic factors to consider when shopping. In Part II, we look at common features of touring boots to give you a deeper understanding. Depending on your intended use, some features are nice to have and some can be avoided. Here, 7 tips to help you choose the right ones, along with advice on buying used.
1. Materials define performance. Know your different types of plastic.
Polyurethane, or PU, is a plastic used in most alpine ski boots and some varieties of alpine touring boots. It’s stiff and has a consistent, familiar flex, and is inexpensive and easy to manufacture. Because it’s common in alpine boots, boot fitters are accustomed to working with it and are able to more effectively fit boots made with PU. Unfortunately PU is the heaviest of the materials used in ski boots as it needs to be thicker to provide necessary stiffness and stability. The plastic is also affected by temperature; the boot will feel noticeably softer on a warm spring day and stiffer on a cold day.
Pebax is another traditional plastic used in ski touring boots. It is light and stiff, but somewhat less forgiving than PU. Most AT boots are made of Pebax. Unfortunately you will be hard-pressed to find a Pebax boot that has the progressive flex of your resort boots. On the positive side, Pebax isn’t affected by temperature as much, so it’s great for spring ski mountaineering.
Grilamid is a relatively new shell material on the ski mountaineering boot scene, commonly seen in higher-end AT boots. It’s a specialized plastic that’s a formulation of nylon. Grilamid has the advantage of being stiff and strong, therefore minimal material can be used, which reduces weight and bulk. Although it’s stiff, some skiers feel Grilamid doesn’t have as nice a flex as polyurethane. It also tends to be expensive to manufacture, and those costs are passed through to the consumer.
Carbon fiber is used to varying degrees in high-end ski touring boots. It is ultralight and ultra stiff, and can dramatically reduce a boot’s weight. Unfortunately, carbon fiber boot parts are expensive and difficult to manufacture. It’s more common to see carbon fiber used as reinforcement while molding plastic. That way you can use lighter thinner plastic, but keep the boot stiff and high performance.
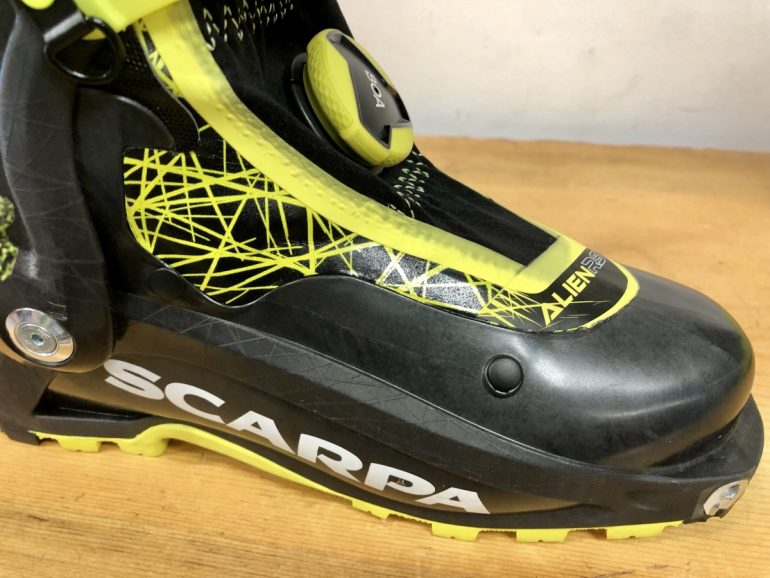
The Alien RS is a perfect example of a Carbon Grilamid boot. Warning: this construction is hard to punch!
2. Buy a boot with a minimum of 50 degrees of cuff articulation.
Walk/ski mode is probably the most important feature — it makes an AT boot what it is. At the most basic, it’s a mechanism that makes the boot more flexible for walking uphill. Even most freeride touring boots have a range of motion of 45 degrees or more. A boot with less than 45 degrees will be harder to travel efficiently in the mountains with as you will get less distance on every stride. In general, boots with less than 45 degrees are either older models or glorified alpine boots with impressive Apres modes.
Some mechanisms work better than others, and there’s a big variety in how much they “loosen up” the boot. Traditionally they simply attached the top and bottom portions of the boot shell. Recent innovations have made the connection tighter and the walk mode softer.
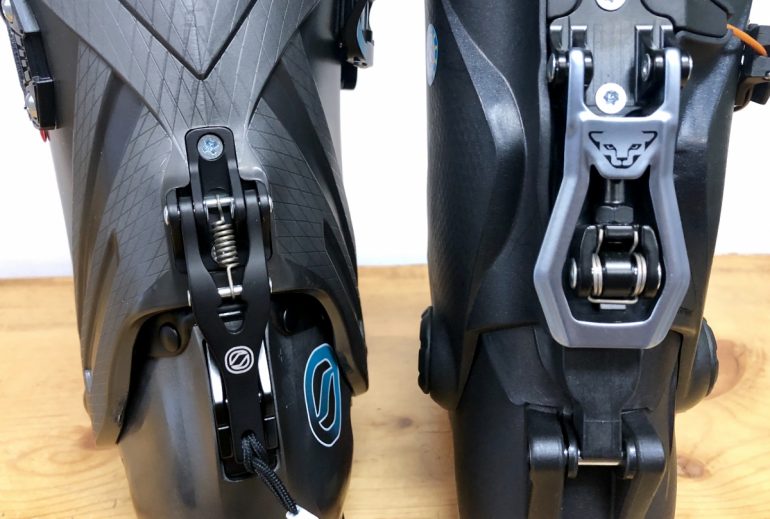
The Scarpa F1 on the left has an excellent walk mode, but the Hoji on the right is designed for skiing.
3. Choose the right amount of rocker and tread.
Lugged soles are another feature that sets AT boots apart from other ski boots. Almost all ski touring boots have some variety of lugged sole made of soft, grippy material. This helps with walking and hiking, especially in difficult terrain. Unfortunately, rubber soles wear out quickly when used for hiking without skis which can render them incompatible with normal alpine bindings. Some newer AT soles have hardened areas that are certified for use in frame or MNC alpine bindings. The “rocker” in these lugged soles allows you to walk with a more natural stride even when the boot does not allow your forefoot to flex. Beware that their are compatibility issues with boots with more rocker.
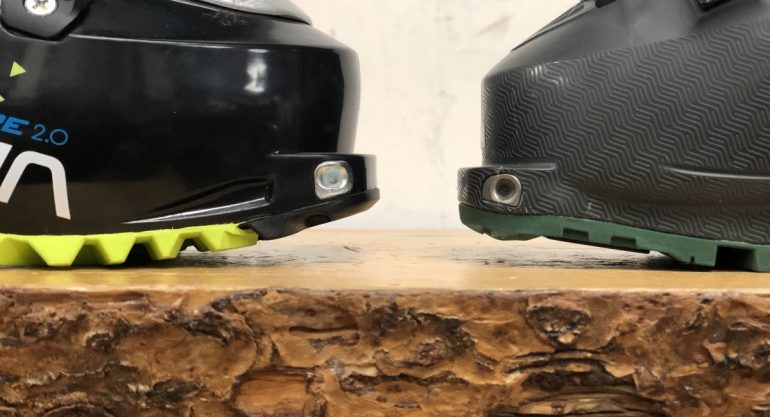
The boot on the left has far more rocker than the more freeride sole on the right. Also notice the hard plastic on the right to interface with MNC bindings.
4. Make sure your new boots have standardized tech fittings
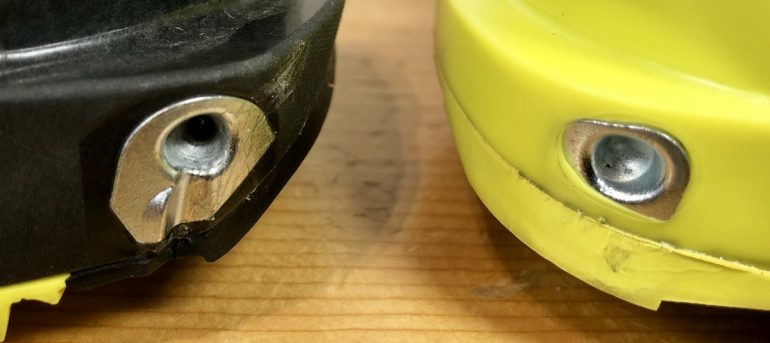
Tech fittings are small metal fittings that enable a backcountry skiing boot to be used with “tech” bindings [see our Tech Tuesday on choosing tech bindings]. These bindings, long solely made by Dynafit and now produced by a variety of manufacturers, are the current accepted standard for ski touring bindings. Standardized fittings are crucial to the function and safety of your bindings. Some tech fittings from less reputable brands have been known to cause drastic release value differences. Learn about your tech fittings here.
5. Don’t count your buckles
Buckles are of course how boots are closed, and they can provide much of the stiffness. Traditionally, the number of buckles directly correlated to the stiffness of a boot with “four buckle” boots were seen as the burliest boots out there. However, recent developments have thrown this out the window with some two or three-buckle being as stiff as four buckle boots. Even many alpine boot companies are producing boots with fewer buckles. When shopping for older boots (three+ years old), it can be a good idea to consider the number of buckles. However with newer boots, do not use the number of buckles as a way of evaluating the “power” of the boot. Keep in mind that some clever power strap designs take the place of a top buckle and are much lighter.
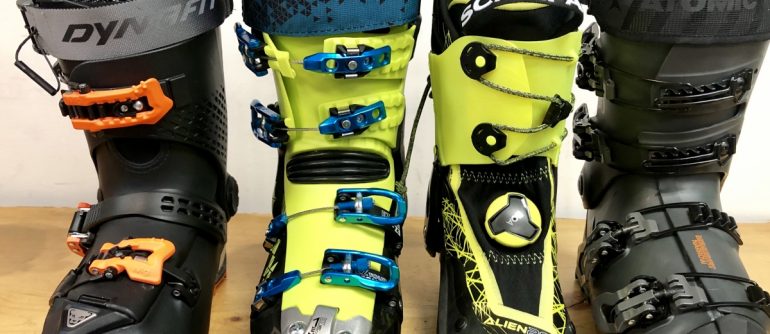
Buckles come in many shapes and sizes, but are not a perfect measurement of the performance of a boot.
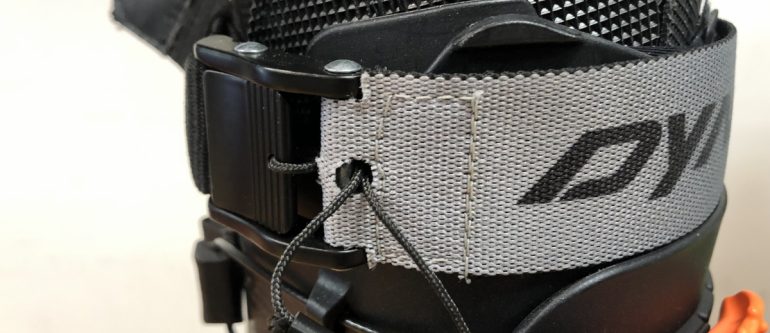
Here the Hoji uses a power strap instead of a 4th buckle, but also employs the often overlooked instep buckle for better heel retention.
6. Know ahead of time what boot adjustments are important for you.
Adjustments for cuff alignment and forward lean are common on alpine boots, but unfortunately not on AT ski touring boots. They add weight and complexity, and therefore are commonly left out. If adjustment is a feature you need, take care your boot choices include it or plan on having a boot fitter make adjustments using fitting techniques.
7. Be wary of stiffness ratings
It is difficult to ascertain how a boot will ski. For one, stiffness depends largely on fit (not to mention how tightly you crank your buckles). Also, there is no truly objective and accurate way to compare boot stiffness across manufacturers. Many manufacturers assign a “flex” or “stiffness” rating to their boots, usually from 110-130. Don’t be fooled by these numbers. There is no regulation governing them — they’re arbitrary and best for comparing boots within a brand rather than across the shopping spectrum. Most manufacturers simply assign 130 to their stiffest boot in a line, and 110 to their softest boot. There is little to no correlation between different companies. The best way to ascertain stiffness is to read reviews, and then get out and demo the boot if possible. Perhaps most importantly, don’t fall into the trap of using stiffness as your most important criteria for boot performance. Pro skiers leaping off 75 foot cliffs might need a boot that fits like cast iron, while most skiers appreciate something with more comfort and can simply adjust their technique to accommodate an average flex.
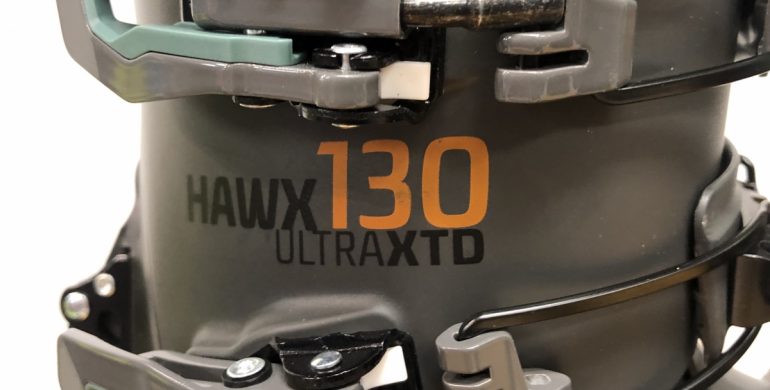
Although a 130 stiffness rating seems impressive you should only use it as a reference within that line of boots. The Hawx 130 XTD will be stiffer than a Hawx 120, but there is no standardization across brands.
Bonus Tip: Mind the pros and cons of used touring boots
In general, boots are the hardest backcountry gear to buy used. There is a wide variety of sizes and fit often depends on how worn out or custom molded the liner is. If you do find a pair of boots that seems right, here’s a checklist to follow:
-Check the shell first. Look for cracks in flex areas, especially at the curve in the tongue on “cabrio” boots.
-Check all buckles for function and breakage.
-Examine the sole for excessive wear. Ski touring boots can be re-soled, but finding someone who can do this well is sometimes a challenge in the U.S. (much easier in Europe).
-How worn is the liner? Liners take the brunt of wear on the boot and easily get “packed out,” meaning the padding gets permanently compressed. The liner may also have holes worn into it, usually in the heel area or from wear points in the shell (often caused by screw or rivet heads). Luckily liners are inexpensive compared to buying new boots, even for top-quality Intuition liners. Therefore, it can be a good deal to buy used boots and then replace the worn out liners with new. That being said, it’s worth attempting to “re-bake” and mold thermo liners that are not too worn out. Talk to a qualified bootfitter about that option.
-Other things to keep in mind: Plastic deteriorates over time, making the boots softer (and possibly more fragile). It’s safe to assume that a well worn (one+ good seasons) pair will be somewhat softer than a new pair of boots. The soles of AT boots often wear out quickly as well due to how thin they are (weight savings). If you are planning on using the boots with Dynafit or other tech bindings, sole wear is a minor issue as it won’t affect the performance of the bindings. However, if you are using your boots in alpine bindings or plate/frame style AT bindings (Fritchi, Duke, etc), sole wear can make the binding fit incorrectly and compromise the release mechanism (check used boots in such bindings before purchase). Also, if you hike or climb without skis, sole wear can be a detriment and some AT boots wear quickly at the toes under the tech fittings when used for these activities.
The complex mechanisms in AT boots can break and wear out as well. Walk-mode mechanisms and cuff pivots are more difficult to repair; failure of these mechanisms may mean a boot is doomed for the dumpster.
That concludes Part II of our ski touring boot buying guide. What did we miss? Leave a note in the comments. Also check out our other ski touring boot resources, listed below.
Wildsnow Ski Touring Boot Resources
Wildsnow boot fitting category
While most of the WildSnow backcountry skiing blog posts are best attributed to a single author, some work well as done by the group.

